Abyss One: The Magnus
Magnus explained (Puzzles and rewards)

By nyaiera
Published: Oct 21, 2022
Updated: Jul 12, 2025
195,953
56

Introduction
The world of Magnus awaits in the Abyss and provides rewards, skills and quality of life features!
- A form of Fast Travel that can transport you between major cities
- Unique "Abyssal Legacy" skills that enhance a pre-awakened skill for every class
- A PEN Armor piece of your choice as a quest reward
- Remote Access to other region's storage with the ability to move / store items.
- Once per family Quest Rewards that include a (15 day) Value pack
Rewards From the Magnus
The Magnus quest line rewards you with a bunch of rewards like one PEN boss armor piece, instant teleportation between regions, a new skill for all classes and more.
Fast Travelling Map
Once you've finished with the Magnus questlines you'll be able to interact with Abyssal Veins to teleport without using the Magnus.
This will let you open a unique fast travel teleport map to select a destination to teleport to. Just jump in to the well after selecting a destination and you'll travel there without going through the Magnus.

The Abyssal Wells for Ulukita will also be unlocked when you unlock the Mediah knowledge in the Magnus questline.
| Abyssal Well (South West of Muzgar) | Muzgar Arrival Point (West of Muzgar) | ||
 |
 |
PEN Boss Armor
One of the big rewards, especially for newer players, is a selectable PEN armor piece.
| Select one of the following items | |||
 PEN (V)
Giath's Helmet
|
 PEN (V)
Dim Tree Spirit's Armor
|
 PEN (V)
Muskan's Shoes
|
 PEN (V)
Bheg's Gloves
|
 PEN (V)
Griffon's Helmet
|
 PEN (V)
Red Nose's Armor
|
 PEN (V)
Urugon's Shoes
|
 PEN (V)
Leebur's Gloves
|
The gear pieces are identical to those obtained through Jetina's Guaranteed PEN. As such they can't be listed on the Central Marketplace.
The helmets and chest pieces can be enhanced to Labreska's Helmet and Fallen God armor respectively using the usual methods.
Remote storage
Another reward from the Magnus which is great for quality of life is the enhanced remote storage.

As you complete more of the Magnus main questline you will connect more of the storages together.
This isn't available in Muiquun and Port Ratt and can't be used to transport trade items, basic potion items, Ornette's Spirit Essence or Odore's Spirit Essence.
Class skill: Abyssal Legacy
Completing all of the Magnus questline will unlock a new "Abyssal Legacy" skill for each class.

Once you use the secret book to learn the new skill, it will replace the skill commands of an Absolute skill in your character's arsenal.
You can still add and use the replaced Absolute skill via Quick Slot.
For other Characters:
You only have to do the quest line onces for all of your classes to get their skills. To get the skill on other characters you talk with the black spirit and he will give you a quest called [The Magnus] Abyssal Revelation.

Family item rewards
The Magnus also offers one time Family rewards, including a 15 day Value Pack.
| Rewards for Opening the Following Abyssal Veins | |||
| Abyssal Veins: Valencia |
Elion's Tear x5, Blessed Message Scroll (120 min) x5, Item Collection Increase Scroll x5
|
||
| Abyssal Veins: Calpheon |
Valks' Cry x5, Artisan's Memory x5
|
||
| Abyssal Veins: Mediah |
Sealed Compass (7 Days), [Event] Sealed Book of Combat (7 Days)
|
||
| Abyssal Veins: Valencia |
[Event] Sealed Book of Life (7 Days), Secret Book of Florin x5
|
||
| Abyssal Veins: Kamasylvia |
[Event] Tachros' Spirit Stone, [Event] Stella's Spirit Stone
|
||
| Abyssal Veins: Drieghan |
[Event] Shakatu's Luxury Box, [Event] Enhancement Help Kit III
|
||
| Abyssal Veins: O'dyllita |
[Event] Golden Blessing of Agris x3, [Event] Supreme Old Moon Scroll x3
|
||
| Abyssal Veins: Mountain of Eternal Winter |
Item Brand Spell Stone x3, Patrigio's Apparel Bag
|
||
| Abyssal Veins: Balenos and complete the entire questline |
Advice of Valks (+120) x1, Cron Stone x500, Value Pack (15 Days)
|
||
Fast Travel
After you complete the Magnus you will be able to use the wells for Fast Travel for a cost!
| Entering Location | Exit Location | Silver |
| Bartali Farm in Balenos | Velia in Balenos Serendia Eastern Border Falres Dirt Farm in Calpheon Stonebeak Shore in Mediah Fohalam Farm in Valencia Lake Flondor in Kamasylvia Duvencrune Farmland in Drieghan Salanar Pond in O'dyllita Zvier Highlands in Everfrost |
1,000,000 3,600,000 3,800,000 9,800,000 7,500,000 4,500,000 6,300,000 5,000,000 |
| Moretti Plantation in Serendia | Velia in Balenos Serendia Eastern Border Falres Dirt Farm in Calpheon Stonebeak Shore in Mediah Fohalam Farm in Valencia Lake Flondor in Kamasylvia Duvencrune Farmland in Drieghan Salanar Pond in O'dyllita Zvier Highlands in Everfrost |
1,000,000 - 2,600,000 2,800,000 9,000,000 6,500,000 3,500,000 5,300,000 4,000,000 |
| Gabino Farm in Calpheon | Velia in Balenos Serendia Eastern Border Falres Dirt Farm in Calpheon Stonebeak Shore in Mediah Fohalam Farm in Valencia Lake Flondor in Kamasylvia Duvencrune Farmland in Drieghan Salanar Pond in O'dyllita Zvier Highlands in Everfrost |
3,600,000 2,600,000 - 5,400,000 11,500,000 4,000,000 4,200,000 5,000,000 4,500,000 |
| Altinova Gateway in Mediah | Velia in Balenos Serendia Eastern Border Falres Dirt Farm in Calpheon Stonebeak Shore in Mediah Fohalam Farm in Valencia Lake Flondor in Kamasylvia Duvencrune Farmland in Drieghan Salanar Pond in O'dyllita Zvier Highlands in Everfrost |
3,800,000 2,800,000 5,400,000 - 6,200,000 9,300,000 4,800,000 6,000,000 5,000,000 |
| Erdal Farm in Valencia | Velia in Balenos Serendia Eastern Border Falres Dirt Farm in Calpheon Stonebeak Shore in Mediah Fohalam Farm in Valencia Lake Flondor in Kamasylvia Duvencrune Farmland in Drieghan Salanar Pond in O'dyllita Zvier Highlands in Everfrost |
9,800,000 9,000,000 11,500,000 9,300,000 - 14,800,000 11,000,000 12,200,000 11,200,000 |
| Grána Dirt Farm in Kamasylvia | Velia in Balenos Serendia Eastern Border Falres Dirt Farm in Calpheon Stonebeak Shore in Mediah Fohalam Farm in Valencia Lake Flondor in Kamasylvia Duvencrune Farmland in Drieghan Salanar Pond in O'dyllita Zvier Highlands in Everfrost |
7,500,000 6,500,000 4,000,000 9,300,000 14,800,000 - 4,000,000 3,200,000 5,500,000 |
| Marak Farm in Drieghan | Velia in Balenos Serendia Eastern Border Falres Dirt Farm in Calpheon Stonebeak Shore in Mediah Fohalam Farm in Valencia Lake Flondor in Kamasylvia Duvencrune Farmland in Drieghan Salanar Pond in O'dyllita Zvier Highlands in Everfrost |
4,500,000 3,500,000 4,200,000 4,800,000 11,000,000 4,000,000 - 1,900,000 2,100,000 |
| Delmira Plantation in O'dyllita | Velia in Balenos Serendia Eastern Border Falres Dirt Farm in Calpheon Stonebeak Shore in Mediah Fohalam Farm in Valencia Lake Flondor in Kamasylvia Duvencrune Farmland in Drieghan Salanar Pond in O'dyllita Zvier Highlands in Everfrost |
6,300,000 5,300,000 5,000,000 6,000,000 12,200,000 3,200,000 1,900,000 - 3,500,000 |
| Erethea's Belt in Everfrost | Velia in Balenos Serendia Eastern Border Falres Dirt Farm in Calpheon Stonebeak Shore in Mediah Fohalam Farm in Valencia Lake Flondor in Kamasylvia Duvencrune Farmland in Drieghan Salanar Pond in O'dyllita Zvier Highlands in Everfrost |
5,000,000 4,000,000 4,500,000 5,000,000 11,200,000 5,500,000 2,100,000 3,500,000 - |
Requirements
The Magnus questline is new player friendly, with relatively low requirements to get started. Your character will need to have completed the following quests:
- "Farewell, Grusha," "Embarking on an Adventure," or "Big Fish in a Small Pond" Balenos main quests
- "[Special Growth] Fughar's Memorandum - Chapter 1" during the Simplified questline.
- "[Everfrost] Beyond the Doors of Alyaelli" from the Mountain of Eternal Winter main questline
While you are able to start the questlines after completing the above, it is only up to a certain point.
There are some parts of "Abyss One: The Magnus" that are available after completing the Serendia and Calpheon main questlines.
Heading to the Magnus
Starting Quest [The Magnus] Nostalgic For Velia obtained from Black Spirit (,) in The Main Quest tab. You will then be able to start the questline at NPC Eileen in Velia.
She'll then guide you over to Bartali Farm where you can head into the Magnus! If you can't see the Magnus questline, head to Velia then try speaking to your Black Spirit again, it should appear.

Since the Magnus is new player friendly, it uses it's own unique set of custom gear, just like the Arena of Solare. You're also unable to use regular items while in the Magnus.

If you need to get out of the Magnus for any reason, just hit Esc, you will be given the below menu. 
The Magnus: Abyss One Challenges
Below is an extensive guide on the challenges you'll find in the Magnus! We'll cover each challenge seperately.
The easiest way to find the challenge you're looking for is by using find (Ctrl+F) or using the Table of Contents page navigation to the right of page.
You can click on any of the images on this page for a larger version of the image should you need it.
Memory Fragment and the Peaceful Vegabond
Climb aboard the boat and begin rowing. This is nice and easy, just head towards the lights, the cat will meow when you get closer to the correct light

There is also guiding wind that shows you the way, so you don't have to rely purely on the cat. Simply travel to each light until finished.

Why Don't you do it Yourself?
This is a stealth gameplay section, avoid the Red Nosed Imp's field of vision and collect the three orbs scattered around the cave.

Stack all three orbs in the room on the imp altar, without being seen. Being hit will reset you back to the start of the cave.

After you're done with the orbs you will then be prompted to follow the cat out of the cave to complete the quest.

Pendulum Goes Clickety-Clack
This is a nice, simple one. Pick up the orb, avoid everything and carry it to the otherside.

Once you're at the opposite end, there will be a clear pedastal that you have to place the orb on.

Repeat back and forth until complete.
You will now be done with the first section of the Magnus questline and be awarded with the first enhanced storage and travel back up to the normal world.

For the next part of the questline, you'll taken to Moretti Farm, the anomaly is on the roof here.

After you've interacted with the anomaly you are able to head down the next well, back into the abyss.
Golden Lion of Serendia
Now you'll meet up with Jordine who's also been transported to the Magnus, he'll be helping you on this questline, speak to him to have him open the first gate.
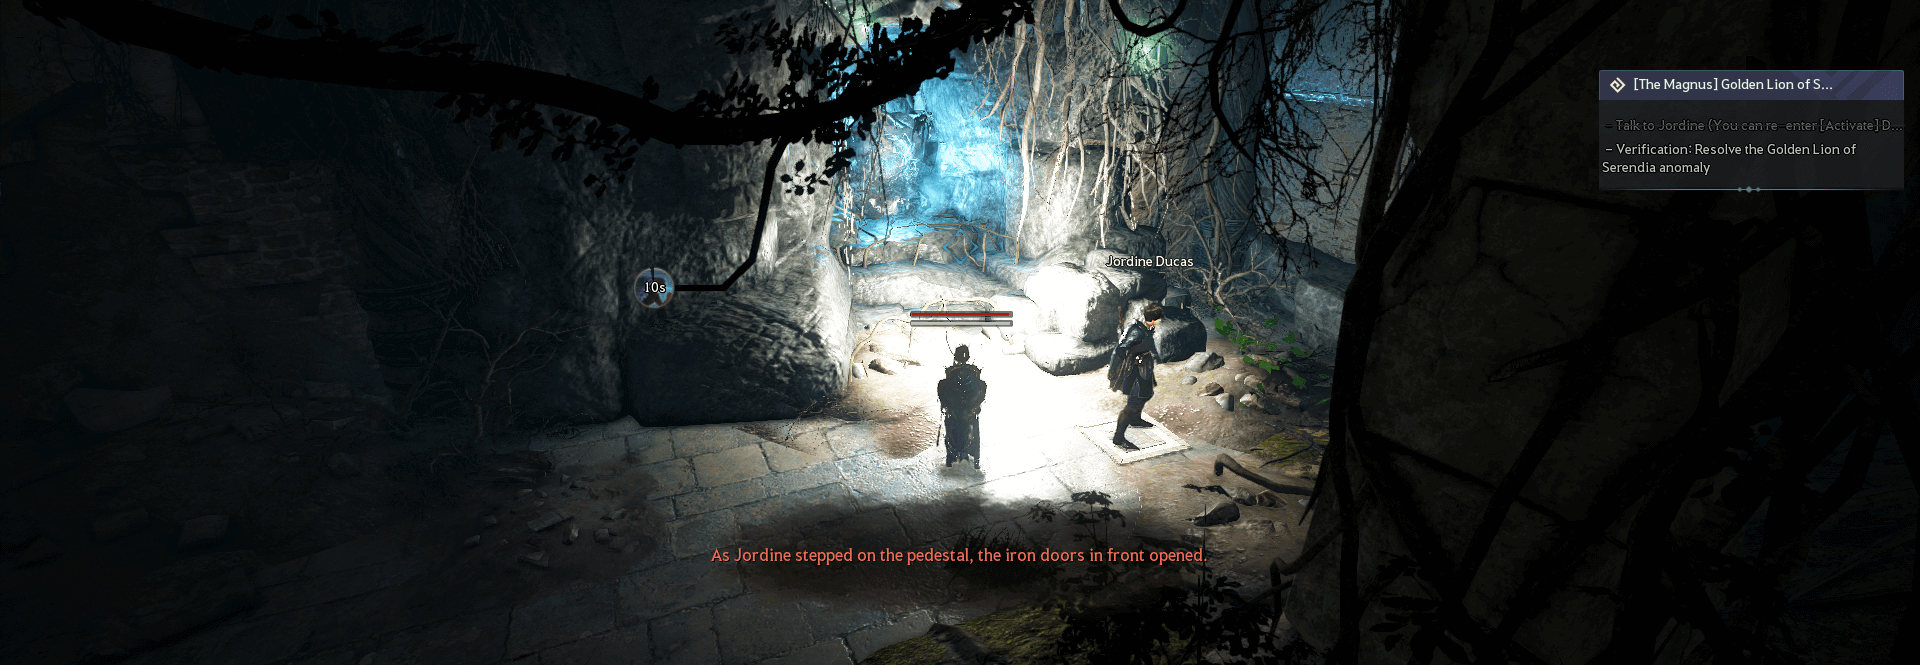
After Jordine has opened the gate for you, step on the yellow pedestal. Keep away from the fire!
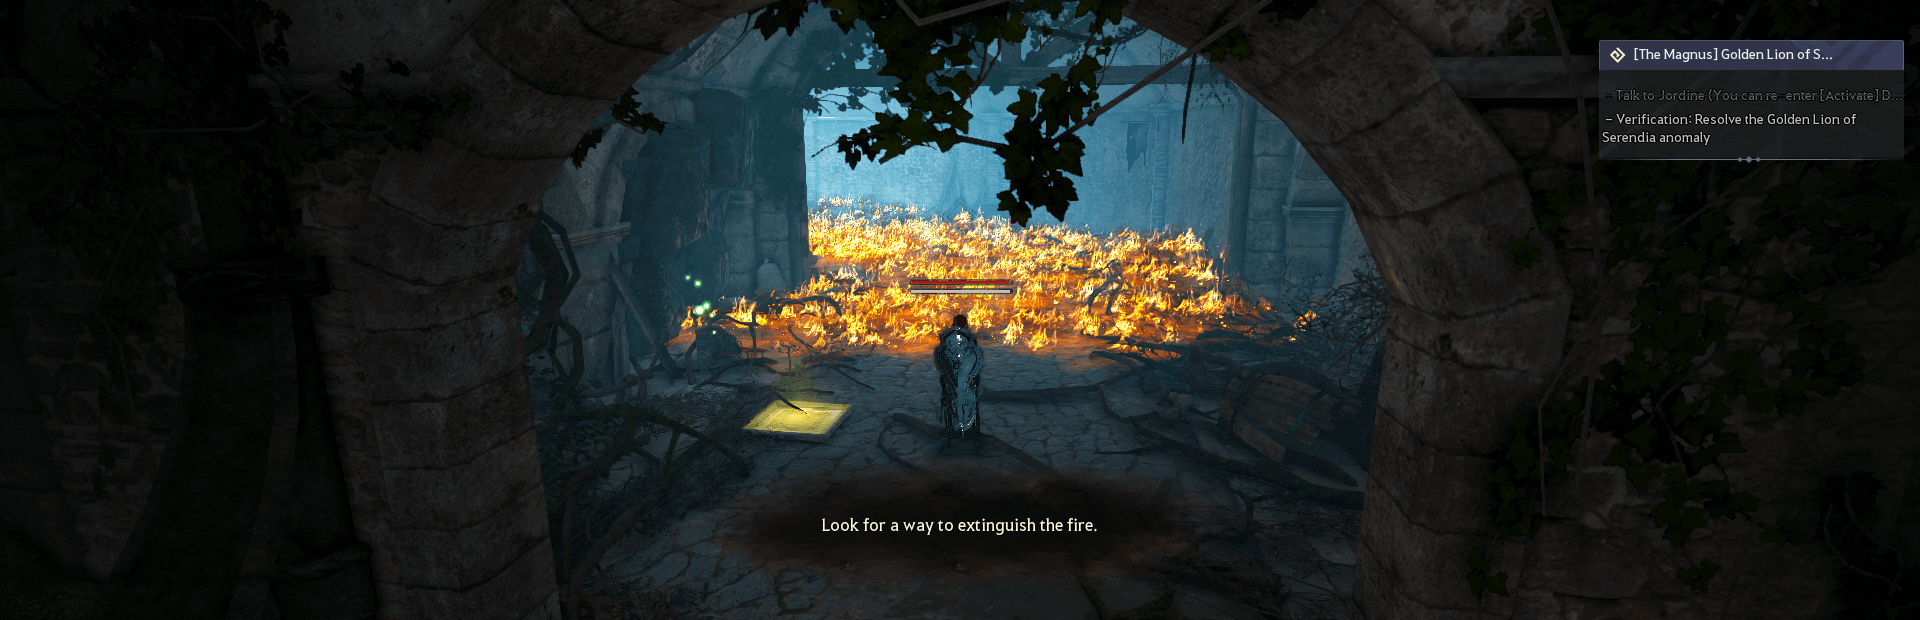
Needing something to extinguish the fire, step into the first room where Jordine still is. Head over to the Mystical waterfall and touch the water.

Slowly approach the fire, let it extinguish slowly. You'll be able to see the flames die out as you walk.

Next you'll come to the second room. Watch out for the floating black spirits as they'll deal alot of damage if you get too close.

Speaking with Jordine will attempt to have him stand on one of the platforms. Here I've used the provided Abyssal Orb and stood on the other platform myself.
This will open the gates to the left in the image below.

When you enter the gates, they'll close behind you. Search the "Junk" and the "Chest" in the image below.
The chest will give you "Ancient Orders" and the Junk will give you a "Rusty Helmet."
Place the "Ancient Orders" on Altar 1 and keep the "Rusty Helmet" for now.

To escape the room, use the crank, and head back through the gates to the room we just left. Ignore Jordine in the image below, I used the purple orb again.
To unlock the gates on the right, this time use the pressure plates like this:

Now interact with the "Old Flag" and the "Sword and Shield" this will give you an "Old Flag" and a
"Rusty Quiver."
Place the "Rusty Helmet" on Altar 3 and place the "Rusty Quiver" on Altar 4.

Now that we have the "Old Flag", exit the room with the crank. Change the pressure plates back to how you first set them and enter the other cell.
Place the "Old Flag" on Altar 2.
Now you will be prompted that the next gates are open and will be able to advance into the next area.
You will have to fight off some monsters with Jordine and destroy the iron gateways.

Finally you will have to face a large snake boss with Jordine, this is the last part of this challenge.

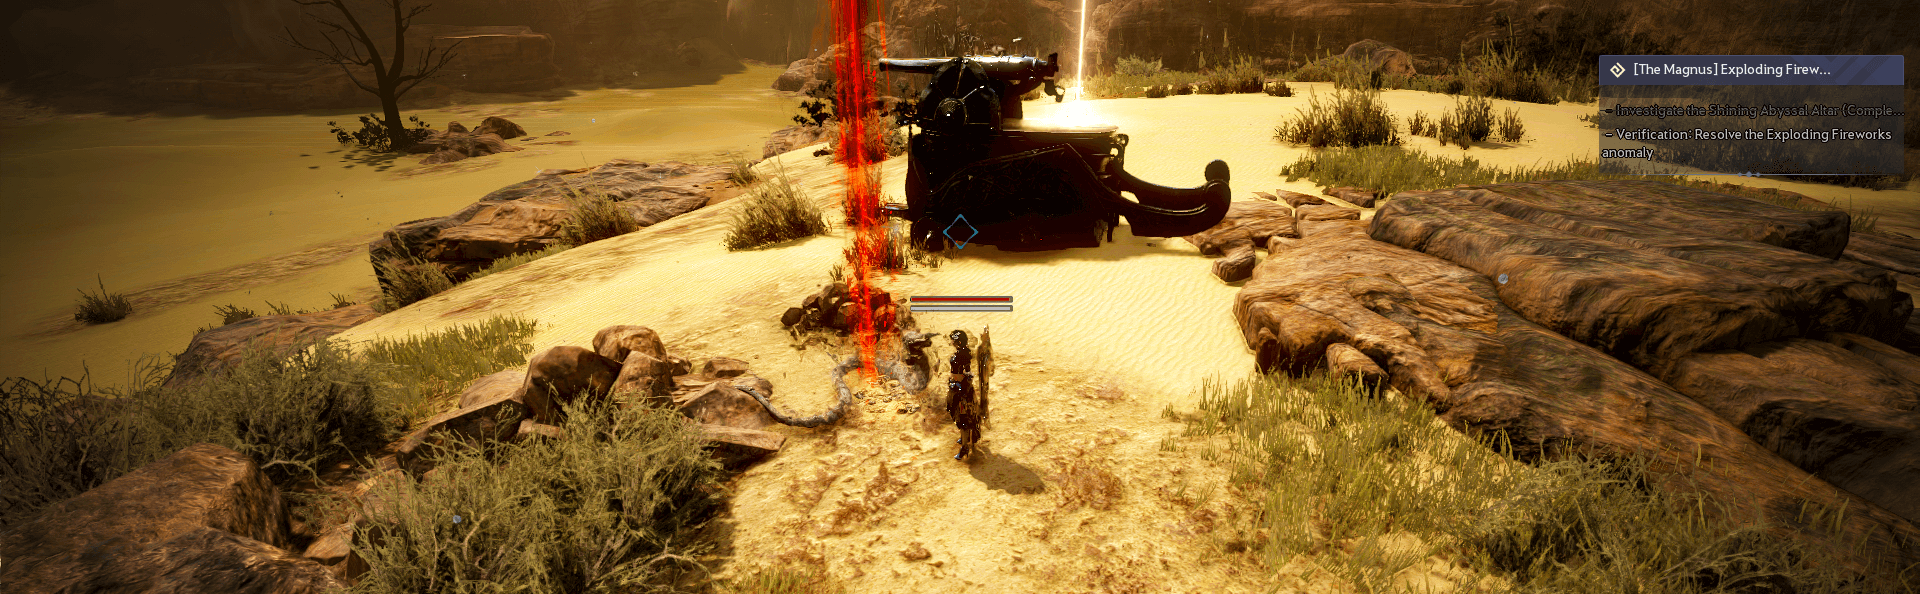
Exploding Fireworks
Talk to the snake Ibedor to begin the challenge, which will involve monsters invading through the portals in the distance.

Ibedor will spawn a chariot that has a cannon attached to it that you'll use to defend from the invasion.
It's best to stay still for a few moments to allow the chariot to properly spawn, otherwise it may not be an interactable object.
You can reset this by hitting "Esc" and clicking "Retry" or by running into the center of the map and hitting "Retry."
Changing graphics options can also sometimes help.
Defeat the incoming invaders by firing the cannon as they attack, "LMB" is fire while "RMB" will activate a rapid fire to help clear out the mobs.

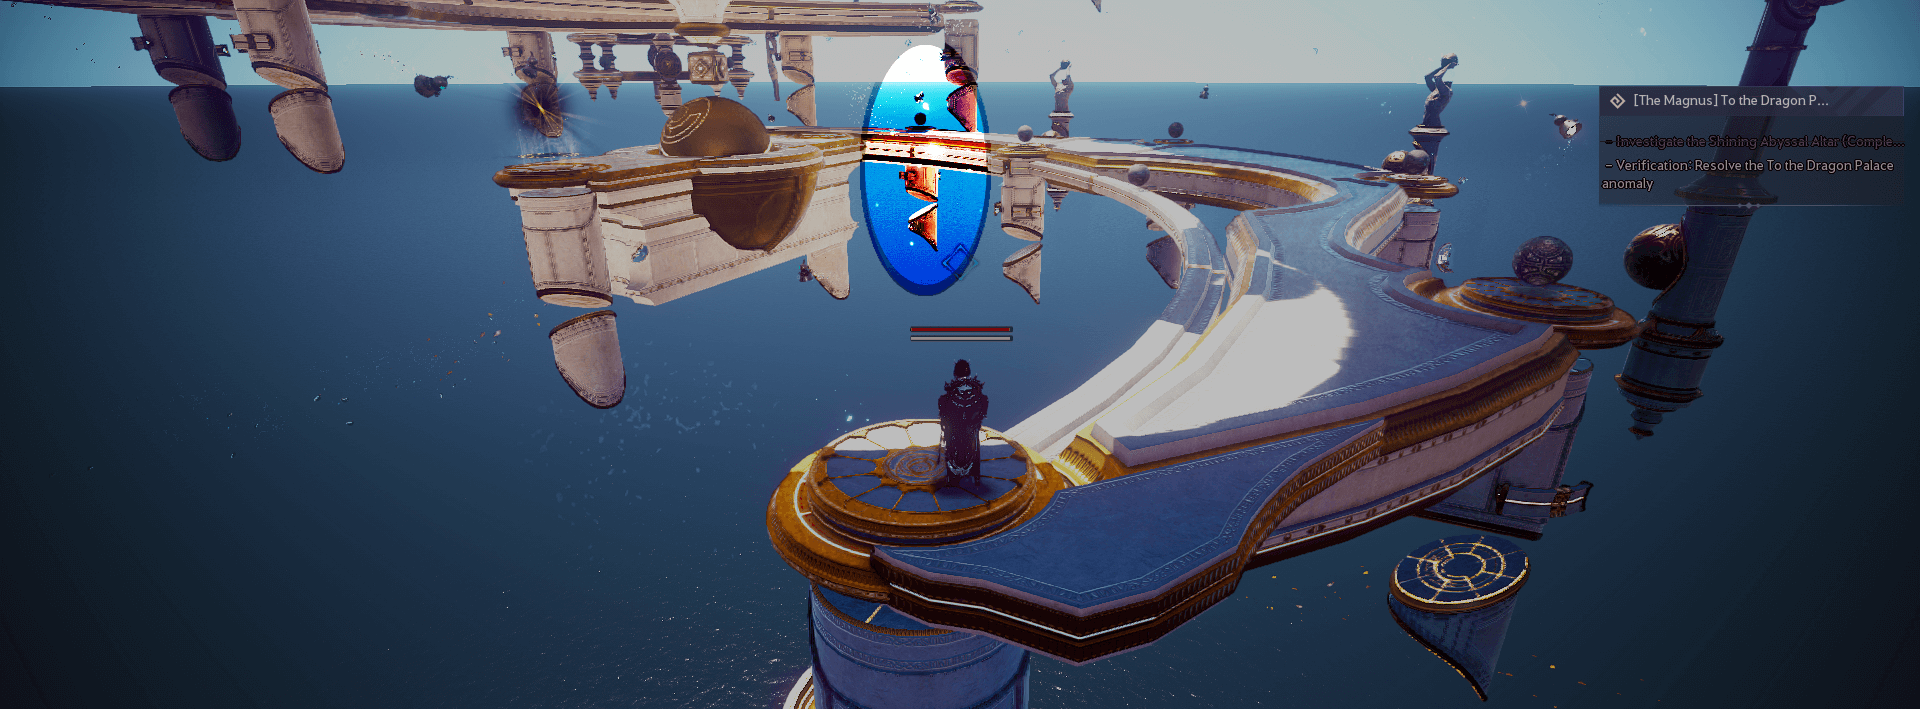
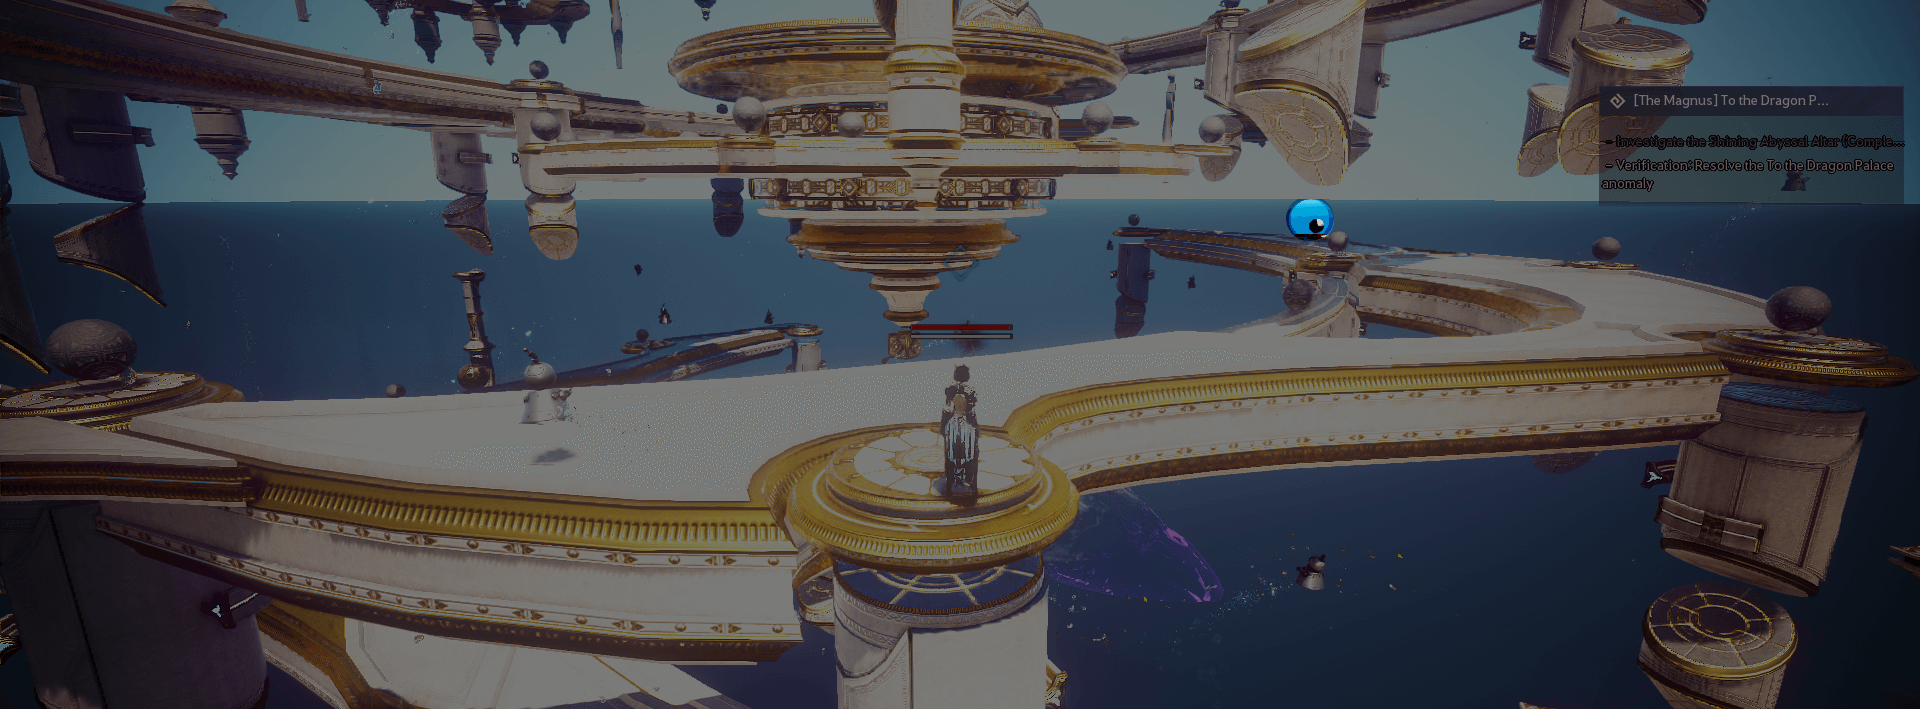
To the Dragon Palace
This puzzle involves using teleportation stones to transport yourself up to the top of a construct. Use the images below to guide you along.
On the starting platform there is only one option, just head forwards and interact with the orb.

There are a few more options this time, just run over to the orb marked in the image below. You can click on the image to make it larger.
This one is another one with only one option, just head over to the other orb. If you fall into the ocean you can reset by hitting "Esc" then "Retry."

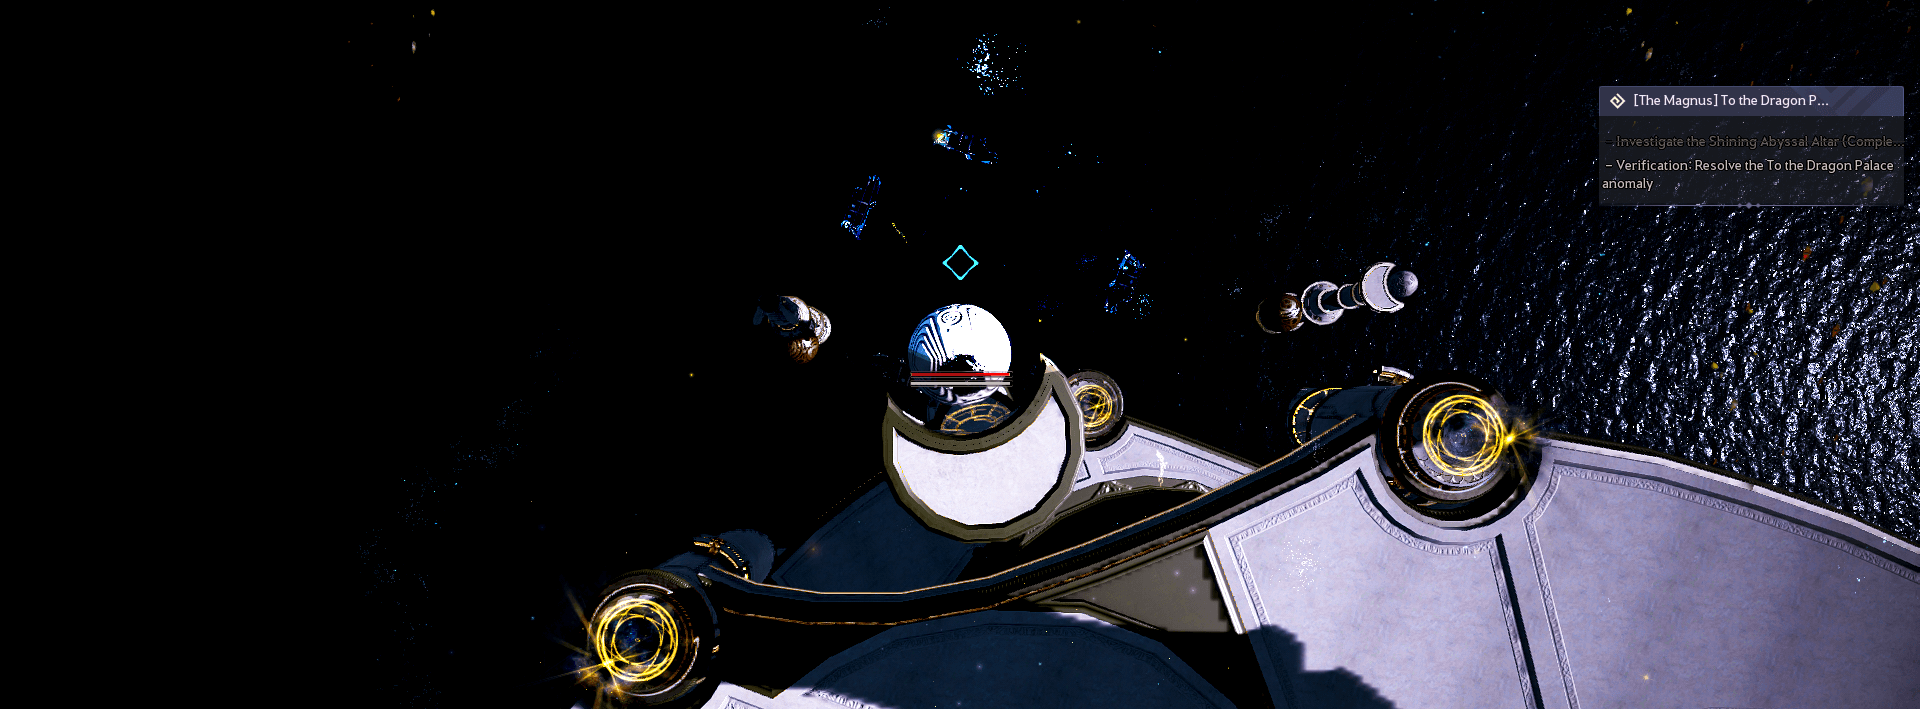
The next orb is on the far side of the next platform and will leave you to a higher level platform. Again, click the below image if you need a better look!
The next orb is across the narrow path, towards the center, be careful not to fall into the ocean.

You'll be transported up to a higher path as you make your way to the top of the construct. Use the orb on the left side here.

This is the last portal to take, which will lead to the top of the construct.

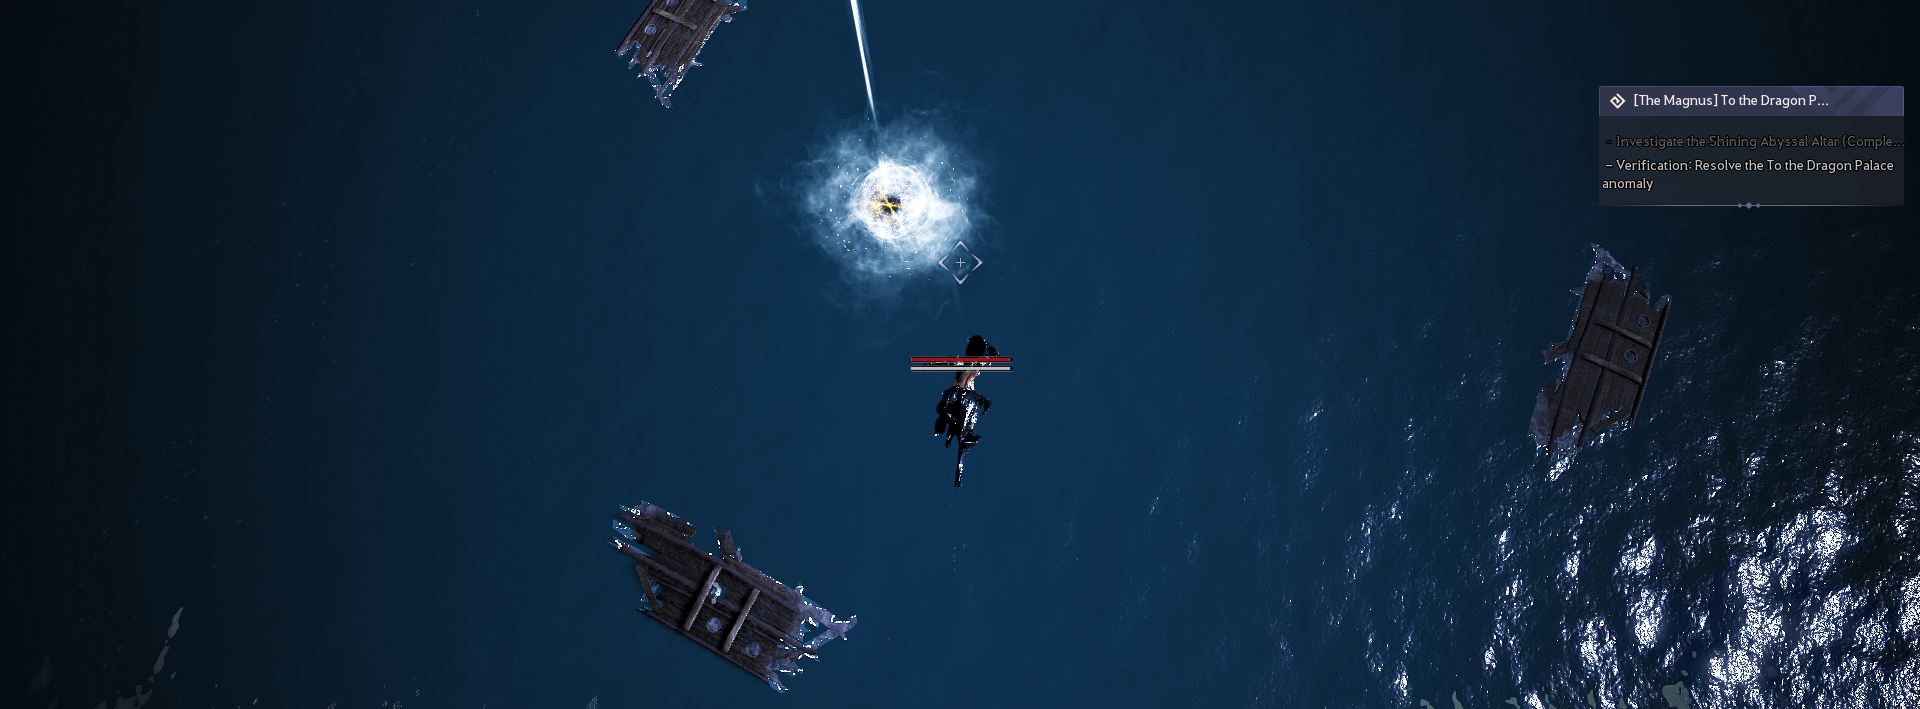
From up high on the construct you can see four rafts in the water below.
Take a leap of faith that will lead to a bright white light, this will complete the challenge and the cat will arrive for you to leave.
This will complete another section, earning you more connected storage. You'll travel back to the regular world and be made to visit Gambino Farm next.
Head back down the well in Gambino Farm and find Wuju, just follow the questline instructions.
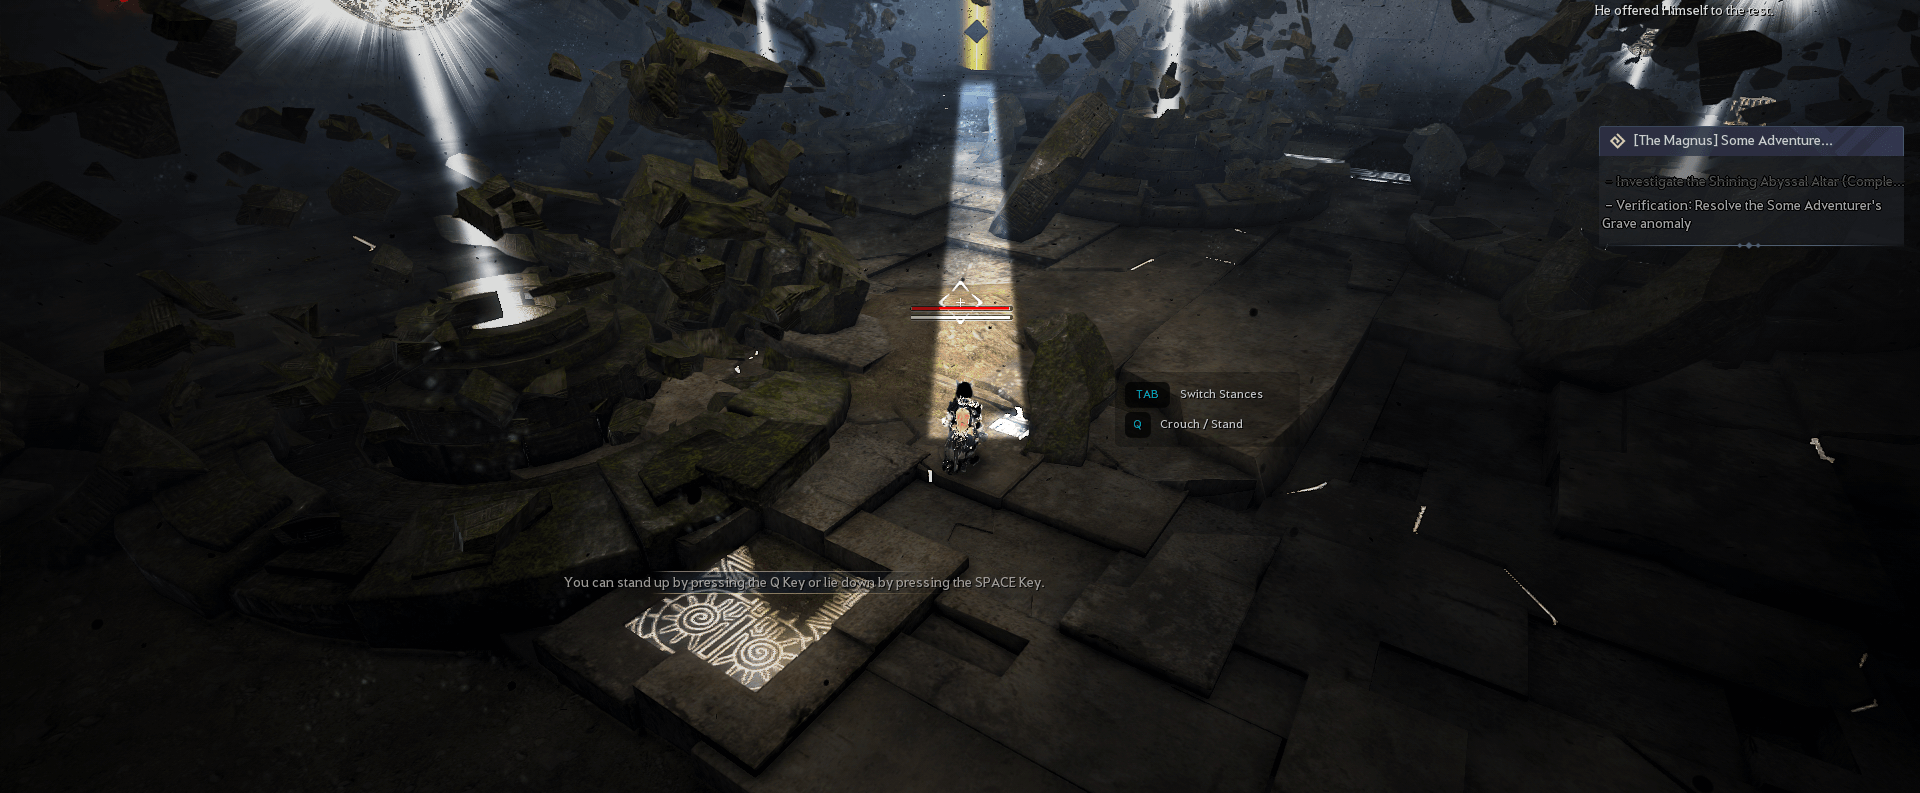
Some Adventurer's Grave
Activate the cube by interacting with it and using the "Chat" option, this will activate the security systems and let you begin the challenge.
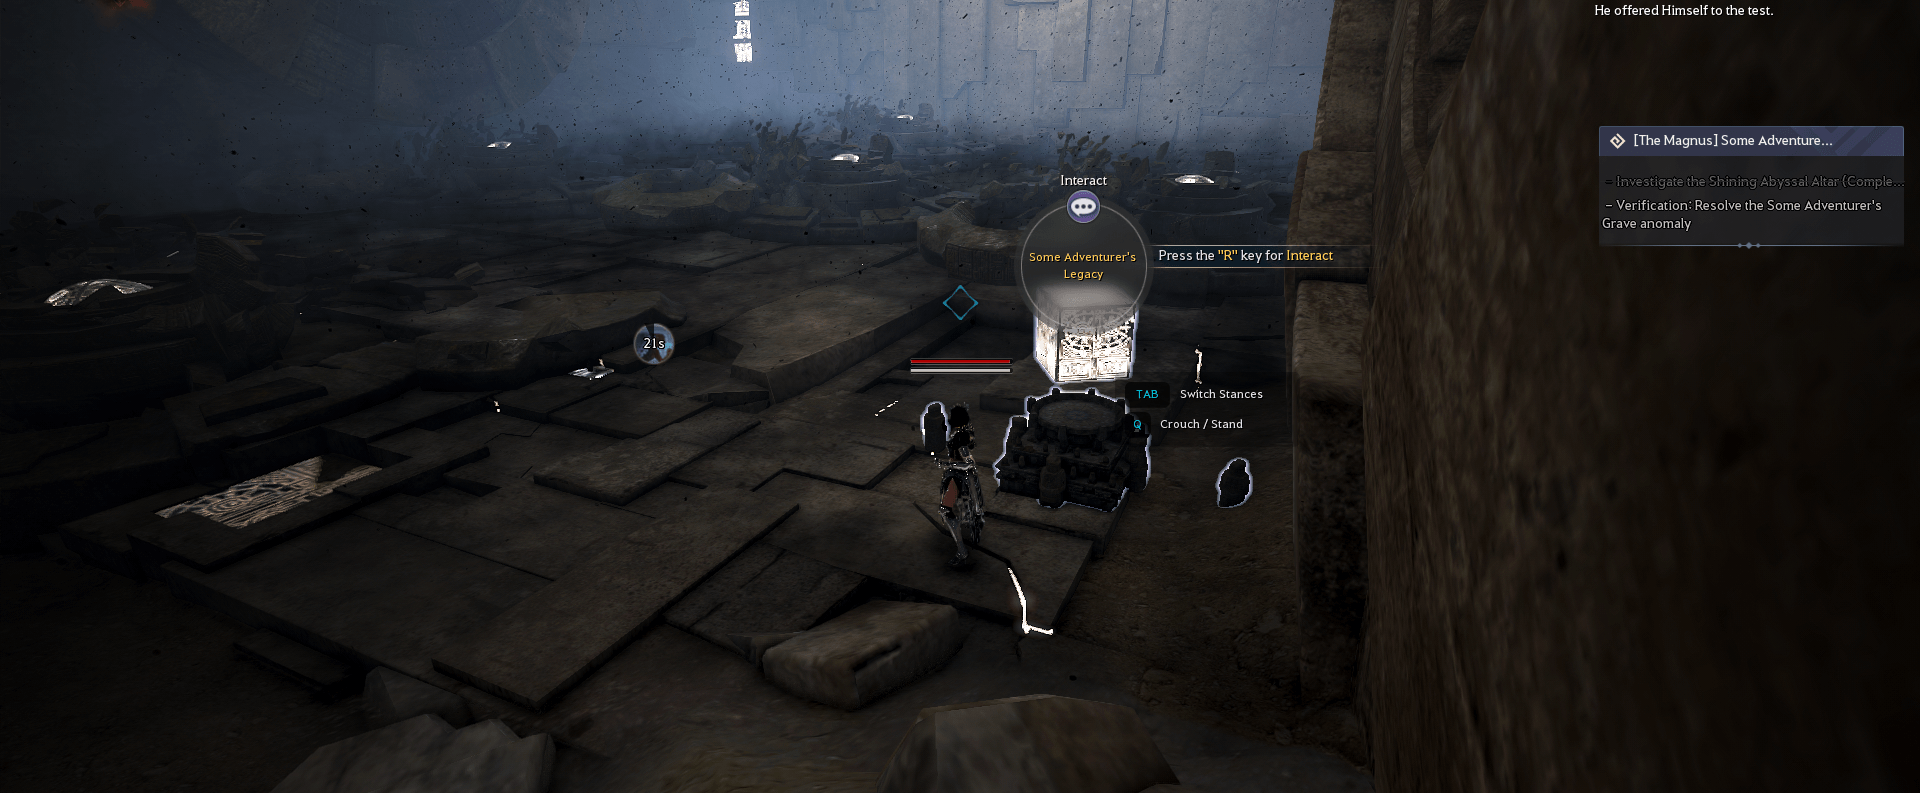
Crouch down using 'Q' then walk through the center of the security systems, when you get to the golden light, destroy the cube by attacking it. You can roll forward with Shift+W to be a little quicker.
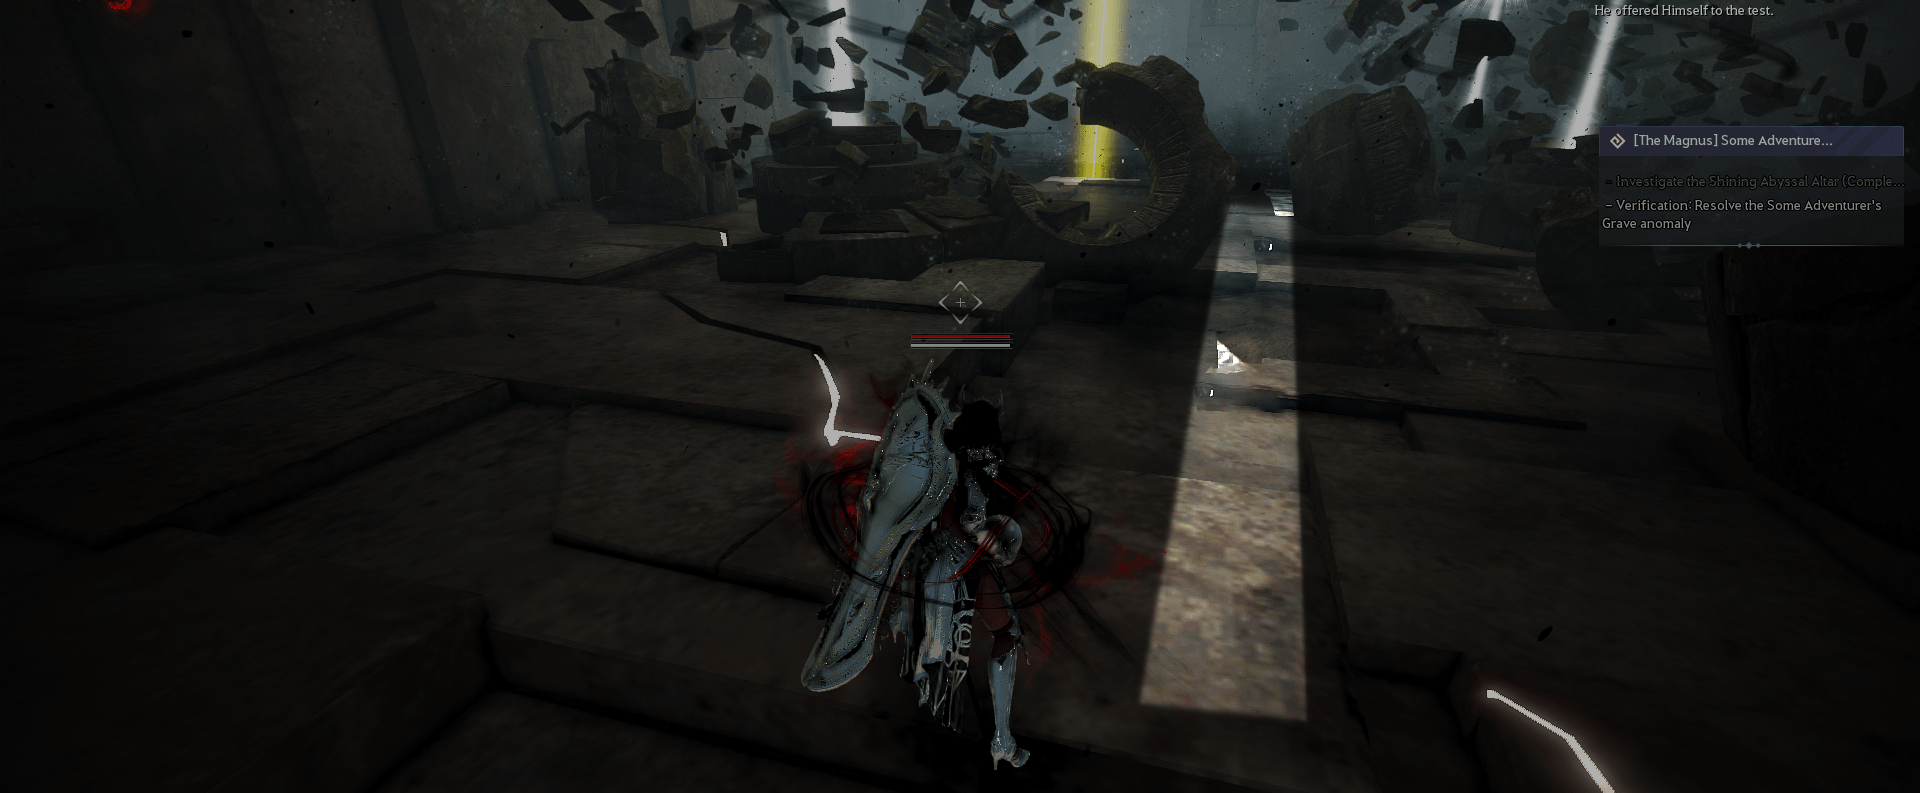
Next, pick up the Abyssal Orb and wait for the red AoE attacks from the security devices to stop, then make your way through them again, you don't have to crouch anymore.
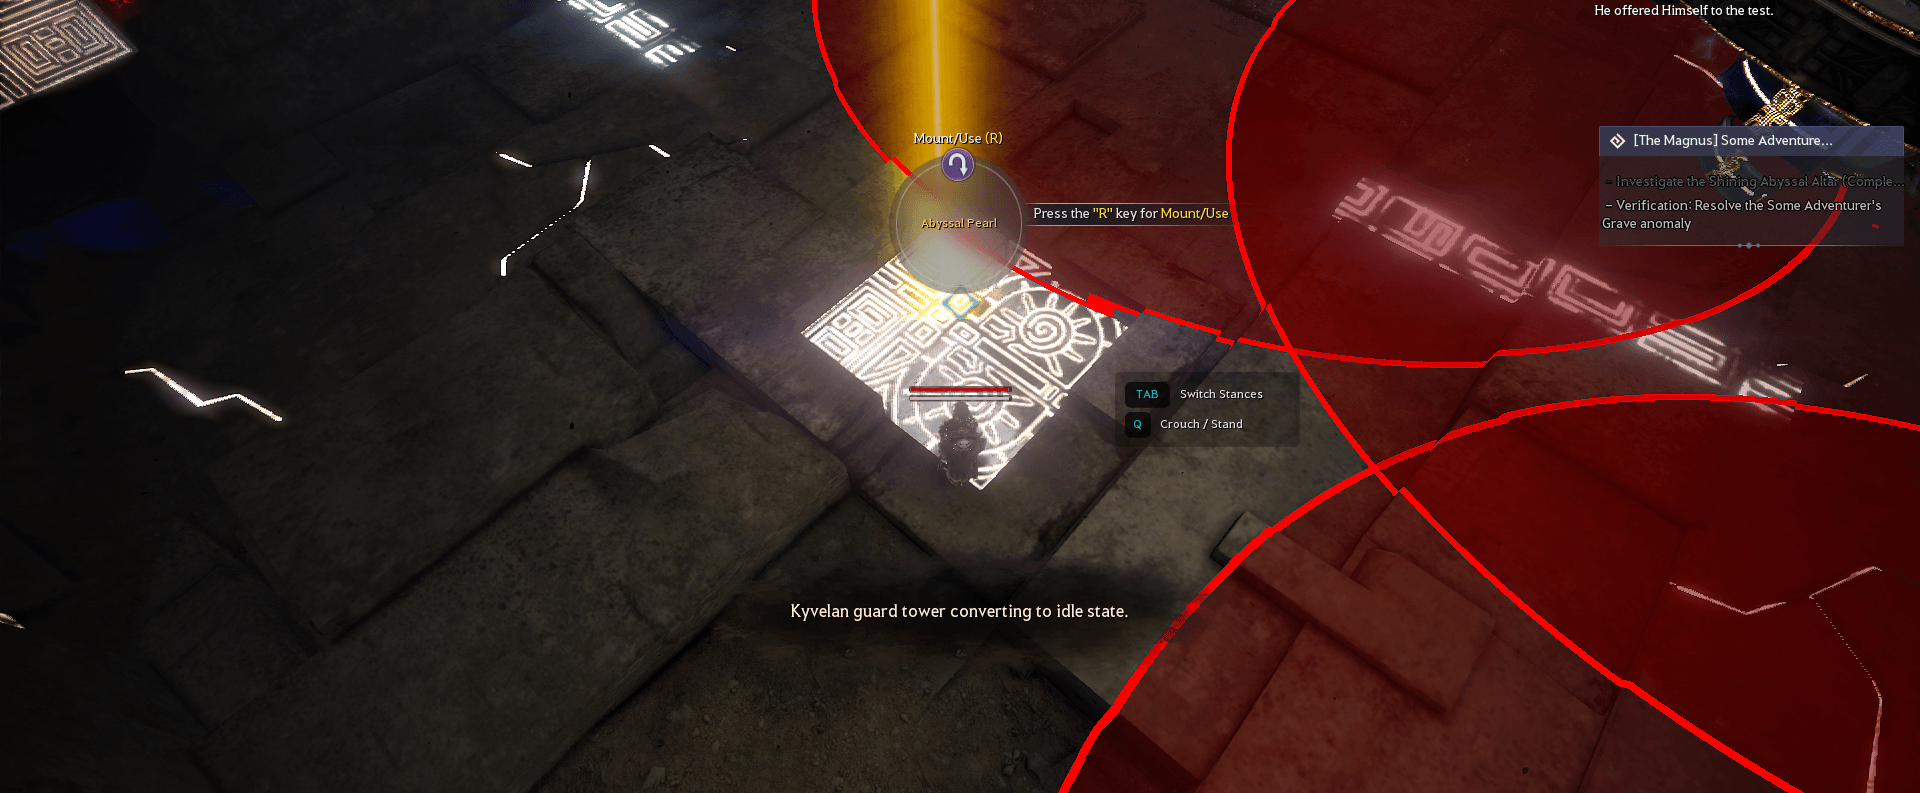
Place the Abyssal Orb down on the pedestal to deactivate the security and complete the challenge.
Note, if the pedestal doesn't spawn, don't worry, you can still place the Abyssal Orb on the white square like below:
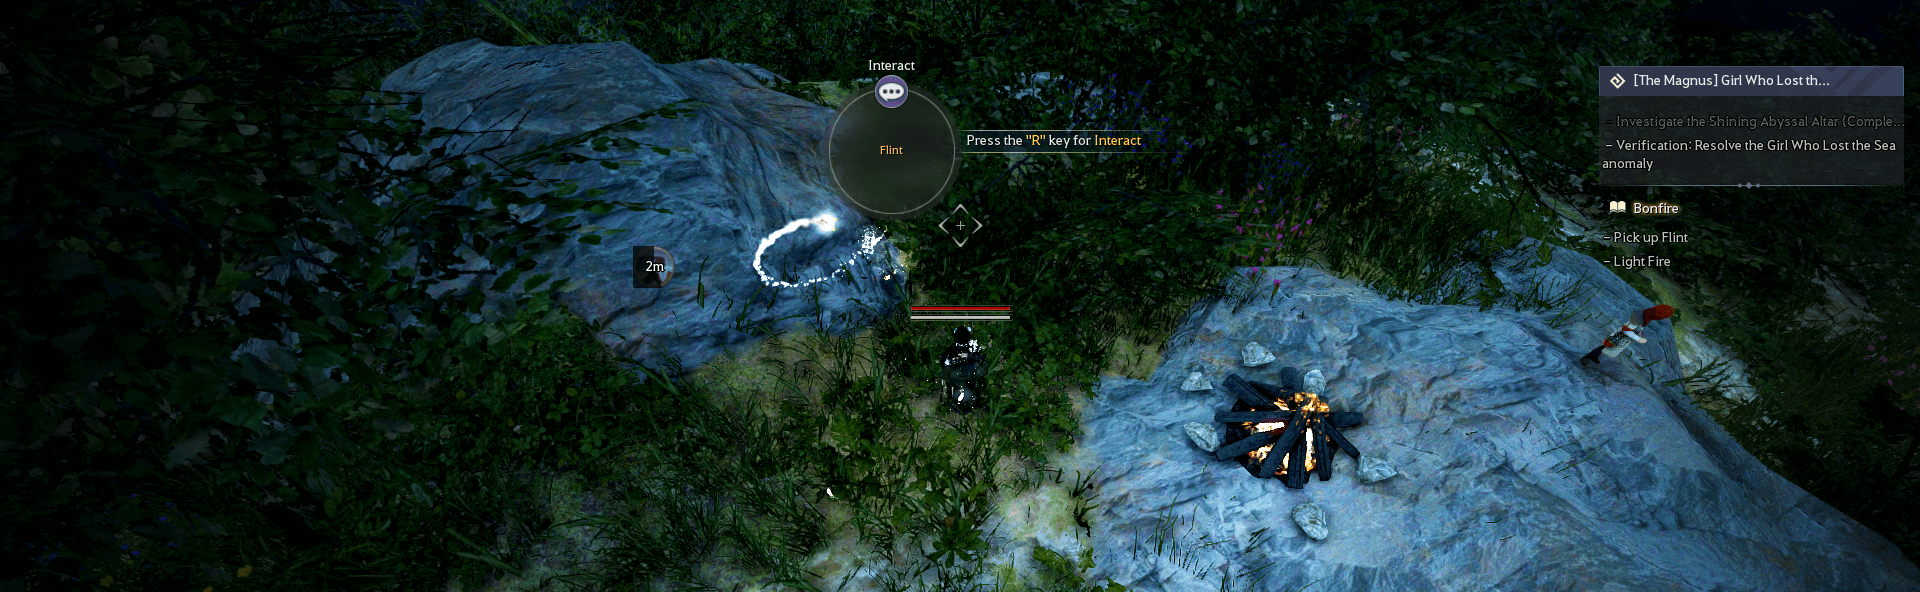
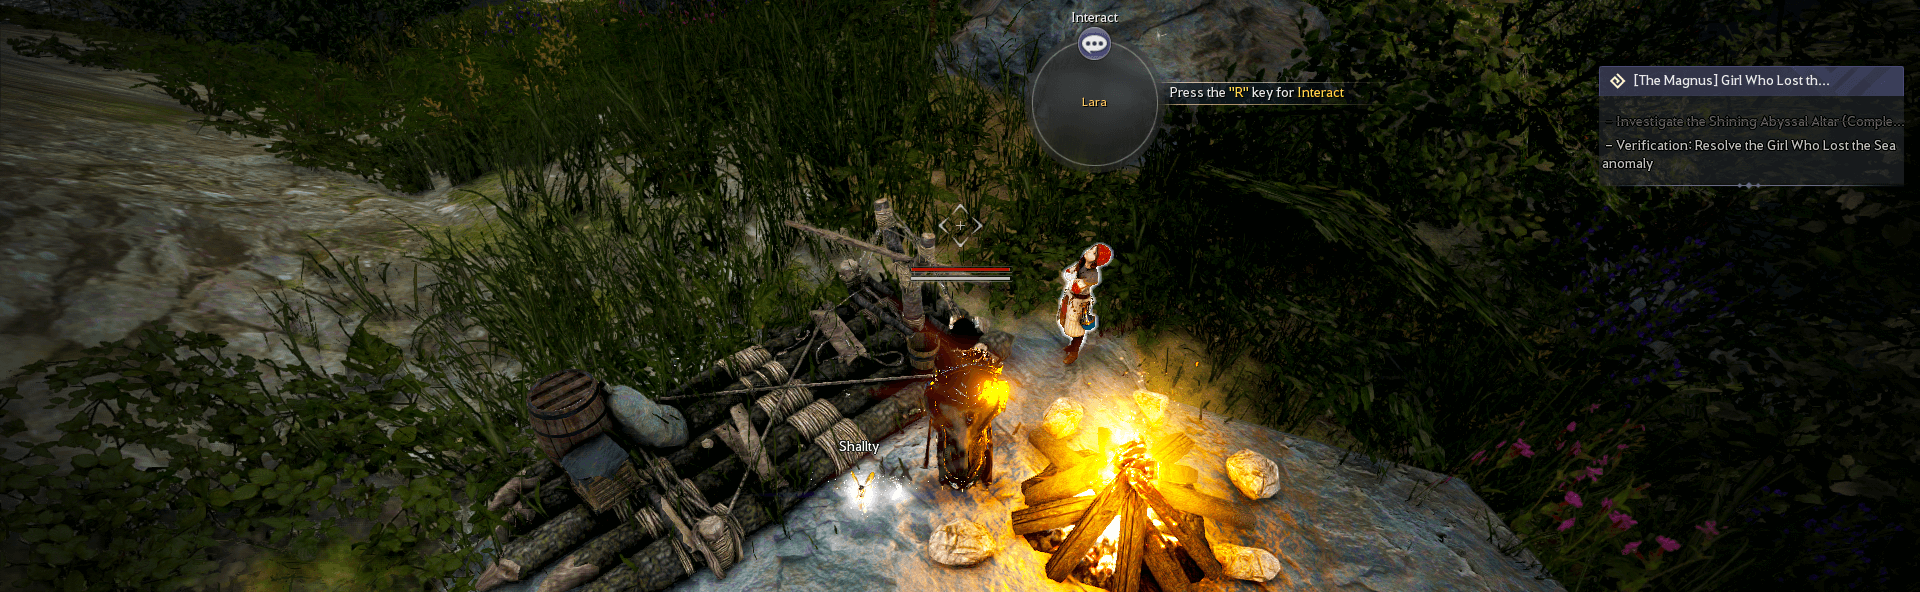
The Girl who Lost the Sea
Interact with the bonfire to start the challenge, you'll then need to interact with the flint. Once you've done that you can use it to light the bonfire and complete the first part of the challenge.
Next talk to Lara until she gives you the quest "Gathering Material #1." Talk to her again and
"Ask for the location of the tree."
Follow the yellow light she creates to find the materials. You'll have to do this for all the needed materials of the quest.
You can jump into the ocean to teleport back to Lara, it won't reset your progress.

Once you've completed that you'll be given "Gathering Material #2." Repeat the process of asking her for the material locations and following the light.
When you have the resin, melt it on the bonfire then speak to Lara to give her the ingredients.
The two of you will create a raft together. Talk to Lara until she starts moving, she will lead you down to the water.
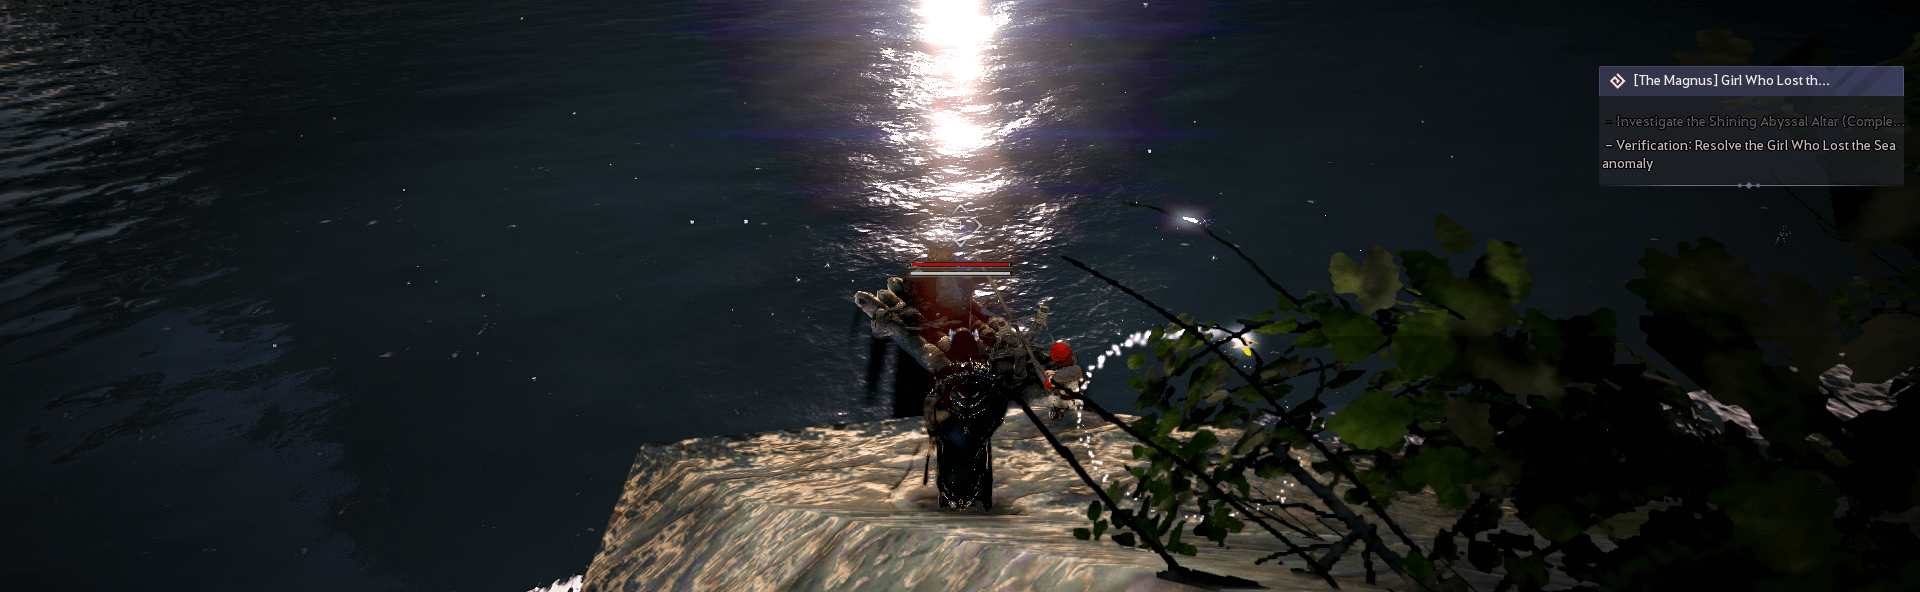
Use the completed raft by the water with Lara to sail out to the cat and complete the challenge.
If the raft doesn't spawn, you can swim out to the cat in the ocean, it will still count.
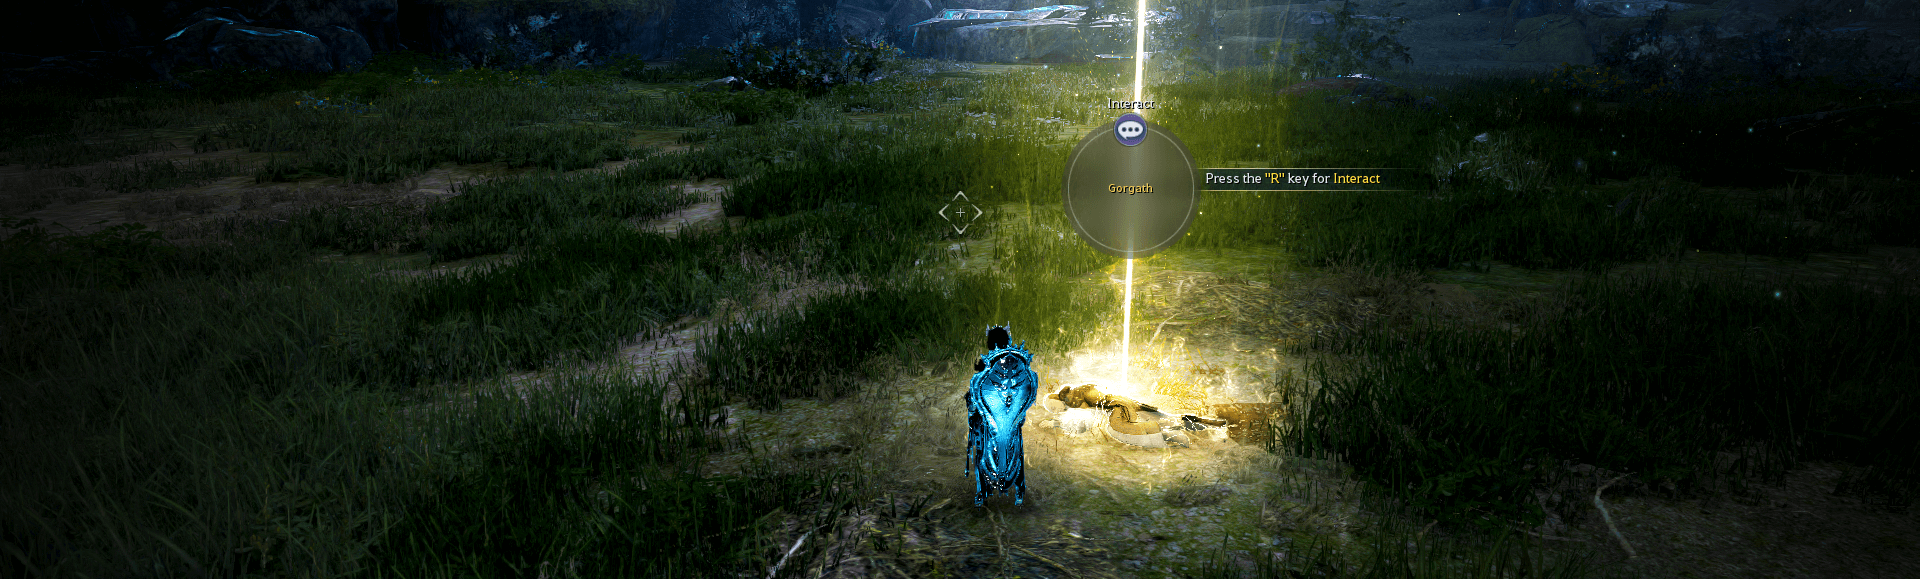
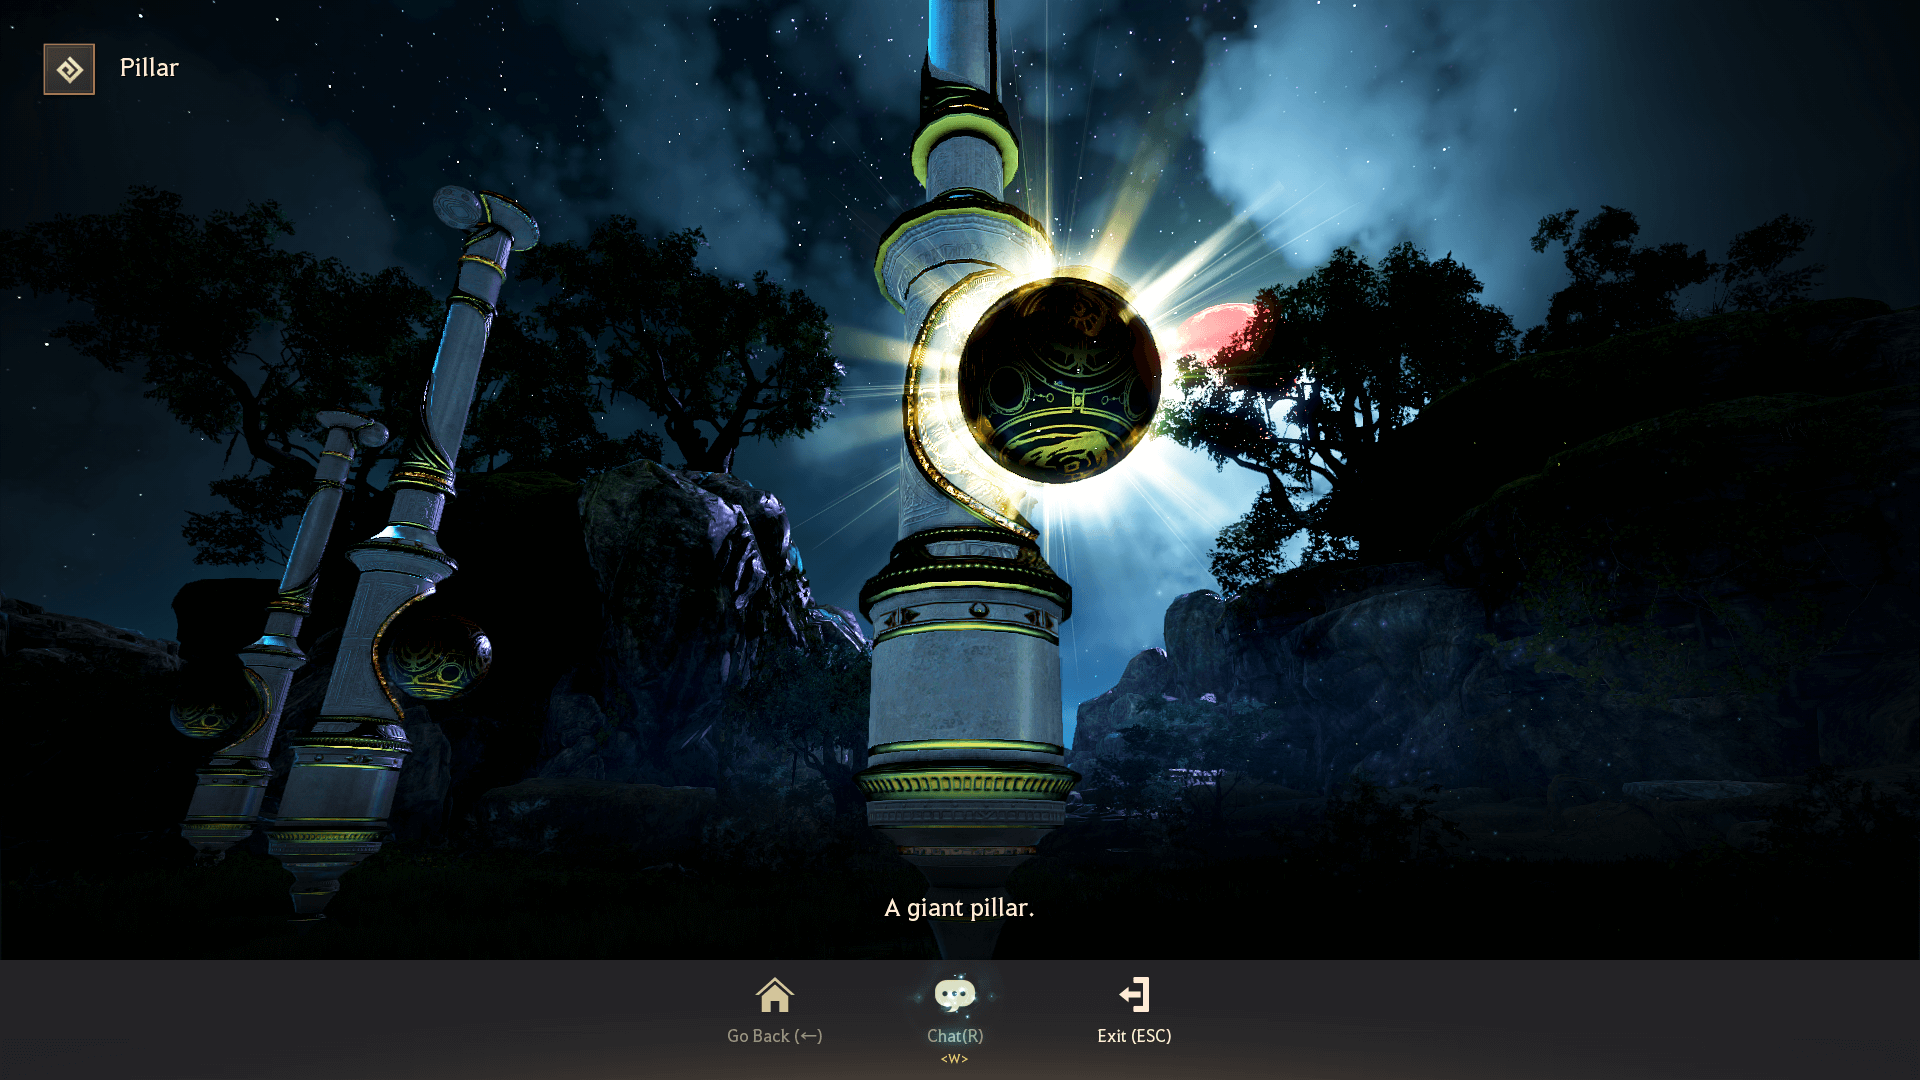
The Only Thing That Matters
At the start of this challenge, you'll have to speak to Gorgath and collect some herbs, the game directs you with very obvious golden lights so nothing to worry about here.
Next giant pillars will spawn in the area. Speak to Gorgath again to move on to the next part of the puzzle.
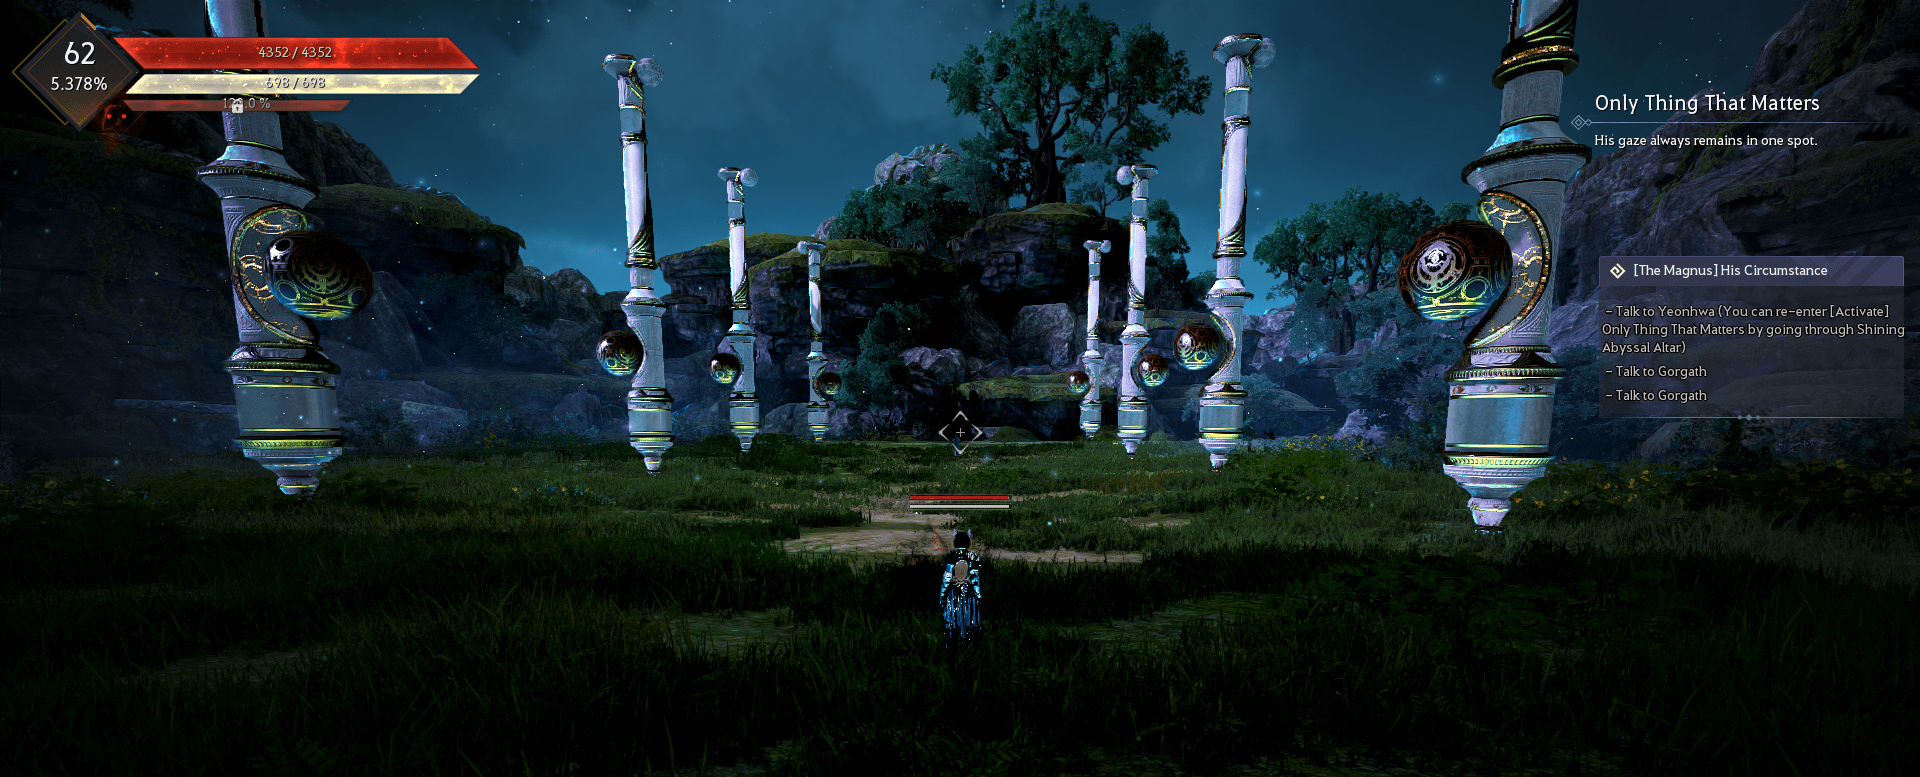
Move over to the patch of light and interact with the giant pillar. It will turn clockwise every time you chat to it. Stop when it begins to glow.
You will then have to spread the light through the rest of the giant pillars by interacting with them.

You can just spam 'R' while interacting with the pillars, you don't have to exit after rotating them.
When spamming 'R' the pillar will continue to rotate, just make it rotate until the light appears. You don't have to actually solve anything.
When the lights are all lit up, the cat will appear and the challenge will be complete.

After this challenge you'll return back to the original world and be awarded with more connected storage.
Speak with Eileen in Calpheon, then make your way over to Gabino Farm to the next well. Head to the lower levels of the Magnus and use the "Mediah" transport.
Next you'll head back to the Altinova Gateway and then jump down the well there. Locate Wuju to start the next questchain.
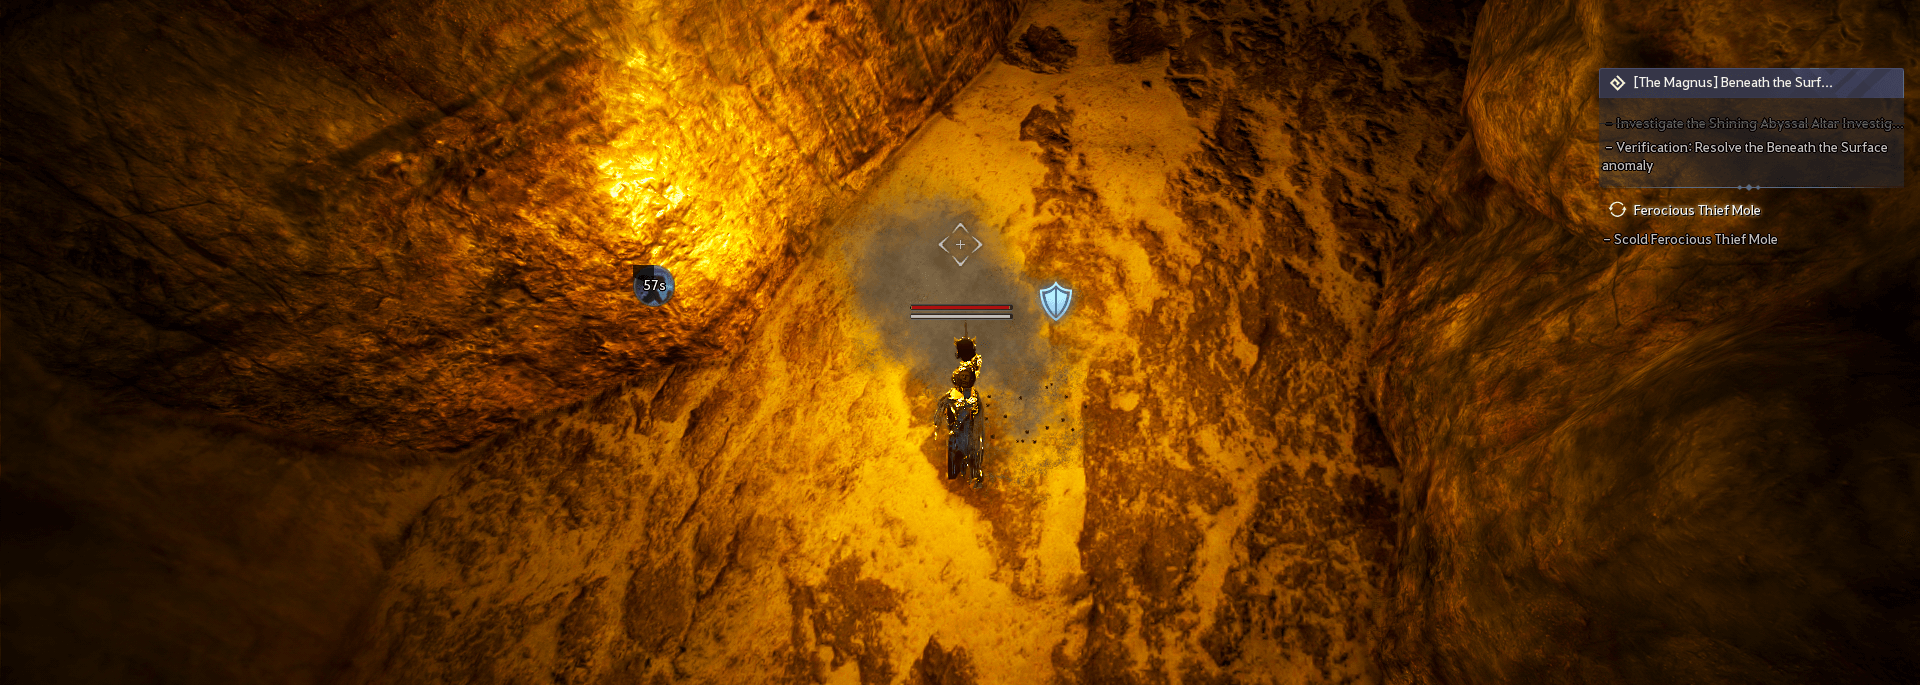
Beneath the Surface
Speak to Zobadi to begin the quest, he'll ask you to hunt moles within the cave. If you stand near the light dust clouds it will spawn a "Small Mole."
These moles won't complete the quest, instead you need to look for a darker dust cloud.
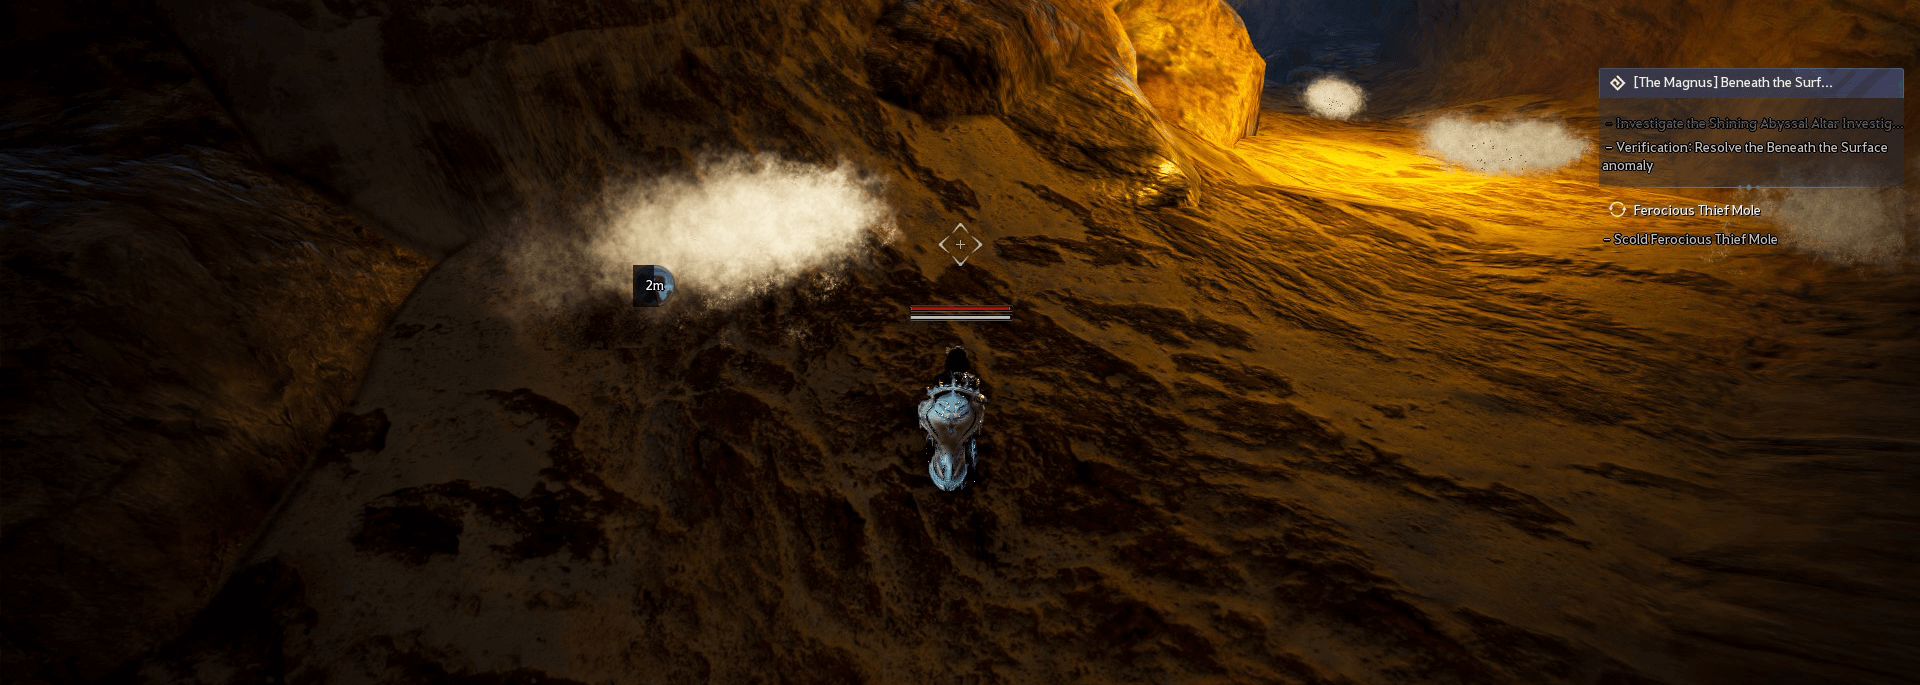
This is the dark dust cloud you'll have to follow around in order to spawn a "Fierce Mole" for you to kill.
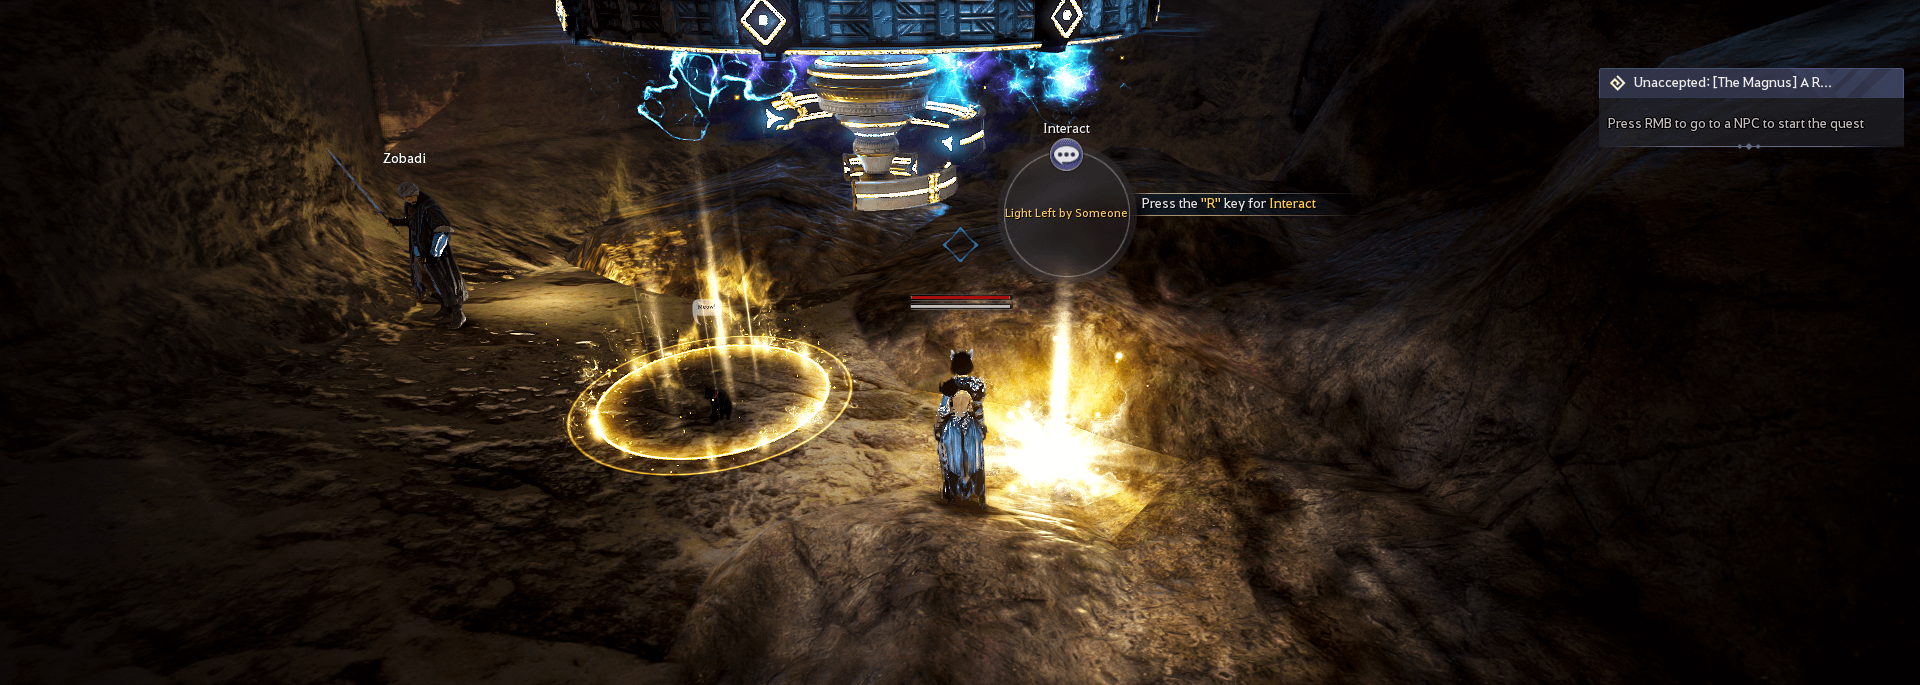
Once you've completed the objective, head back to Zobadi, a light will spawn that will then provide you with the exit to the challenge.
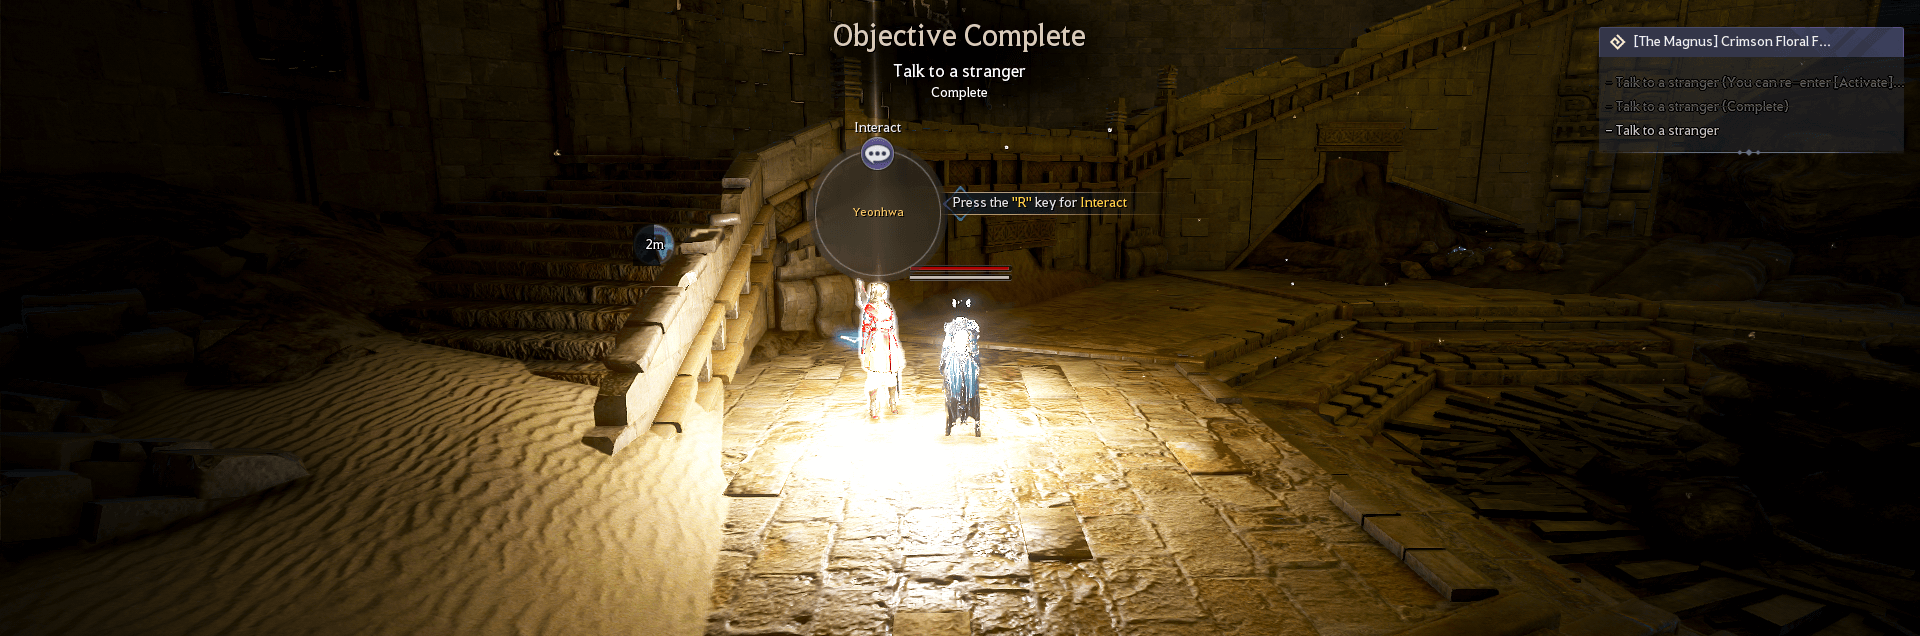
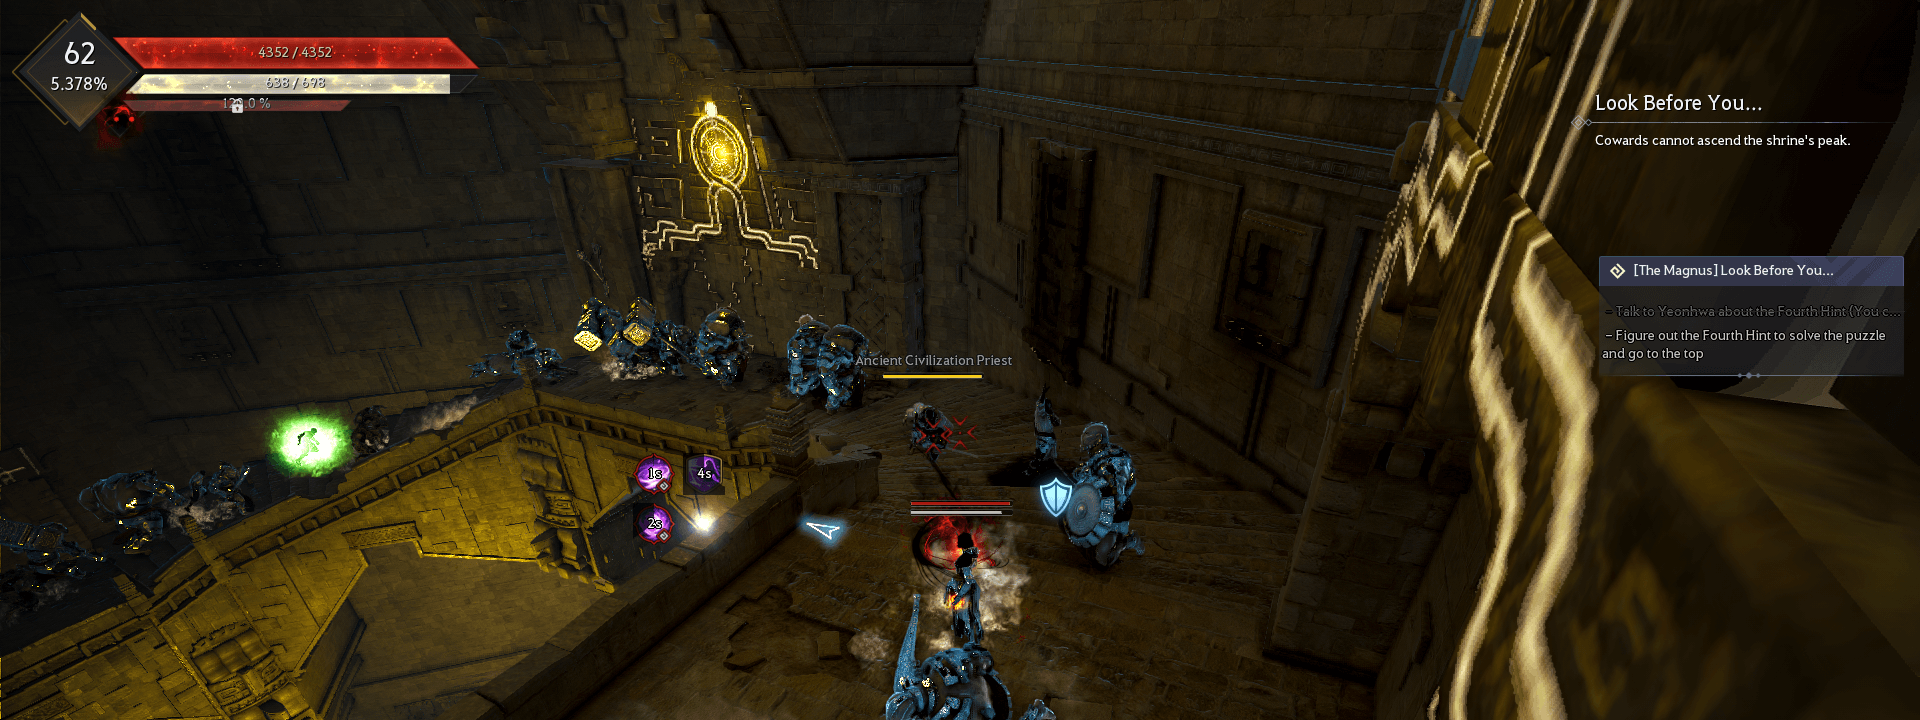
Look Before You
You will now find yourself in a version of Aakman temple. Talk to the Maehwa NPC Yeonhwa to start the challenge.
Once you've spoken to her, head upstairs all the way to the top.
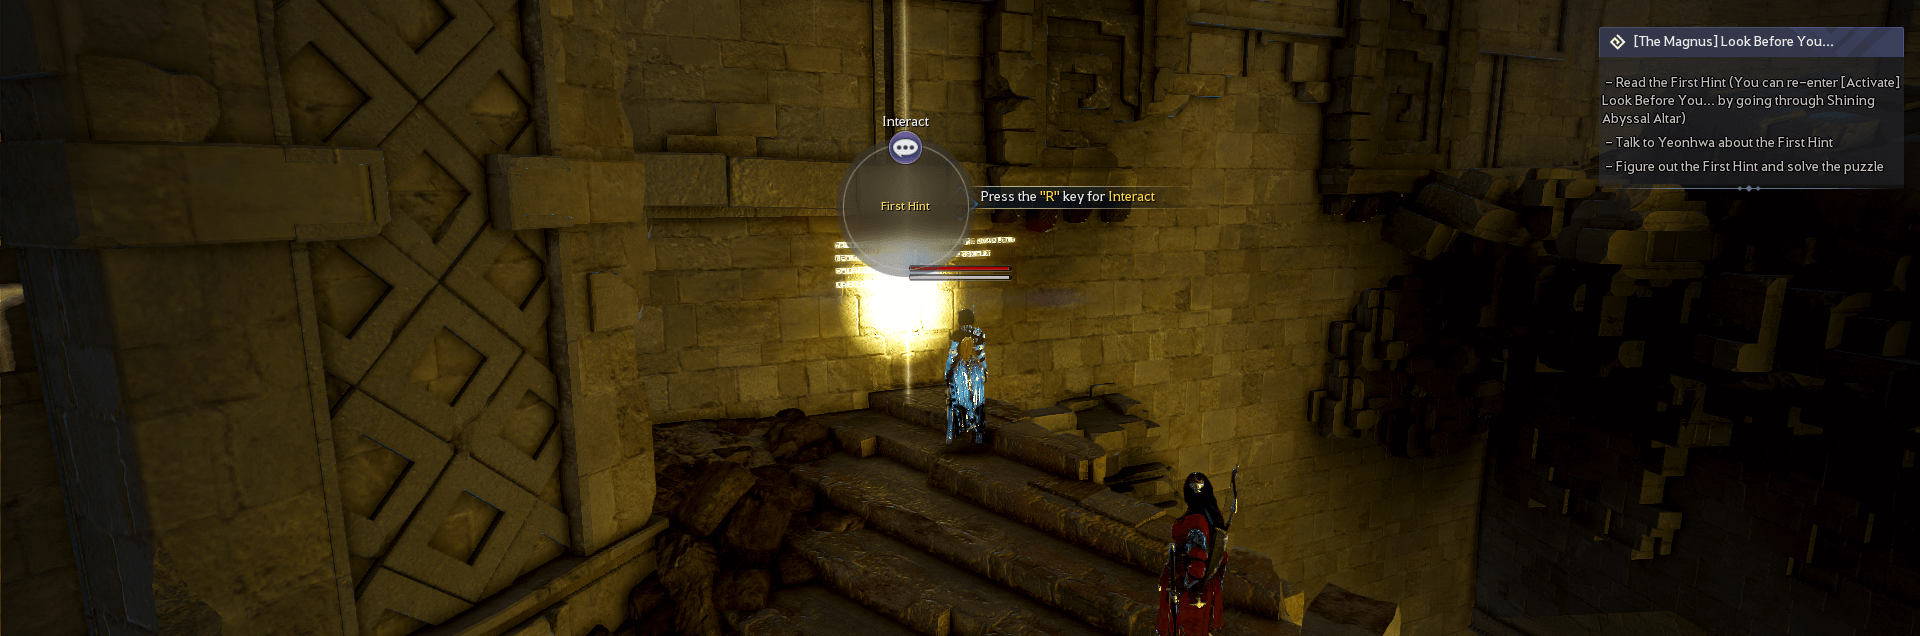
Interact with the message on the wall for the first hint then talk to Yeonhwa to translate it for you. You'll then be told to look for a lamp.
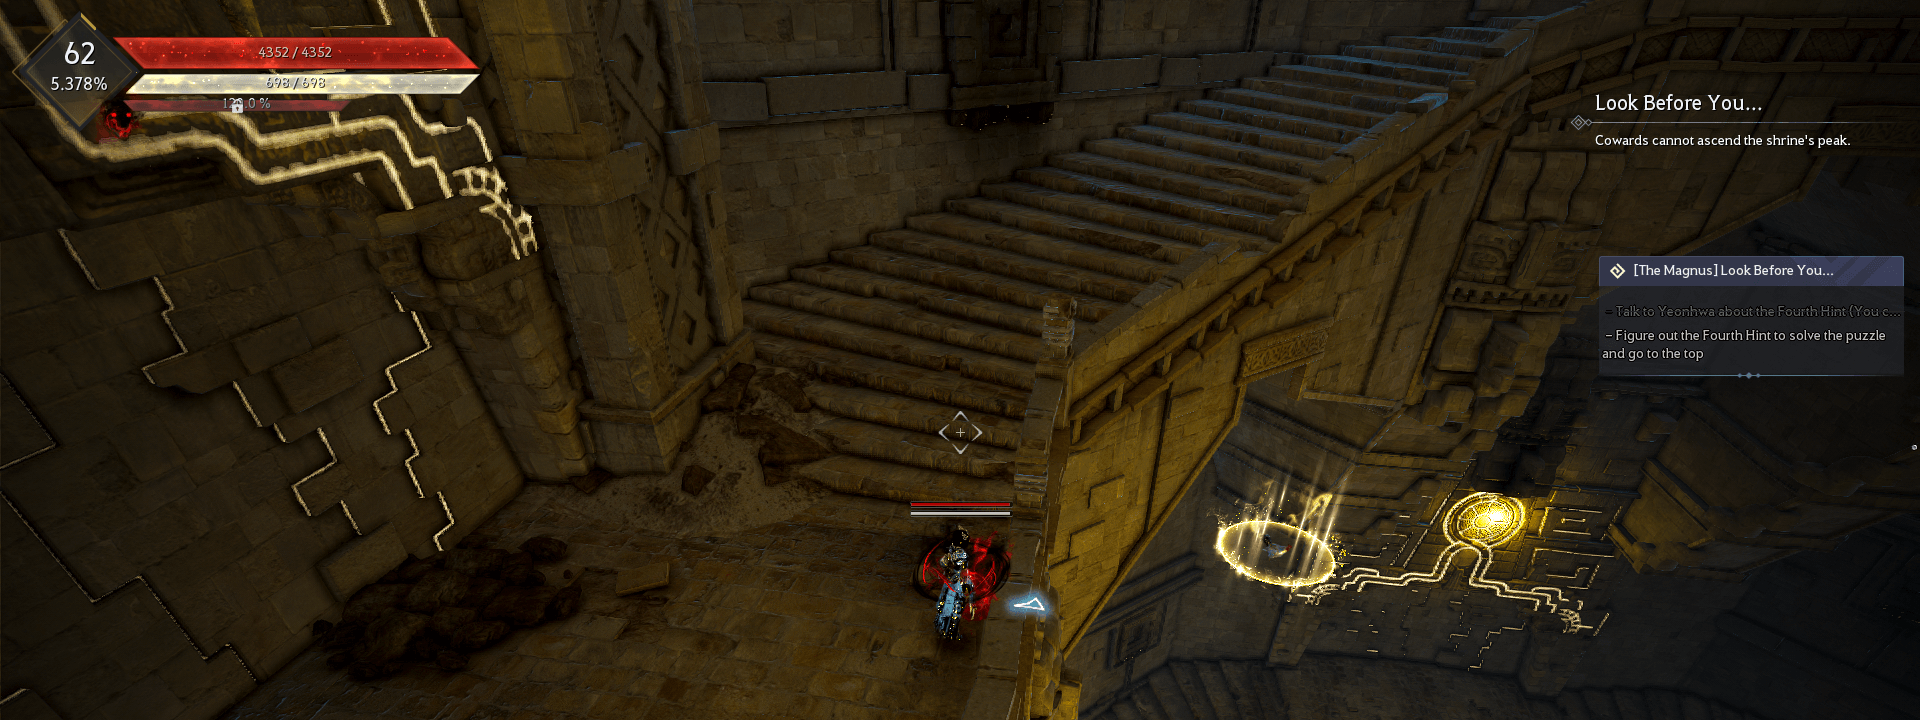
Head back down the stairs until you come across this lamp. Interact with it to continue the challenge.

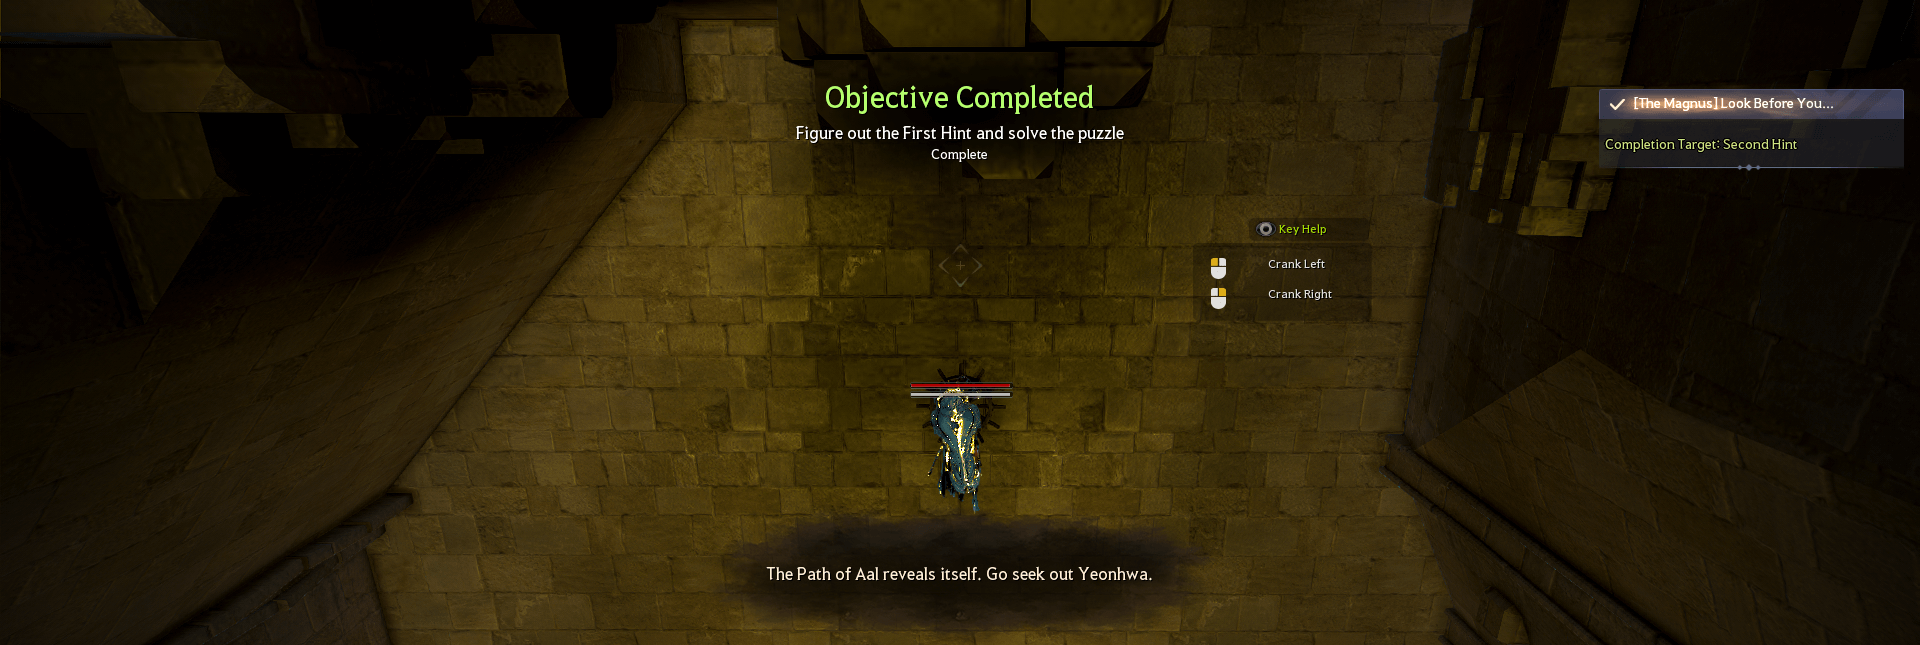
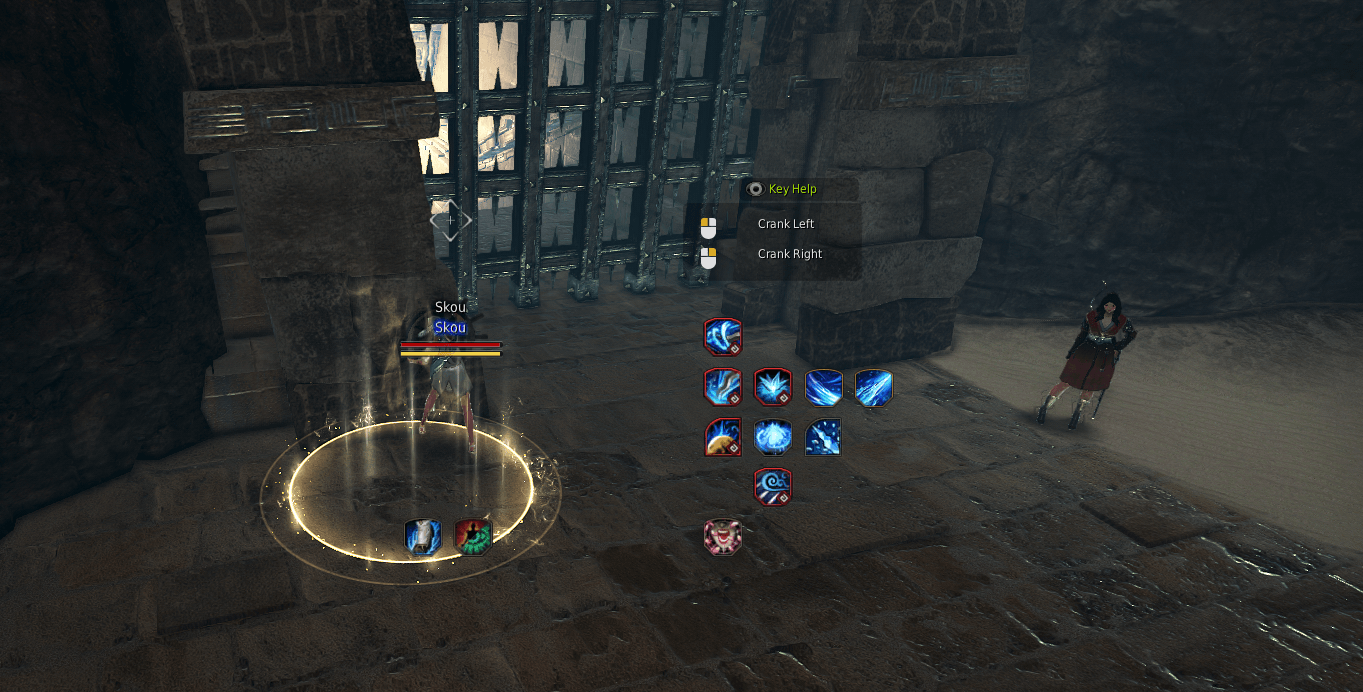
Once you've interacted with the lamp, back up directly behind you and fall off the ledge. There will be an invisible platform beneath you.
When you fall on to the platform, walk up to the crank and Turn it Left in order to complete this section.
If you need it, we have a short youtube video demonstration for this first section, click here!
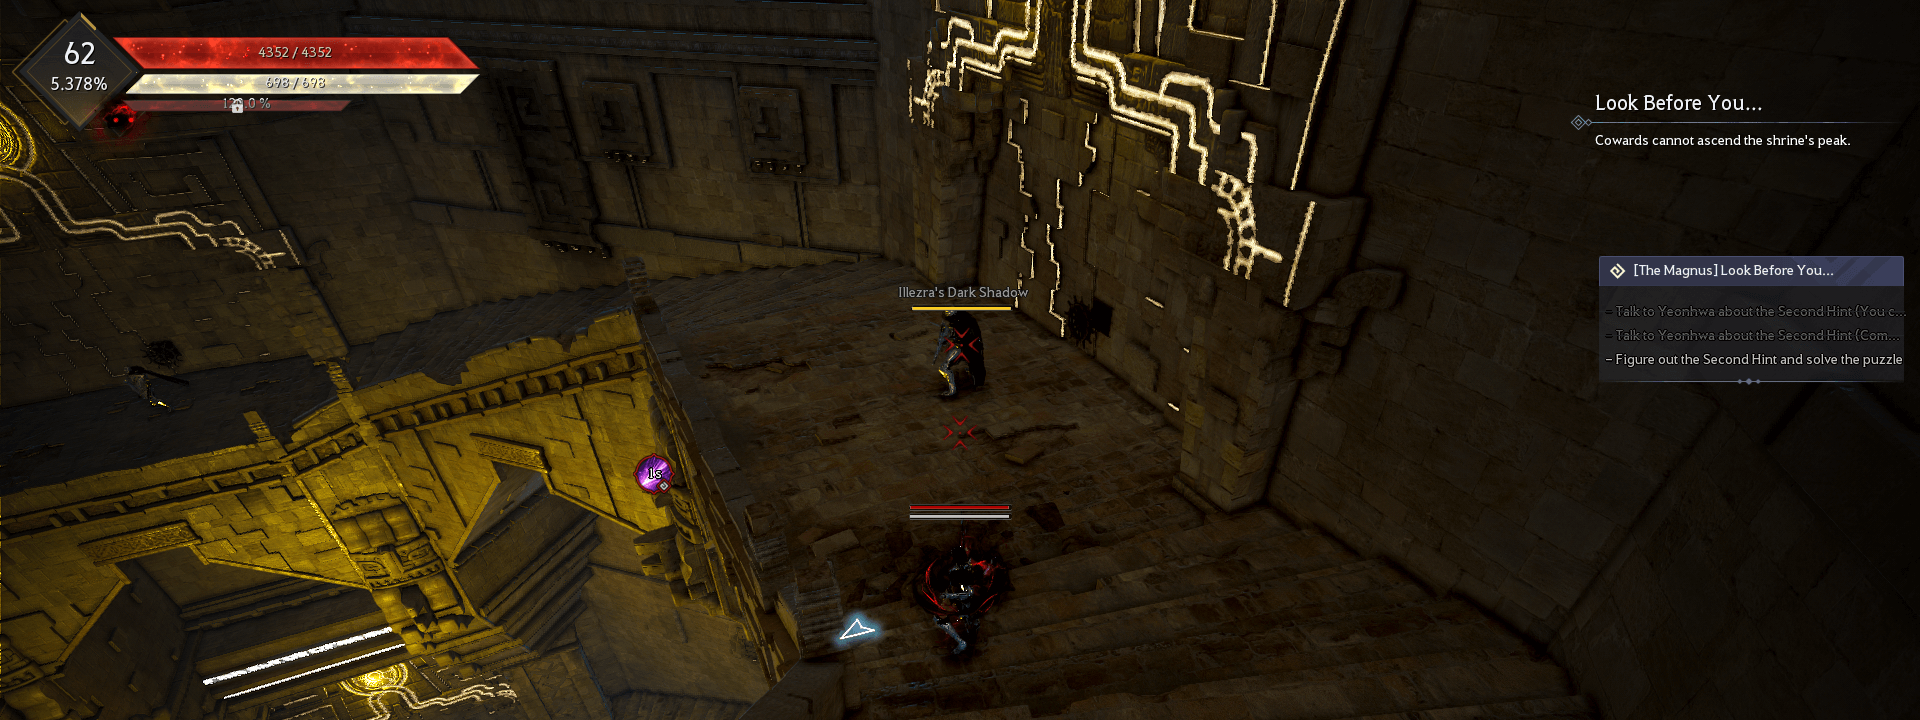
Drop down and head back upstairs to Yeonhwa to talk about the second hint. After you do, three monsters will spawn.
When you defeat the monsters they'll drop either 1, 2 or 3 golden coins. The correct crank to turn is behind the monster that drops 3 coins.
Go back upstairs to Yeonhwa and a bridge will spawn besides her with a small boss, jump on the bridge and defeat it to progress.

After defeating the boss, speak to Yeonhwa for the next hint, monsters will begin spawning. She will tell you to look for a chicken or a dog.
Once you've cleared out some of the mobs, look down the center of the room as you descend the stairs, the chicken isn't difficult to spot as its glowing in gold.
Move over to the chicken and jump down on to the platform its stood on, a new physical platform will spawn and lift you into the air.

Once you're at the top of the platform, jump forwards, you will land on an invisible platform which will then take you up towards the end.
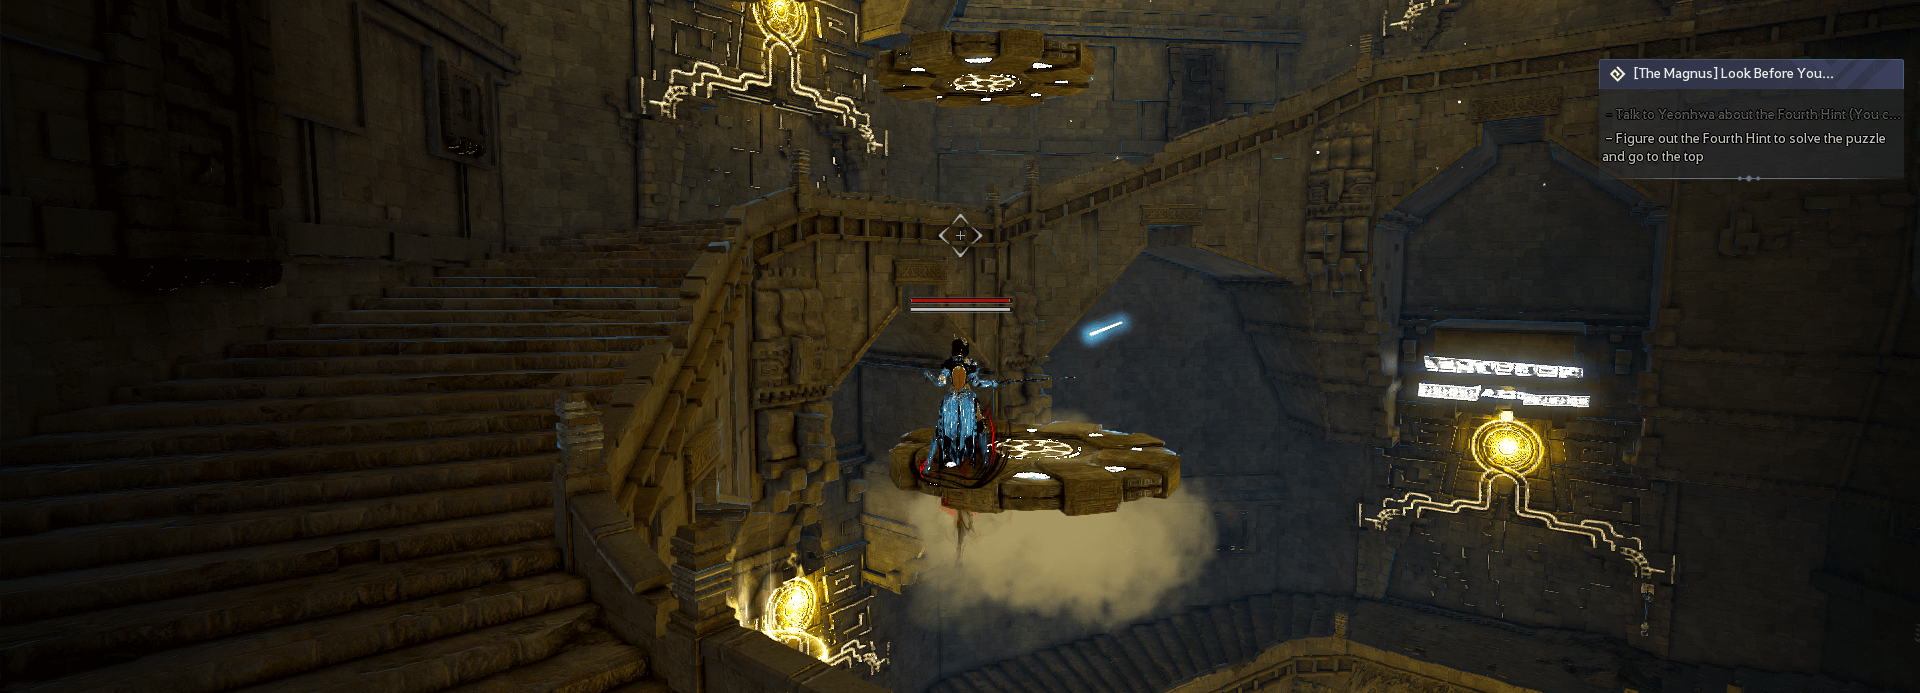
This elevator will then carry you up to the black cat that's waiting for you at the top of the room to complete the challenge.
For another short youtube video demonstration on the platforming in this section, click here!
Stormy Hills
This time its a much simpler challenge. Interact with the "Cron's Heart" to start the challenge. A large yellow wall will surround the area.
It will begin to shrink, limiting the area that you can safely stand in. Just keep moving towards the center of the space to stay safe.
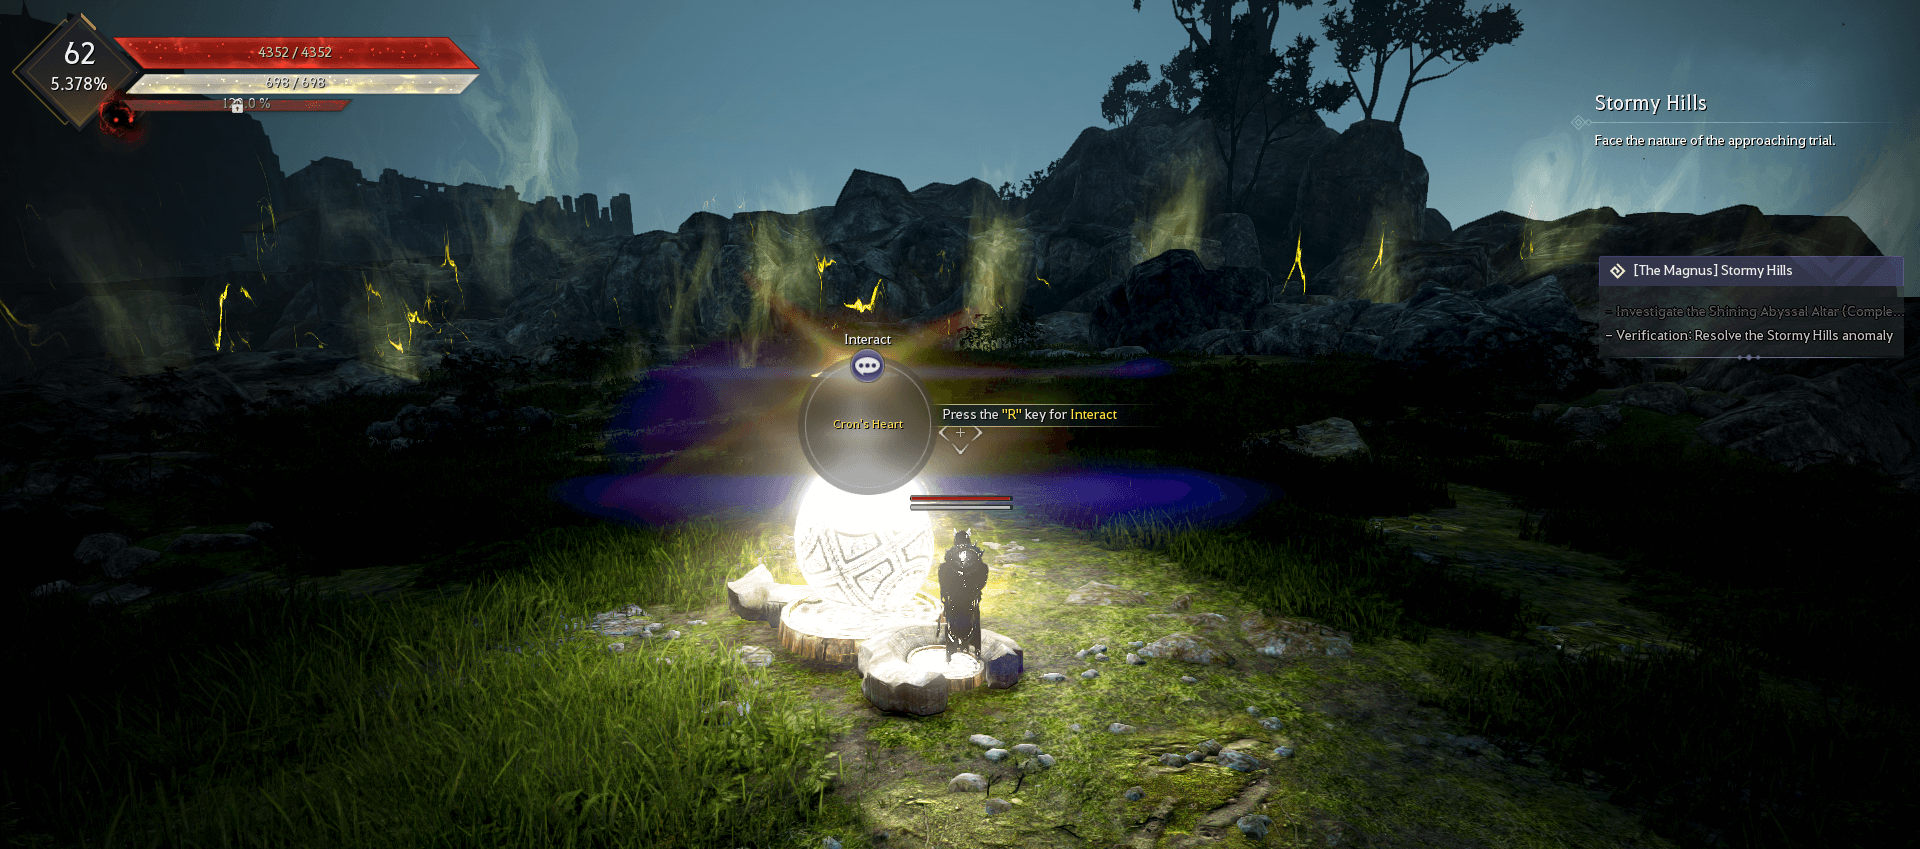
Eventually the yellow wall of energy will shrink until you're able to see a green circle. Stand in it to pass the round.
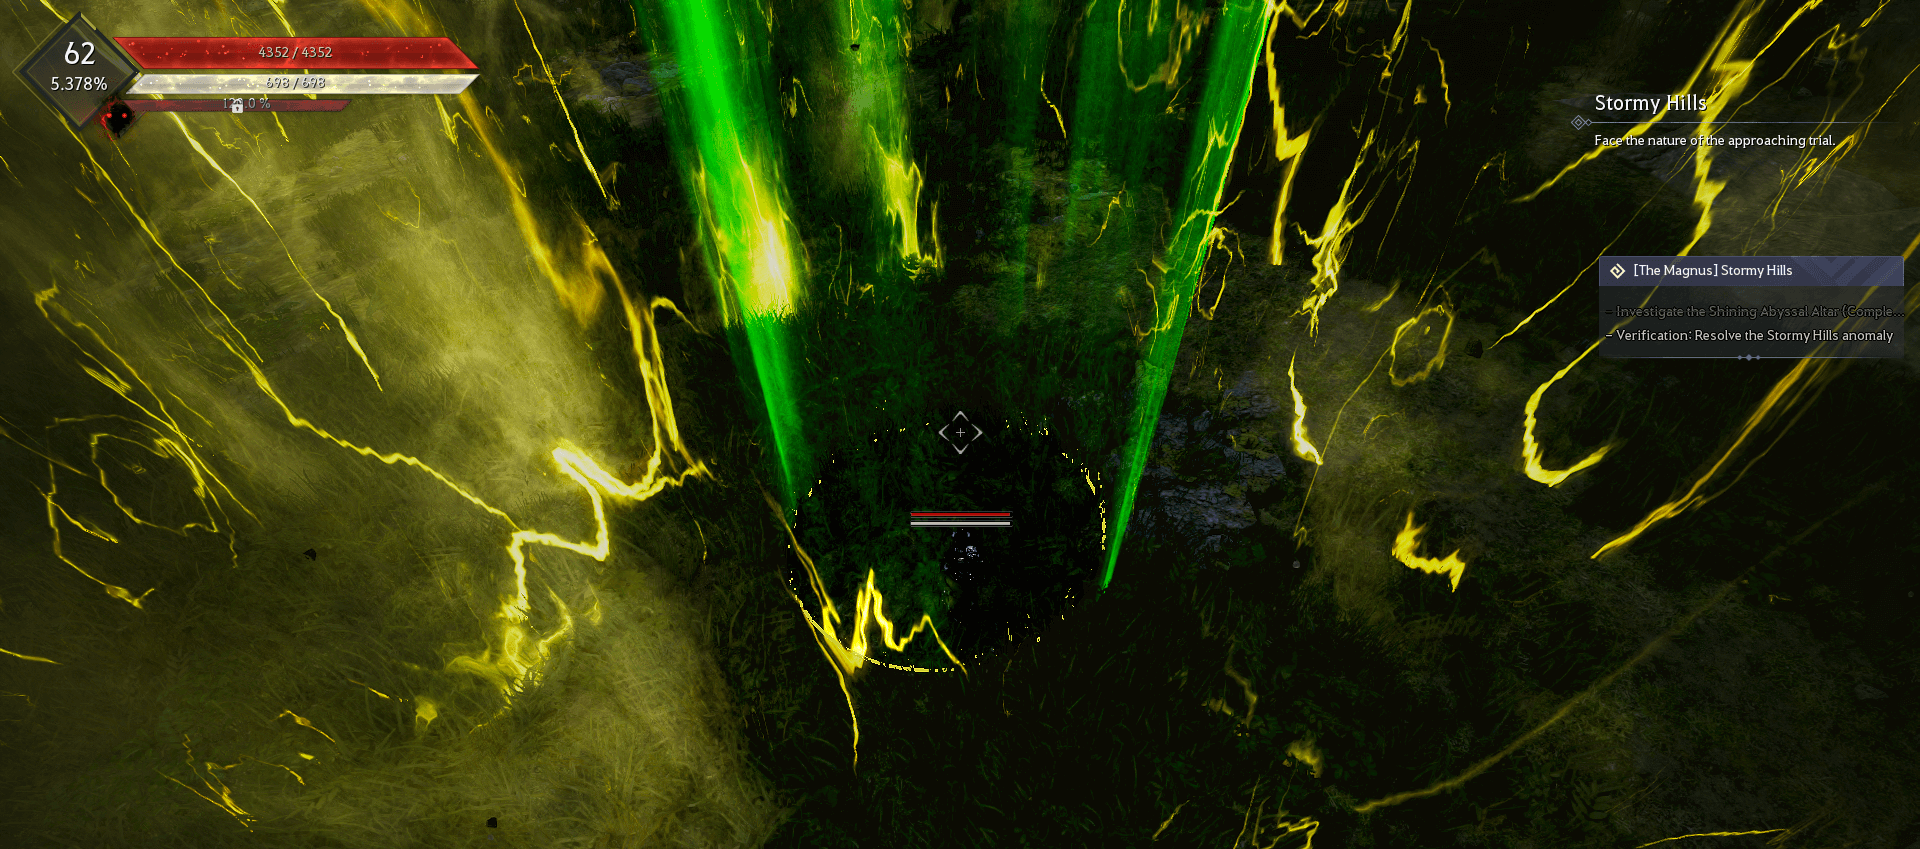
This will happen several times before the yellow wall fades completely and the black cat will appear.
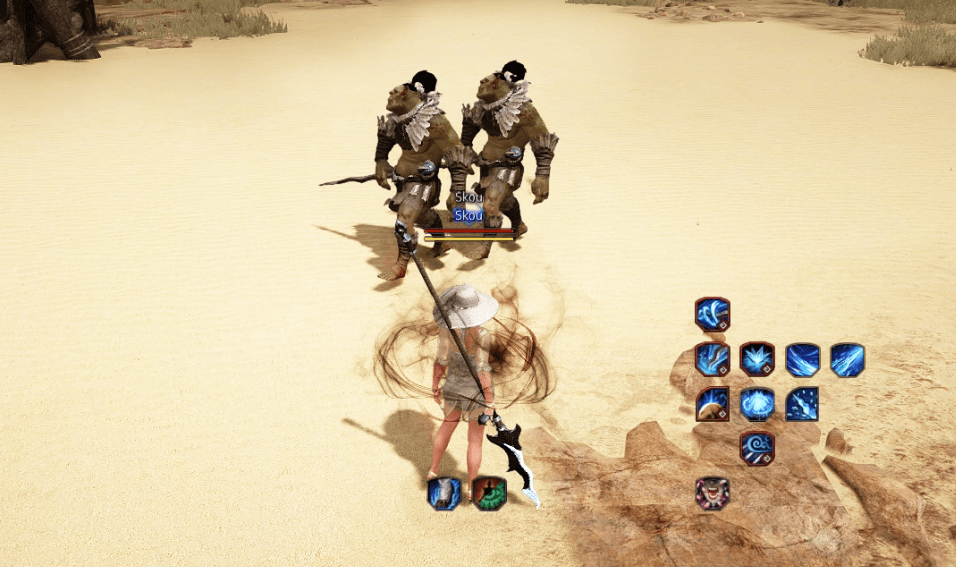
Struggle for Survival
Time for some combat! Waves of enemies will approach the Abyssal Well in an attempt to destroy it. Defeat the waves of enemies.

Eventually after a few waves of enemies, Kutum and Nouver are also added to the challenge. Shortly after the black cat will appear.

After this quest you'll be rewarded with Kamasylvia being connected to your other storage to be used remotely.
After that, you're sent up to the surface again, this time moving over to Kamasylvia where Eileen will be waiting for you at the next well.
Soar Like a Bird
Next you'll be taken to a beach with only a single NPC on. Baulo will ask to tell you some stories. There are three stories in total, two of which have a quiz.
After hearing the first story, the first answer is: Two eagles flew by.
After hearing the second story, the second answer is: Seagull.

Scarlet Thread
Interact with Thread of Fate.
Three NPC's and Three Orbs will appear in Blue, Yellow and Red. The objective is to connect the NPC with the same colored orb.
The path you take has to not cross other colours. You start at one of the NPC's and pick up the small orb next to him. Then walk the path to the same coloured big orb.

The image below is an example of how you could solve the puzzle. (Start at green).

When done, interact with Abyssal Rift (Purple Shining Light) and exit the puzzle through the cat.
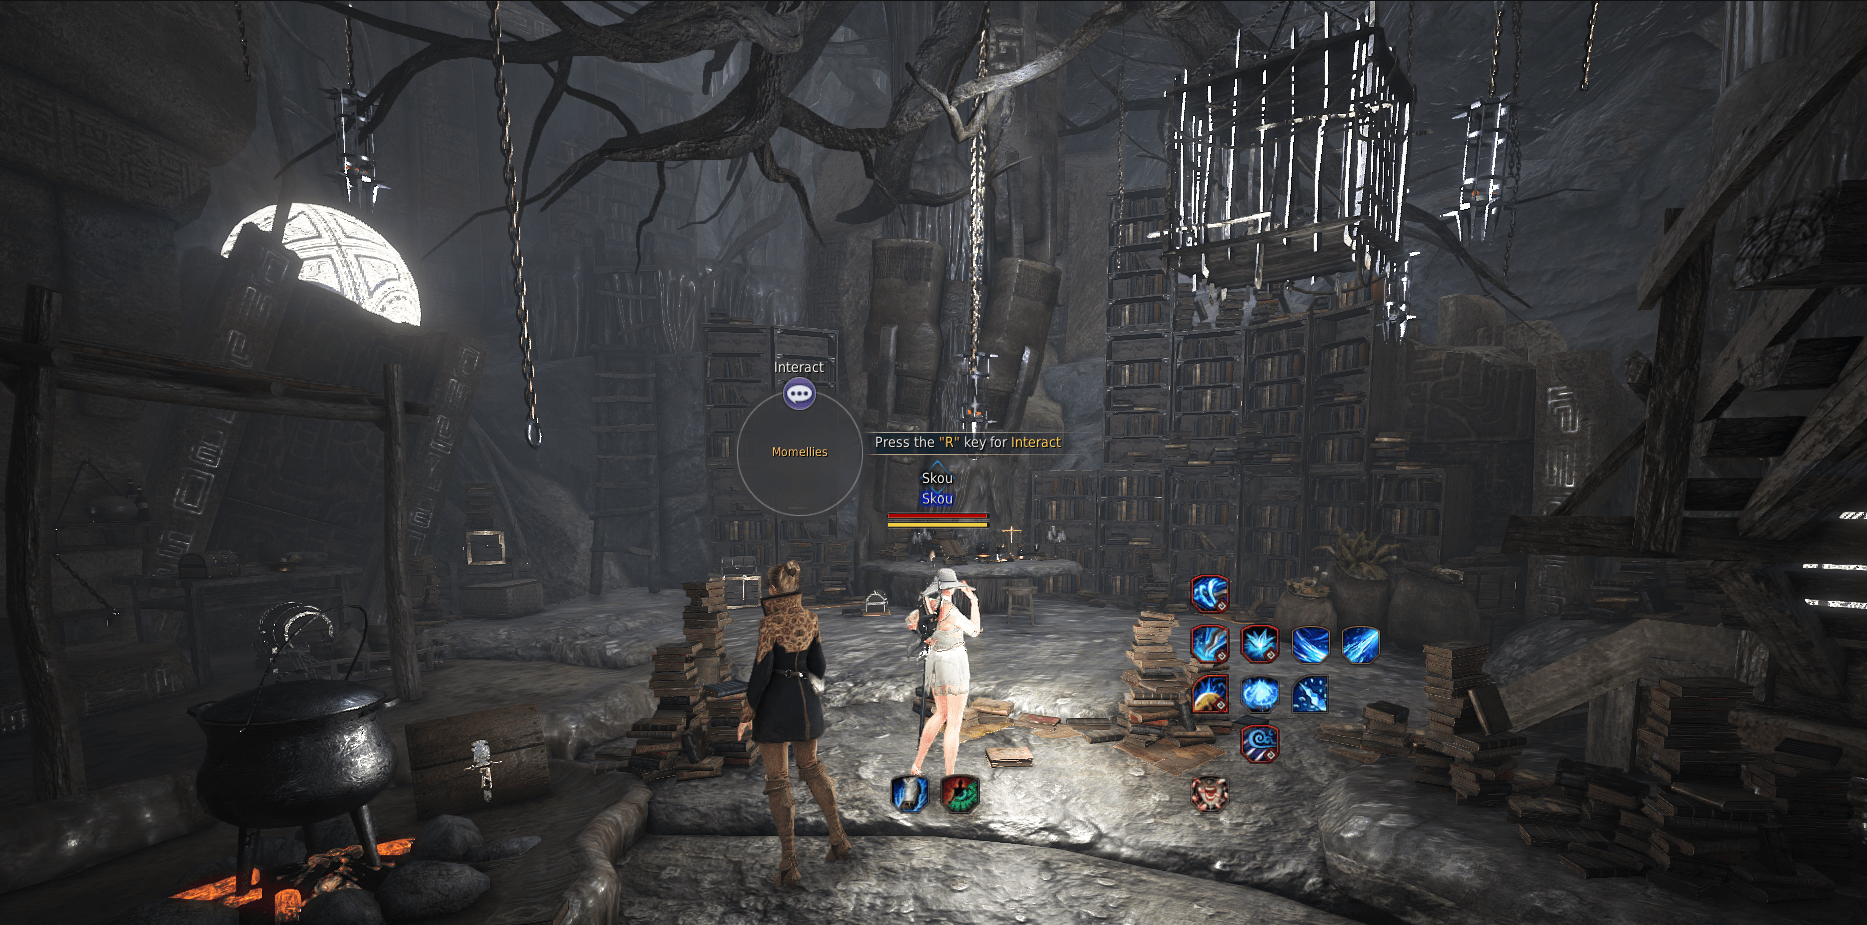
Peculiar Library
Interact with Momellies and receive quest. The quest asks you to guess a few questions.
First Question: Wind and Lightning
Second Question: If there's no bread, then cake!
Third Question: Everlasting Glory of the Vedir, Ordore
If you fail a question she will ask you to read books about it. Just run around the room and interact with some books and return to her and try again.
When you have answered all questions the cat will appear and you completed this puzzle.
Completeing this puzzle will unlock the Dreighan connected storage to be used remotely.
End of Tomorrow
Start the challenge by interacting with Oberin. He will ask you to grab an Abyssal orb from the back of his wagon and transport it to the end of the road.
Be careful for the falling debris as they will reset the orb you are carrying and you will be forced to start over from the beginning.

Drop the ball next to Oberin within the yellow circle around him, then talk with him and complete his task. This finishes the puzzle and you can leave by talking with the cat.
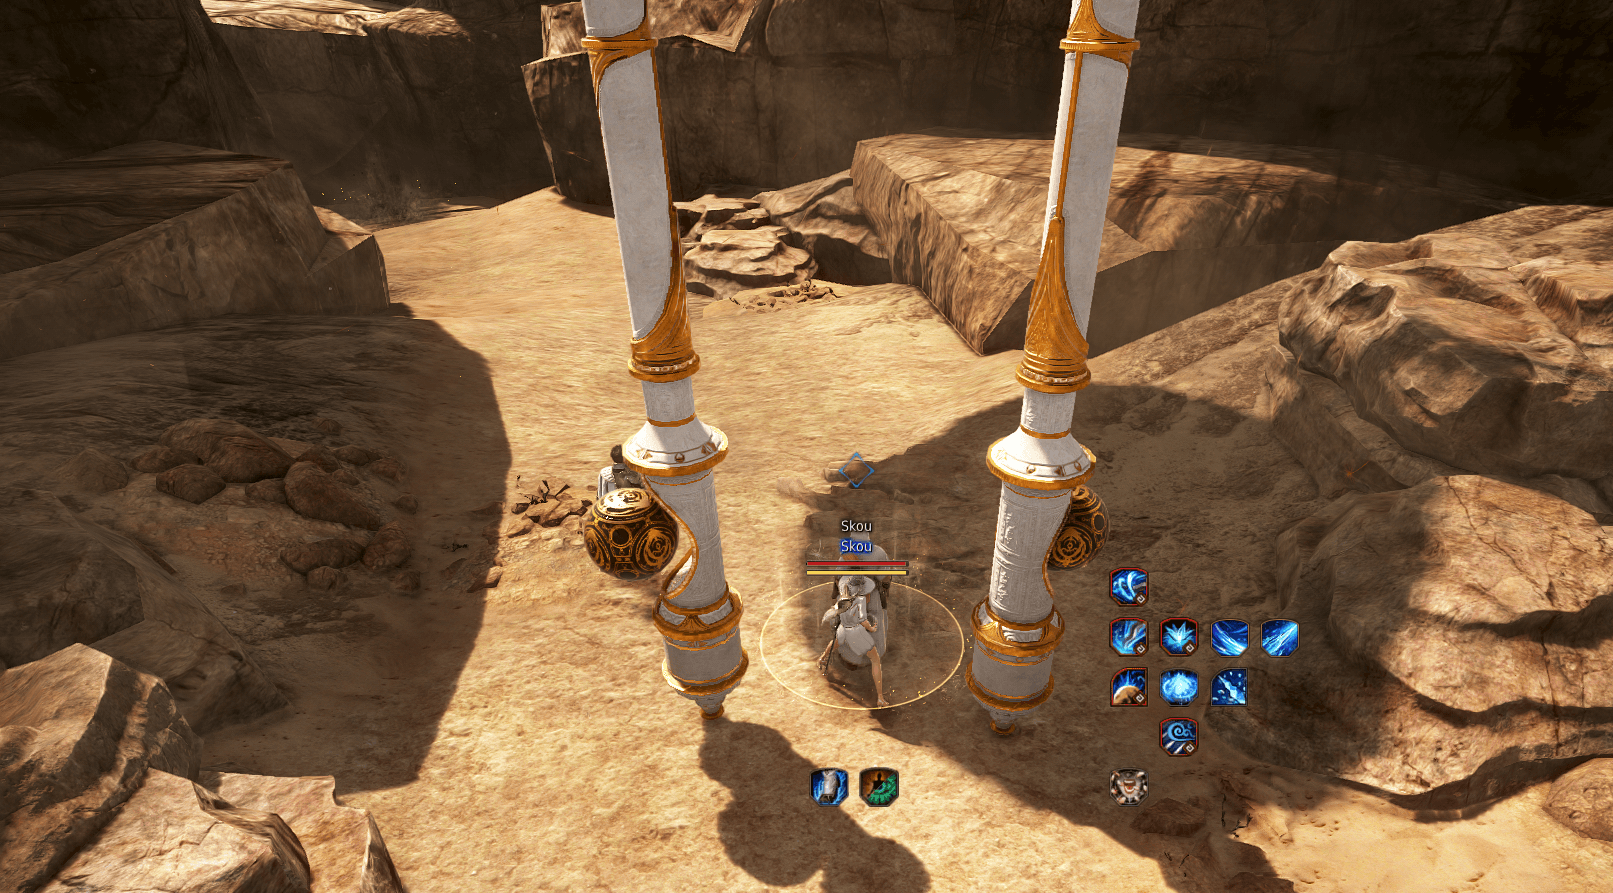
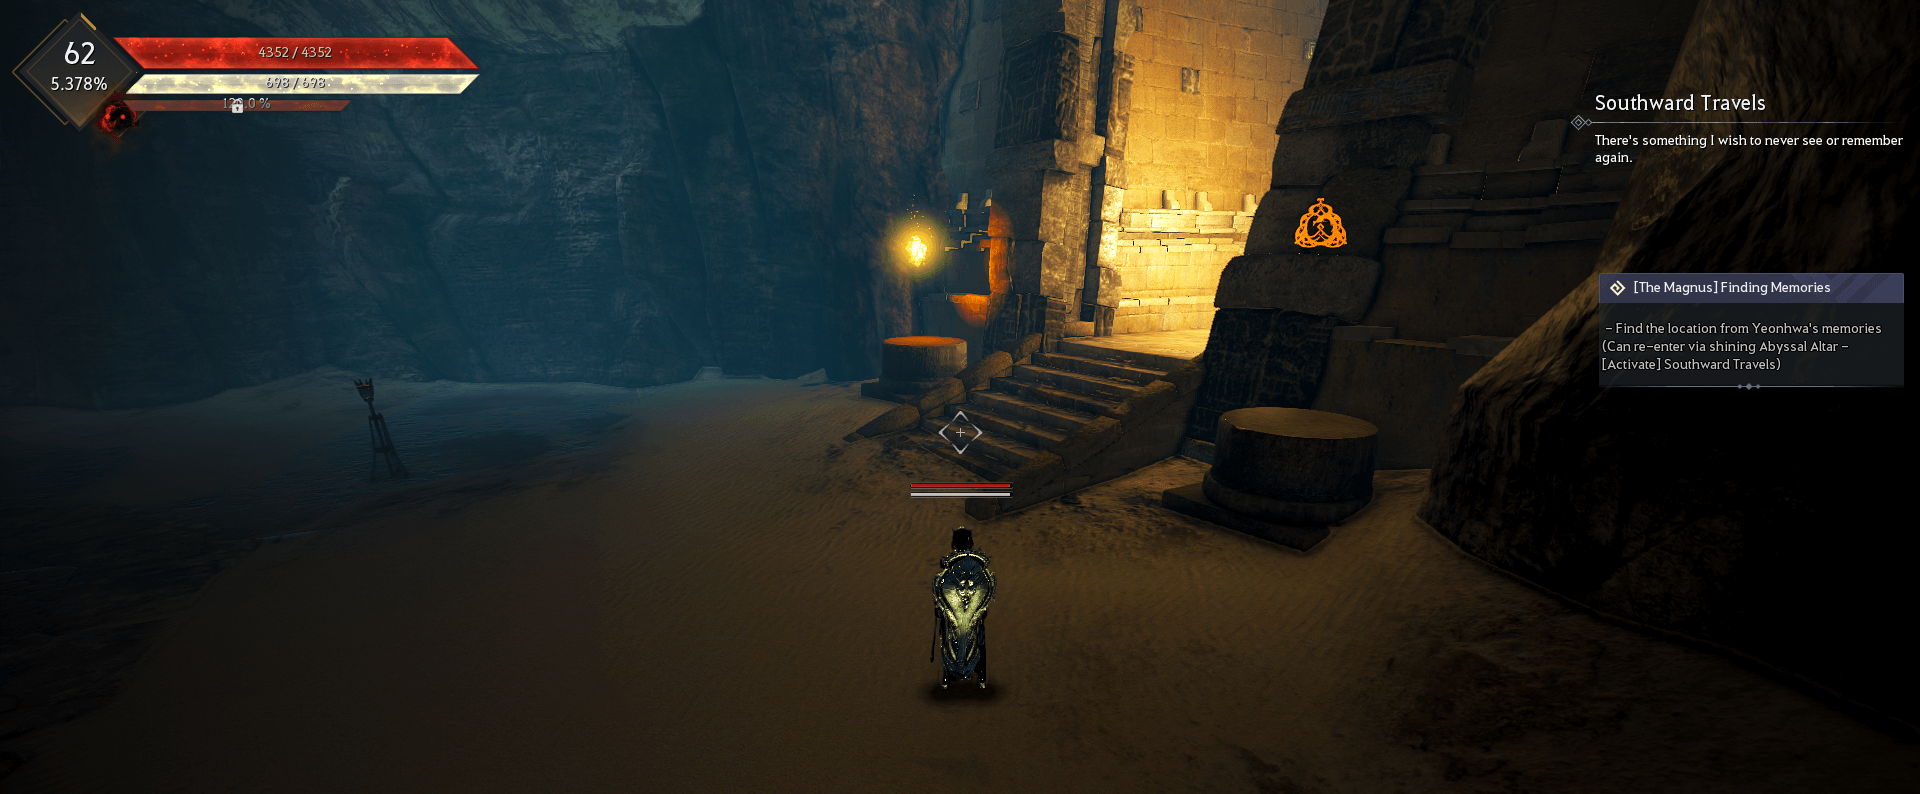
Southward Travels
You'll once again meet up with Yeonhwa, talk to her then interact with the wheel next to the gate. Turn it left twice and the gate will open.
In the next room you'll head down a set of stairs. There are two Braziers, one of either side of the stairs.
They'll be displaying a set of symbols above them and must be lit by a specific candle that shares the same symbol.
You can use the center Brazier to determine which candle correlates to which region's symbol.
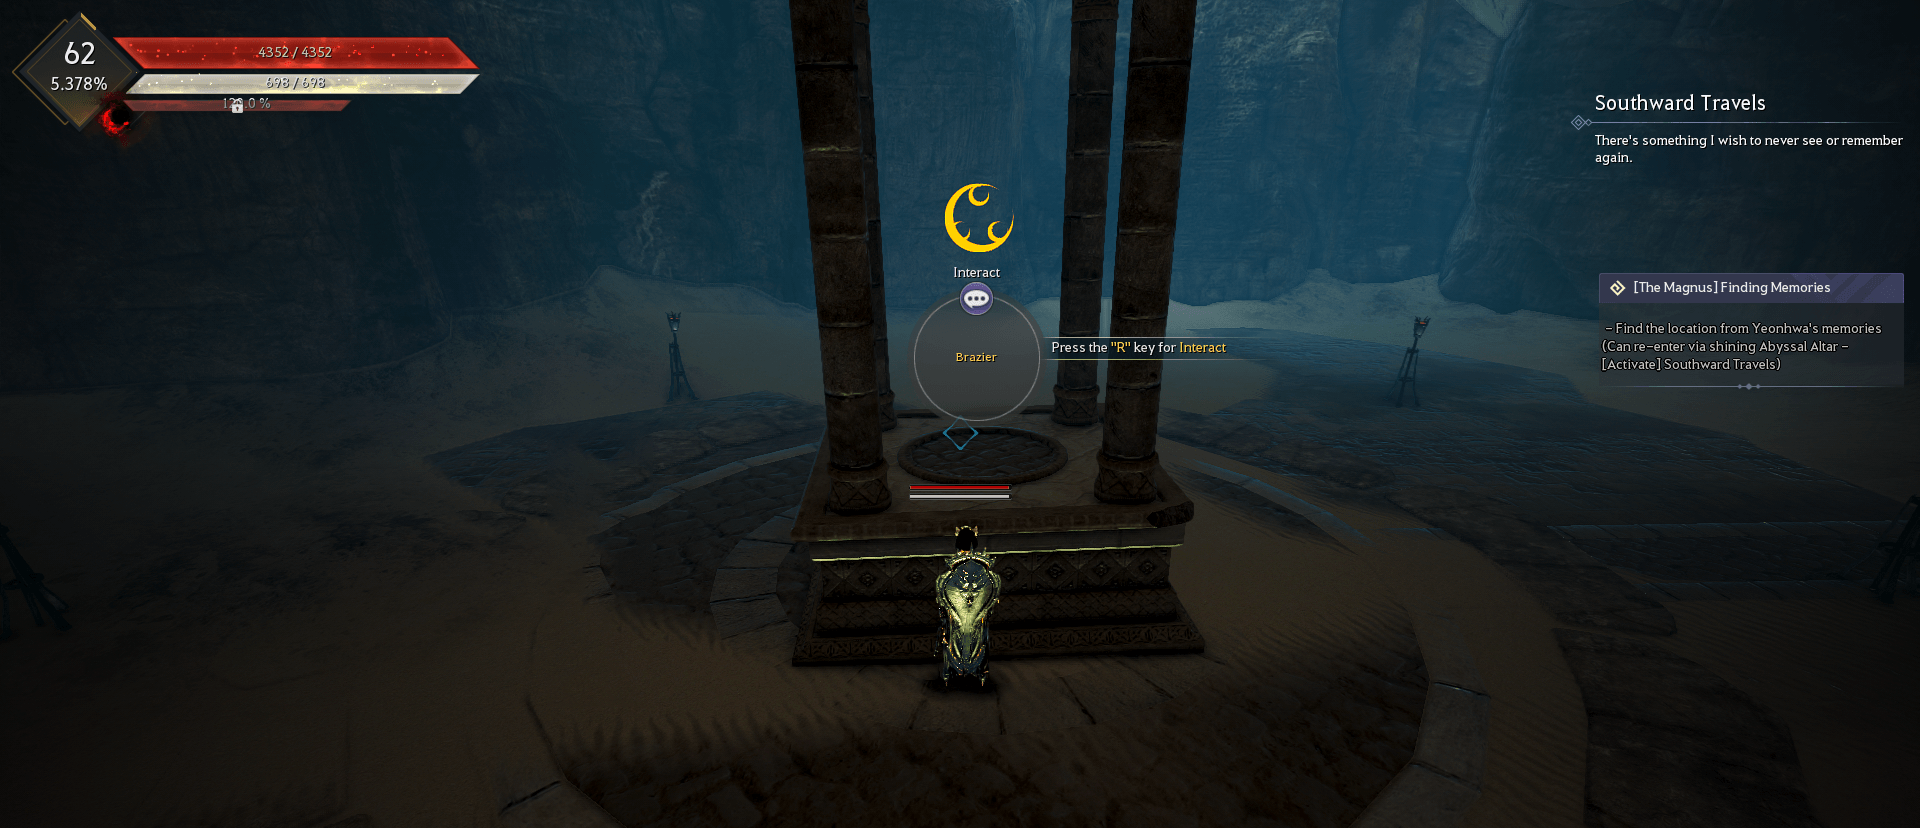
When you've grabbed one of the six candles, use it on the center brazier and its symbol will change.
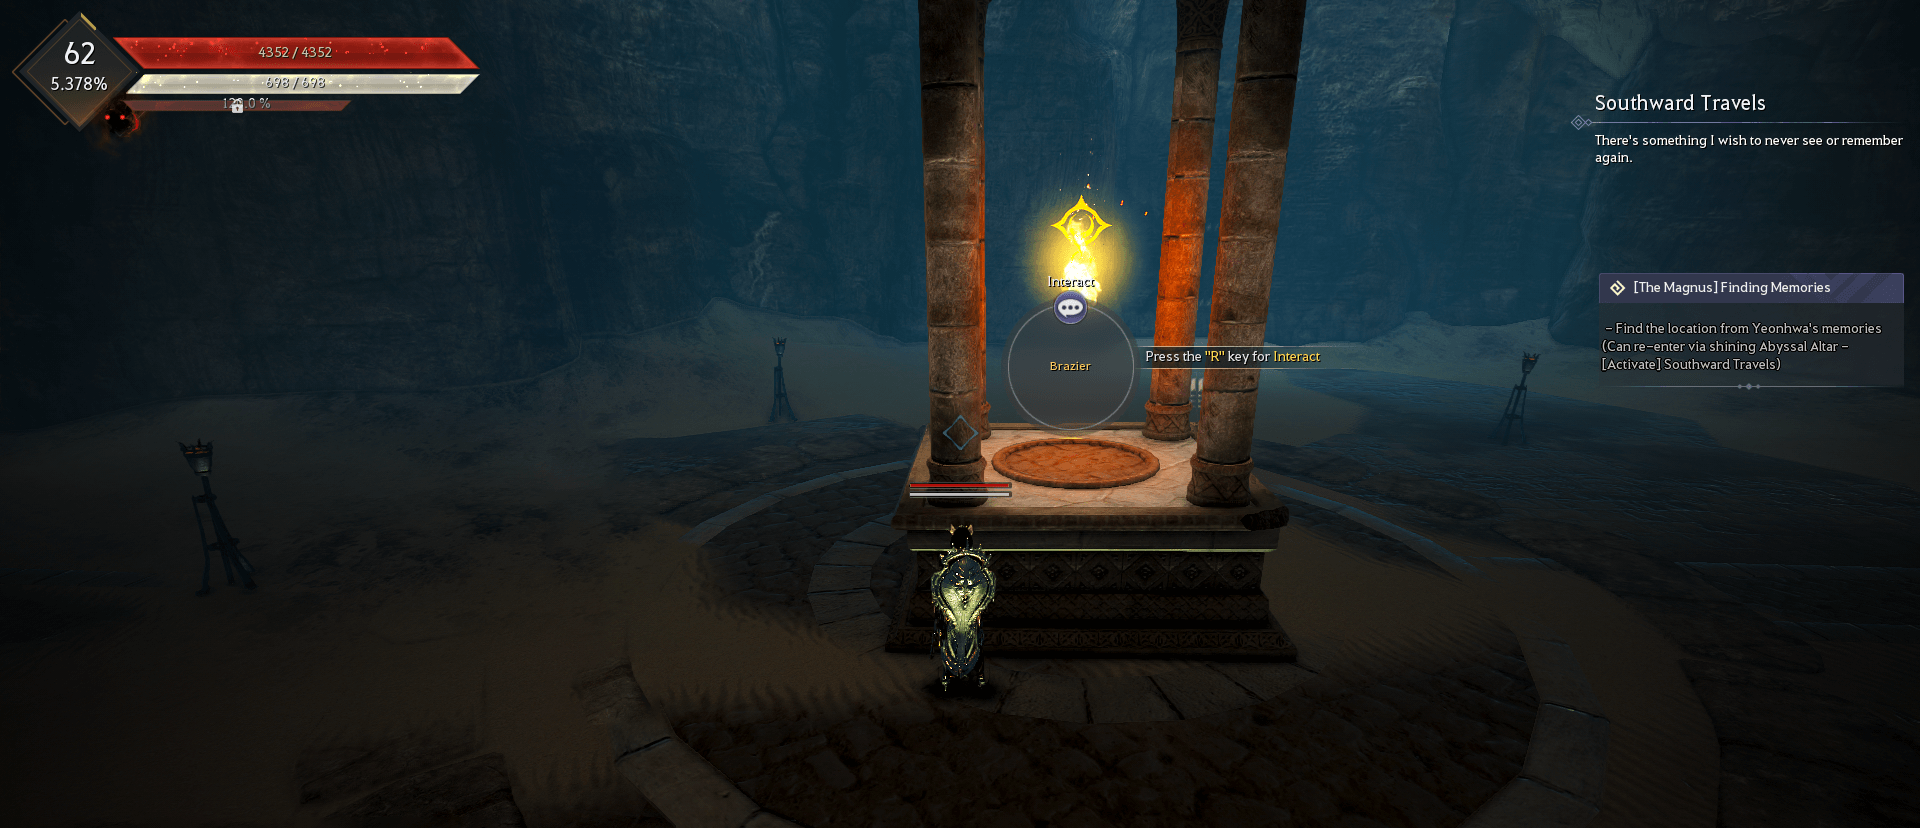
You can also just use trial and error, you will here an audio queue and get a prompt if the brazier stays lit.
Continue to next room and find Yeonhwa and interact with her. She will start to run and red circles will appear around you. Avoid the red circles and follow Yeonhwa

Yeonhwa will stop at a sealed exit while the cave is still collapsing. Behind her there's a glowing shape/pattern on the wall.

Go to the other 4 rooms and find the correct pattern that are similar to the thing on the wall. Look for the golden rings in the rooms to interact with.
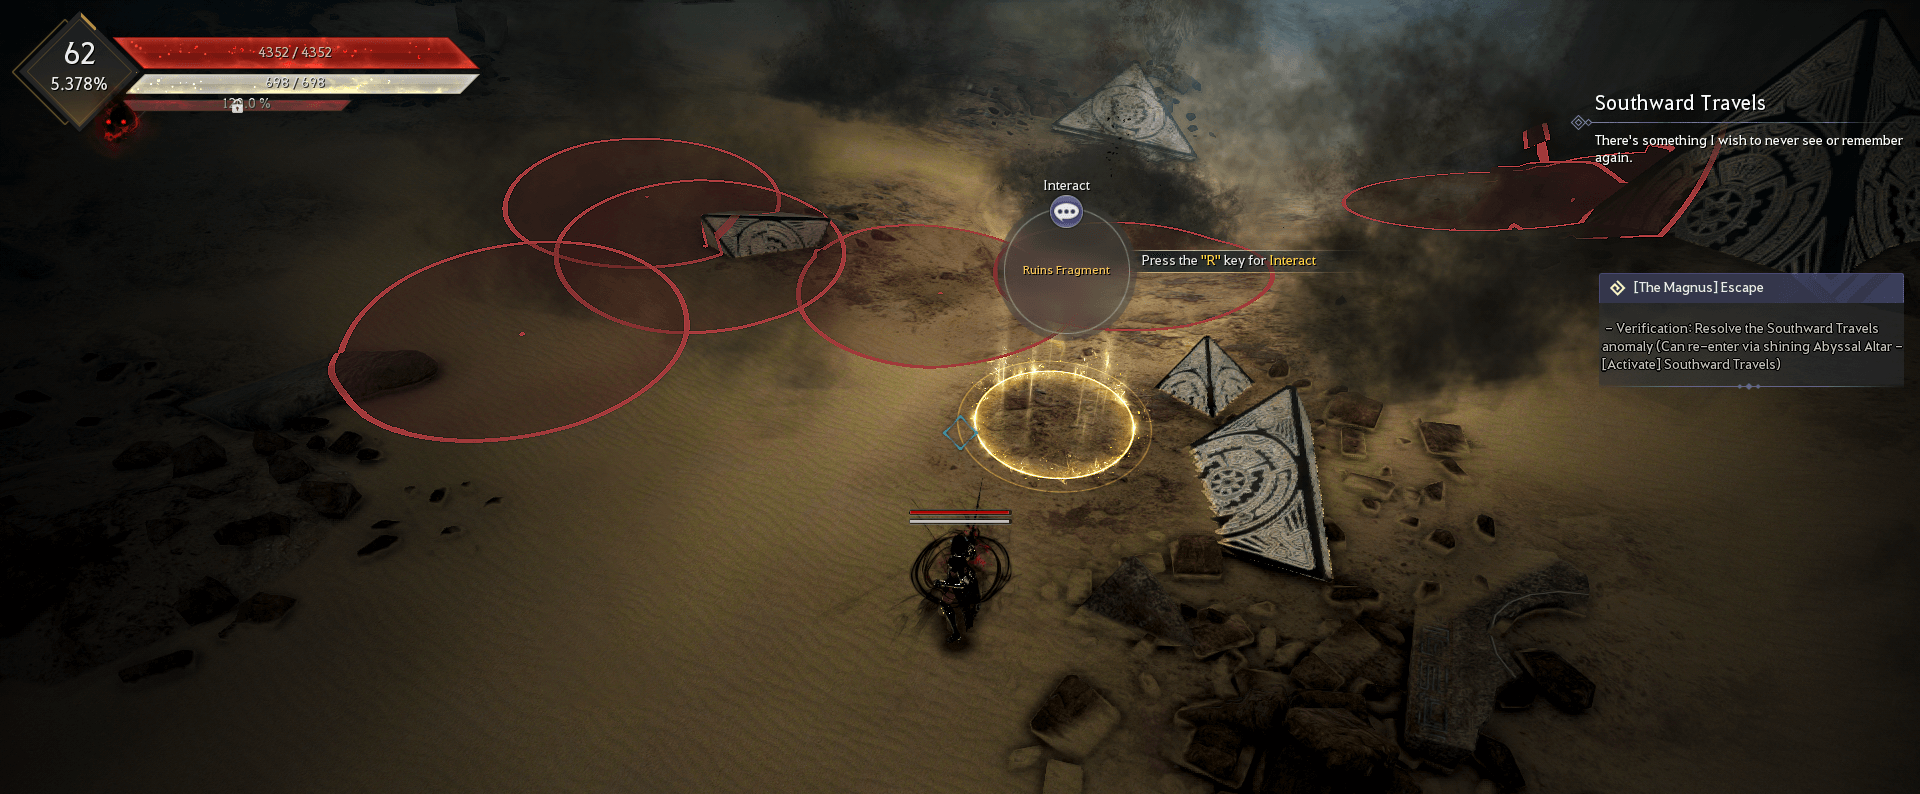
After finding the correct pattern, return to the Ator's Lungs and interact with it. Repeat this 4 times until the small red circles disappear.
Run back to Yeonhwa and follow her when she starts running. She will lead you to the exit.
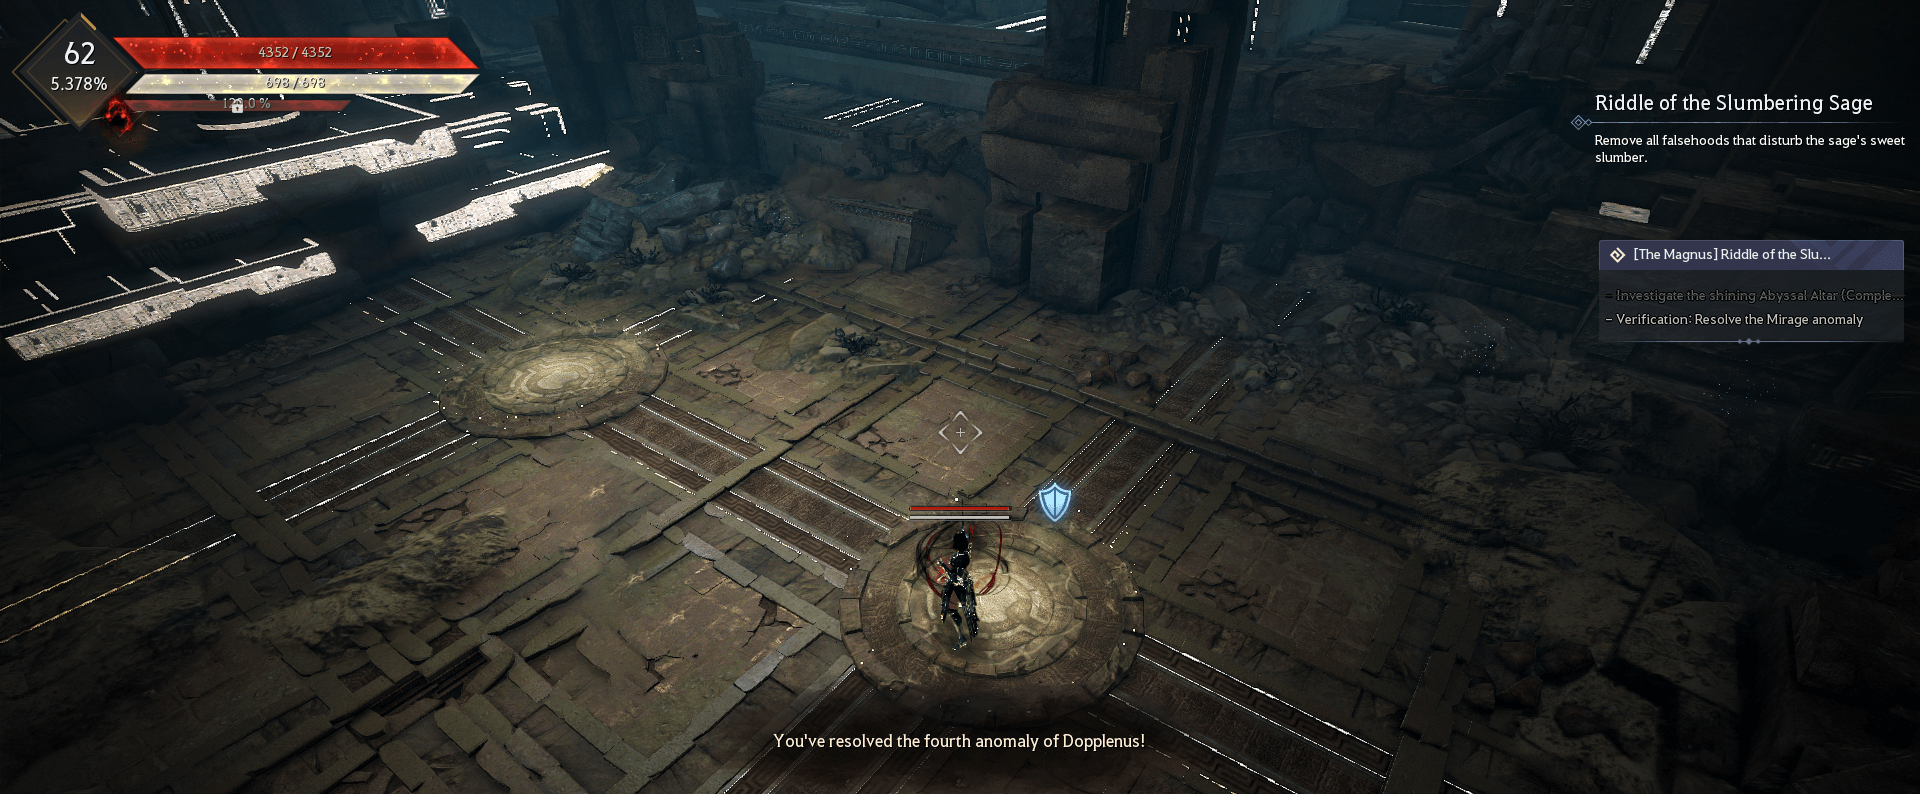
Riddle of the Slumbering Sage
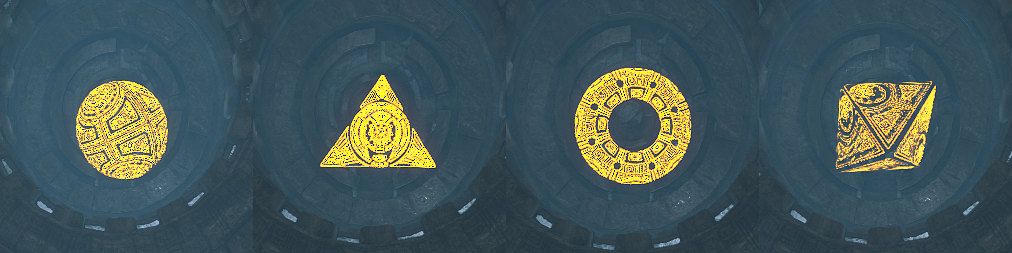
For this puzzle, you will be shown monsters that you have to remember. There will be multiple rounds of this and the amount of monsters will increase each round.

The will have a set amount of time before the monsters disappear and get replaced by two new monsters.
You have to stand on the panel with the monster that did NOT appear in the first round.
This will repeat itself 5 times, with more monsters each round.
Round 1: 2 Monsters
Round 2: 3 Monsters
Round 3: 4 Monsters
Round 4: 6 Monsters
Round 5: 9 Monsters
Tip: Use windows screenshot snip tool to take a quick image of the monsters if that helps. (SHIFT + WINDOW_KEY + S)
After this quest you'll be rewarded with O'dyllita being connected to your other storage to be used remotely.
Third Laboratory
For this puzzle, you'll start at a cave enterance, head inside the mine and to run over to the right.
Interact with the Chimera and select the chat option “Beginning the sealing device experiment”.
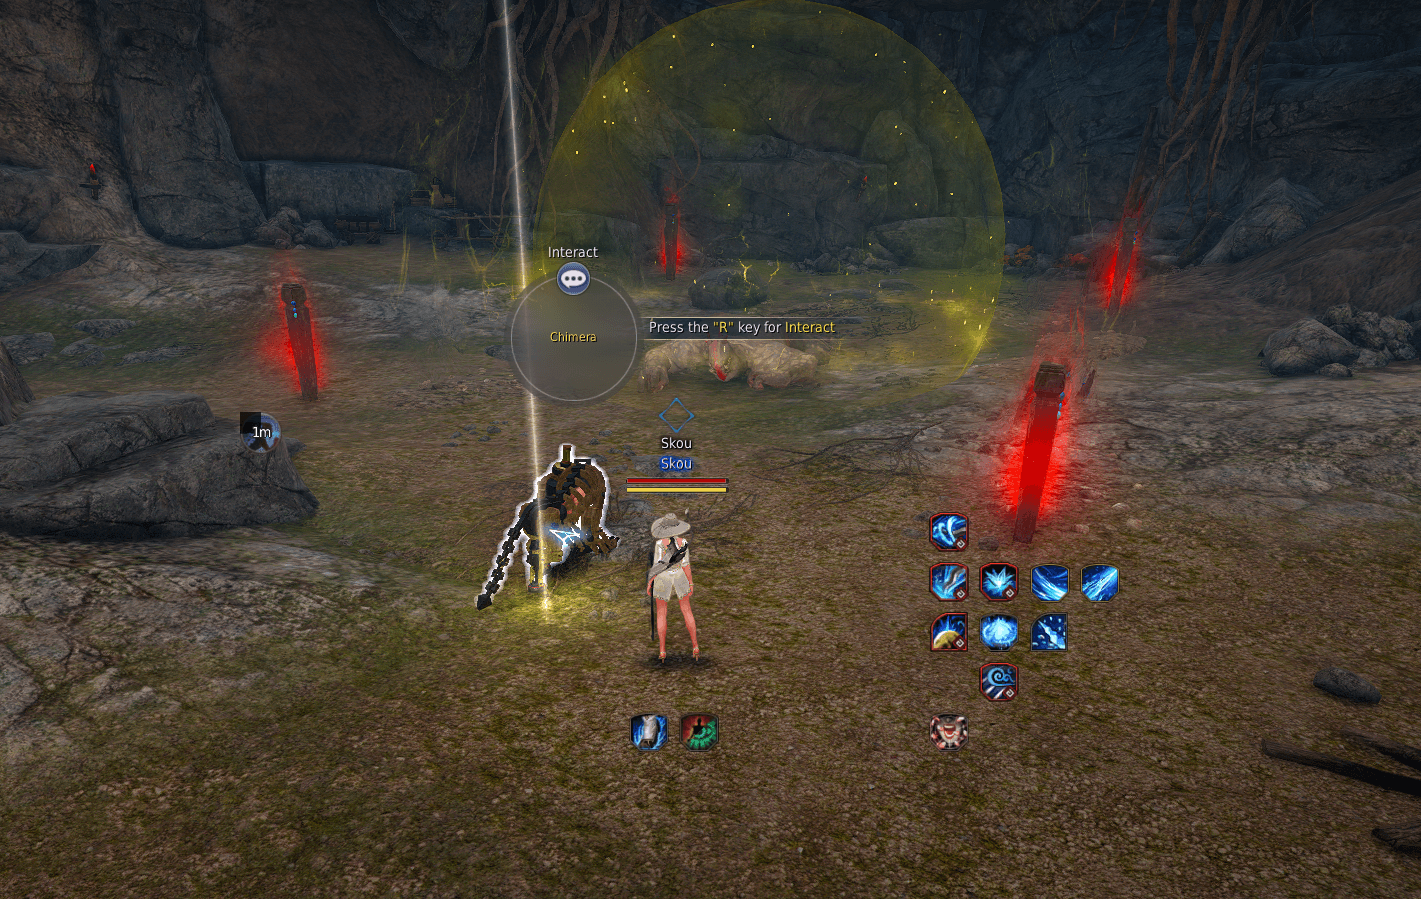
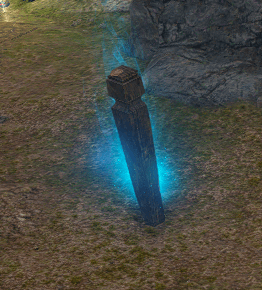
There are 4 pillars around the sealed monster and one of them will turn blue randomly. These are used to control the size of the yellow energy barrier around the monster.
Attack the blue pillar to increase the barrier size.
Attack the red pillar to decrease the barrier size.
The goal is to keep the barrier under control by keeping it at a medium size. If it gets too big or too small the experiment will fail and you will have to try again.
TIP: Abilities with 'Damage Over Time' effects will continuously activate the pillars.
| INCREASE SIZE | DECREASE SIZE |
 |
 |
The Chimera will give you prompts to tell you if the Monster is stable. Continuously hit the pillars until the puzzle is over.
When the puzzle is over, interact with the pillars. And the exit cat will appear.
Where the Dragon Sleeps
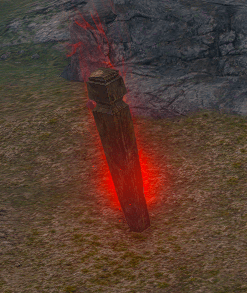
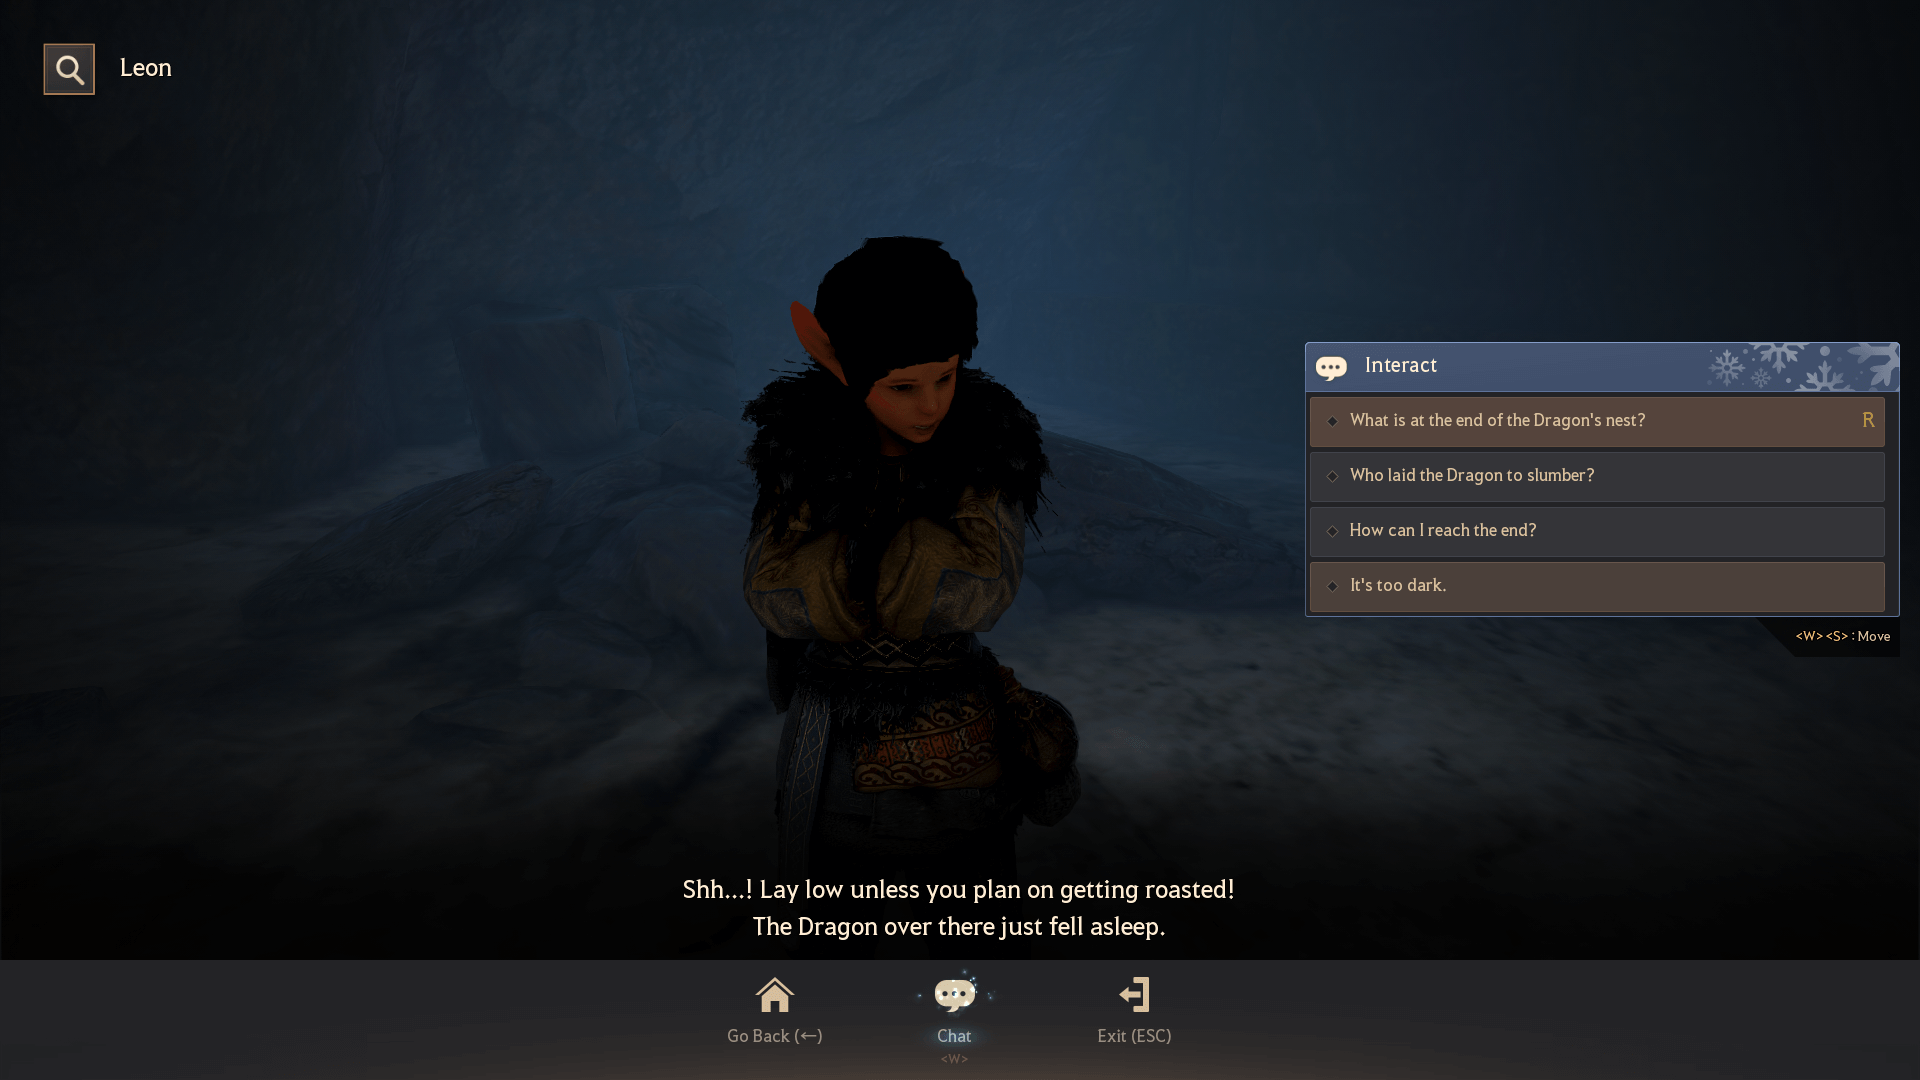
This challenge takes place in a cave with a sleeping dragon, when you begin the challenge a door will be just ahead of you, run through it and you'll see an NPC.
Leon will be just before the enterance to the dragon's lair. Chat with him and say "It's too dark" and he'll light up the cave for you.
Before you head into the cave, you have to crouch to avoid the dragon's sight. Then, go towards the left side of the dragon and navigate through the pot maze.

Sneak around to the back of the sleeping dragon. as long as you don't stand up, the dragon won't spot you.
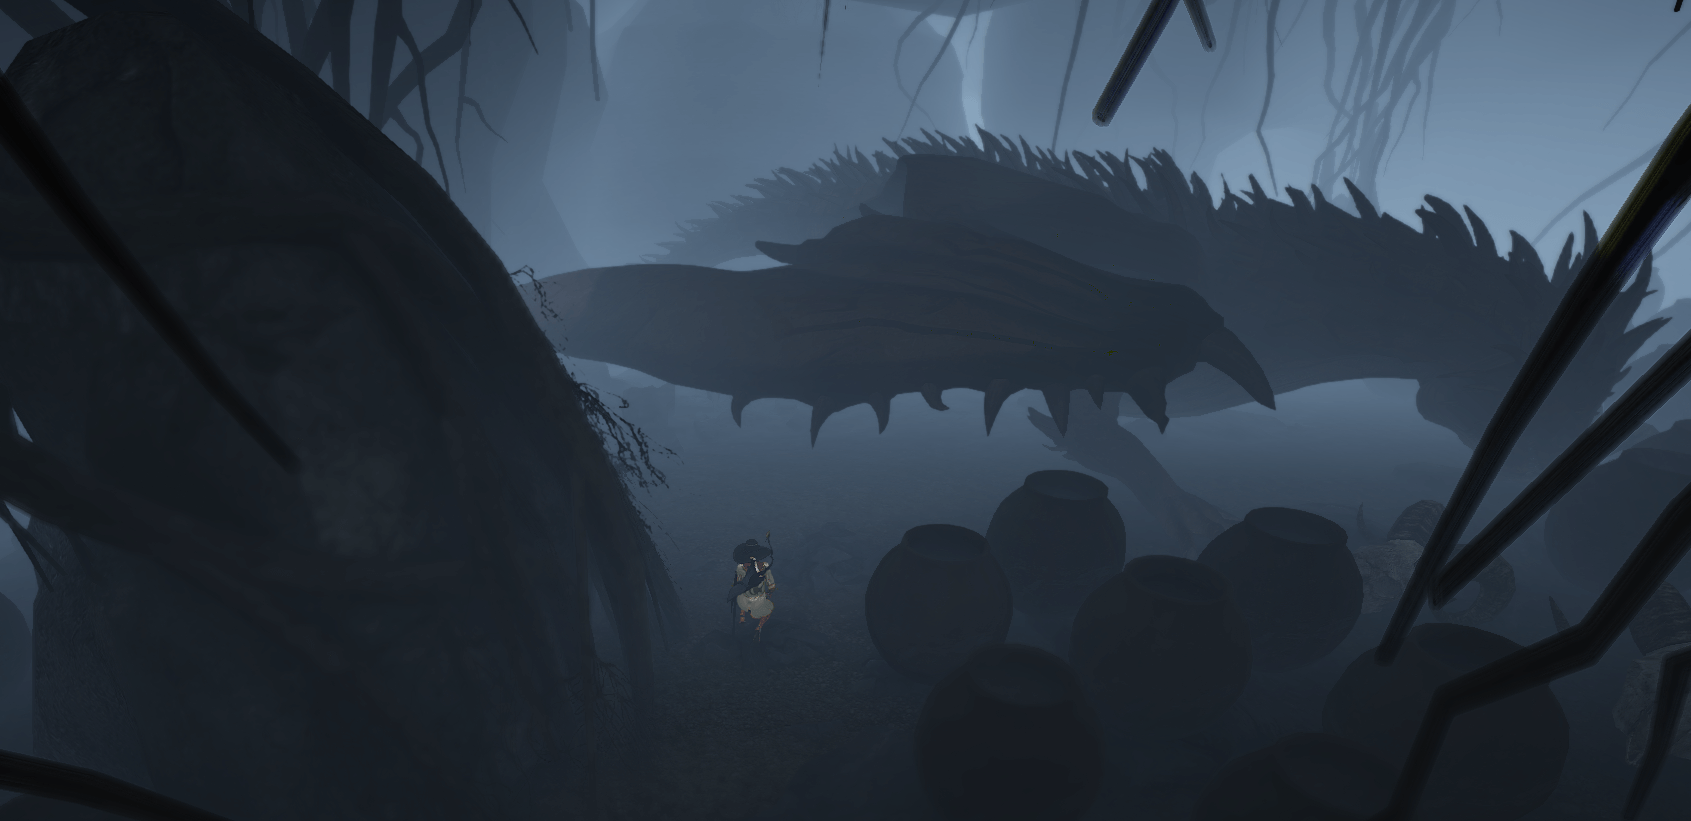
Behind the dragon you'll find a treasure chest that you can interact with. After you interact with it, the chest will be replaced with the exit cat. Nice and simple.

Light-bearing Pot
This puzzle is about finding a light hiding inside one of the jars. Just destroy the jars until you find the hiding light.
If you destroy more than 40 jars the puzzle will reset.

When you manage to find the hiding light, you just have to go and interact with it, then the cat will appear where you entered.
After this quest you'll be rewarded with Mountain of Eternal Winter (Eilton) storage to be used remotely.
Into the Fire
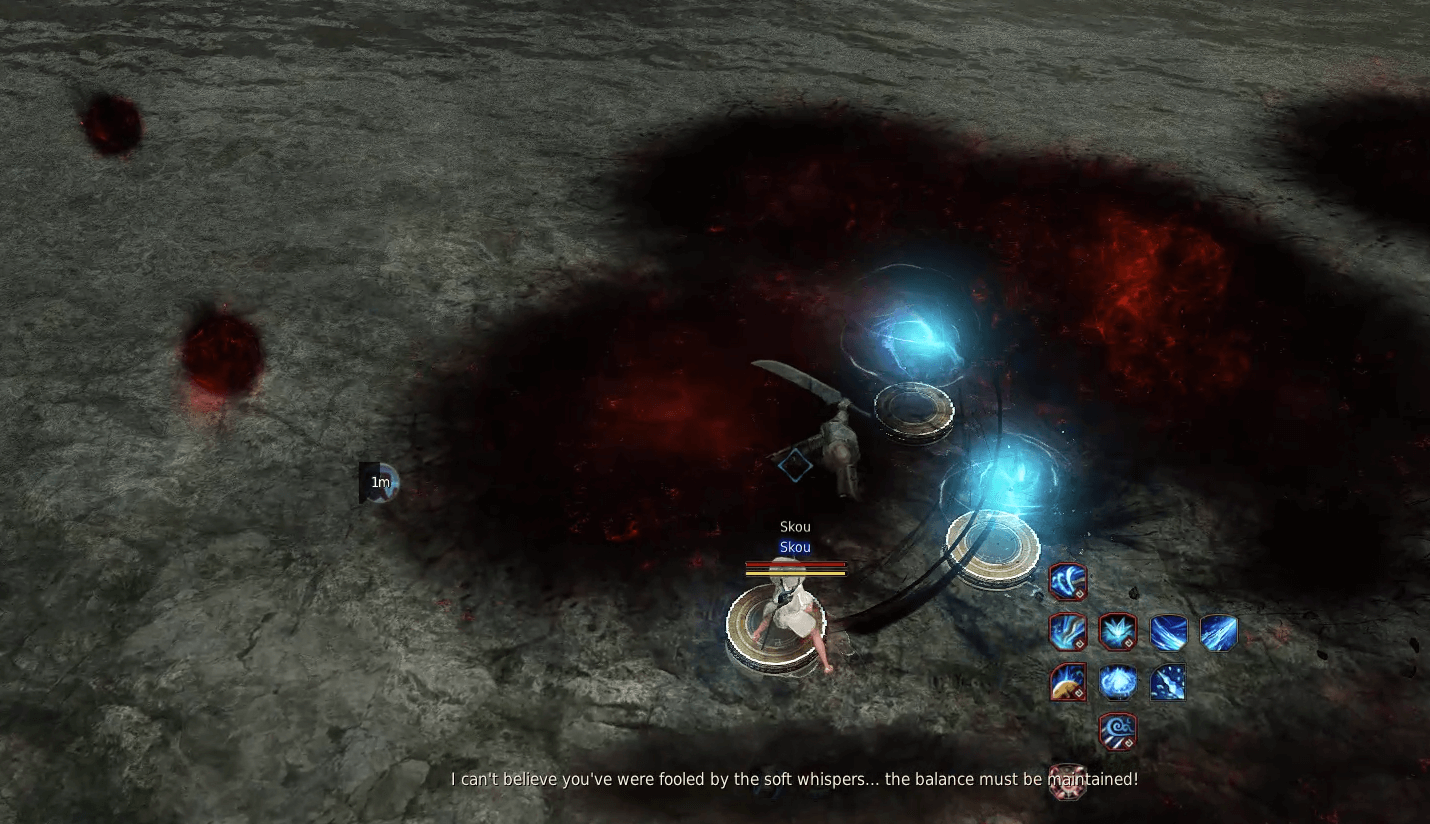
You'll spawn at a body of water with a Shadow Knight in the center, when you approach it, the challenge will begin.
You can see in the image below the Shadow Knight is surrounded by pedastals.
The goal of this challenge is to place orbs on them while avoiding the Shadow Knight's attacks.

When the Shadow Knight attacks, the game will prompt you and orbs next to the yellow and blue lights will spawn.
Each time you pick up a new orb the Shadow Knight will throw out more and stronger attacks.

Run over to them and pick them up while avoiding attacks, then place them next to the Shadow Knight on the petastals around the Shadow Knight.
Once you set down the 5th orb on to its pedastal and complete the circle around the Shadow Knight, the puzzle will complete and the black cat will appear.
Rhutums Strike Back
When you start this challenge, in the distance is a small fort and a Rhutum Wizard. Talk to the Rhutum and ask "Tell me exactly what you're trying to do?"
The wizard will then lead you into the Rhutum fort. Talk to the Rhutum Wizard again and choose the option to "Attempt to seal the evil sphere."
The Rhutum Wizard needs more wizards to help him complete the ritual. Behind the Rhutum Wizard there's a gate you can open and close by interacting with it.
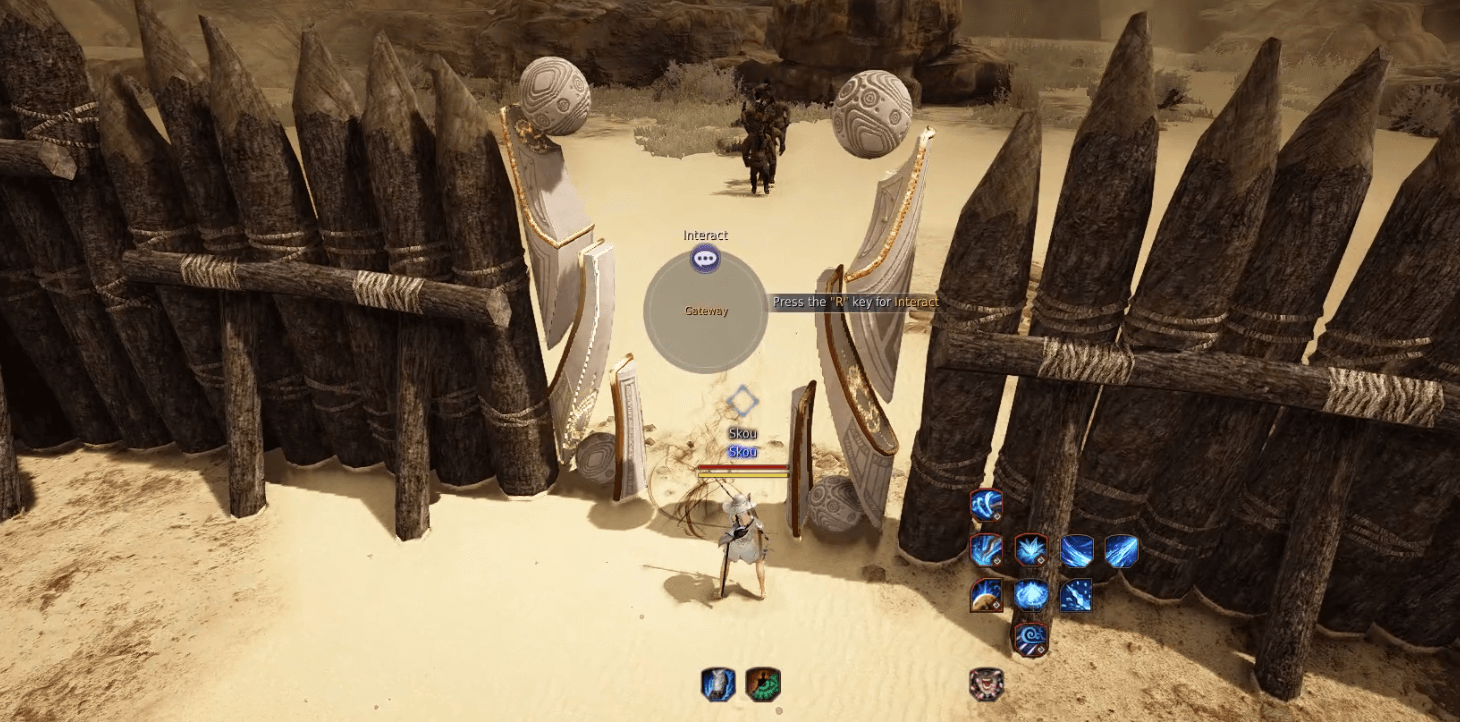
Mobs will come in waves that want to enter the fort, let in the wizards that come in a group of 2 and close the gate for all other mobs.
| OPEN GATE for these two wizards | CLOSE GATE for the larger group of monsters. |
 |
 |
Once 6 additional wizards have passed through the gate, talk with the Wizard Rhutum to finish the challenge.
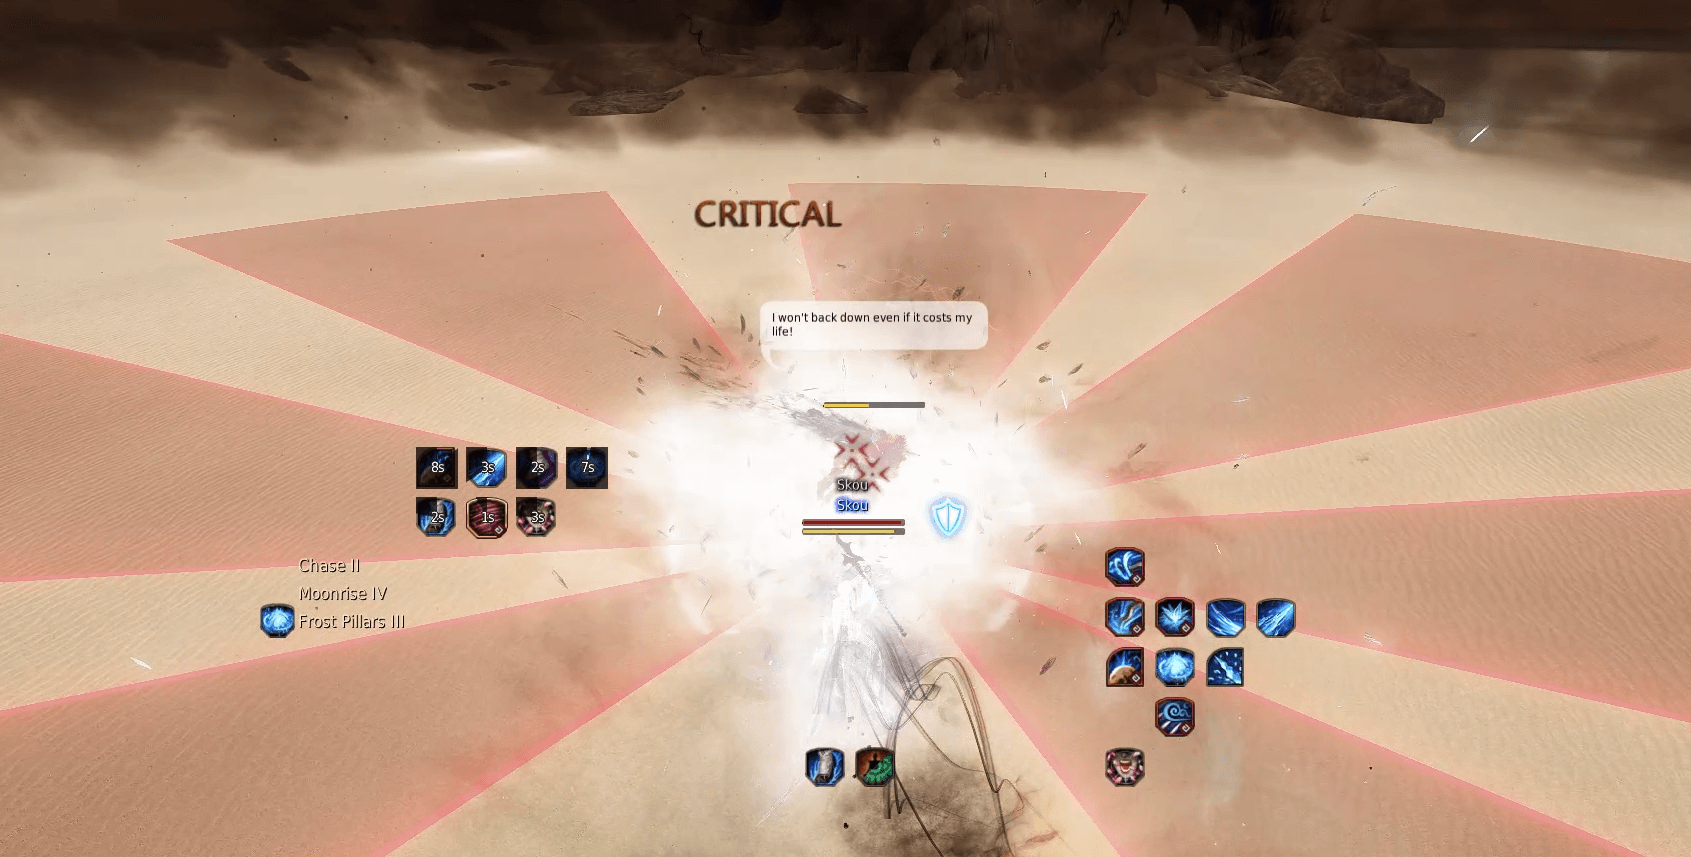
Greatsword's Master
This is the final challenge, a final battle against Goyen. Pick between two difficulties (there's no reward difference between the two difficulties).

Goyen on higher difficulty can do alot of damage, in both versions he will use multiple fighting mechanics.
Avoid his attacks indicated by red on the ground, when his hp falls to 30% he will heal to full.
He will continuously follow you and attack you with warrior type abilities, you can use forward guard to reduce damage if needed but its a lot safer to iframe or dodge.
Defeat Goyen to complete the final Magnus challenge!
After beating Goyen, you will see NPCs waiting for you in the distance by a large tree, head over to them to finish the quest.
Obtainable Knowledge
Completing the main questline will reward you with the majority of the knowledge Magnus provides. Besides those there's new quests and hidden locations that provide additional knowlegde scattered around the world.
Thanks to Vollkornbeet for helping out with this section.
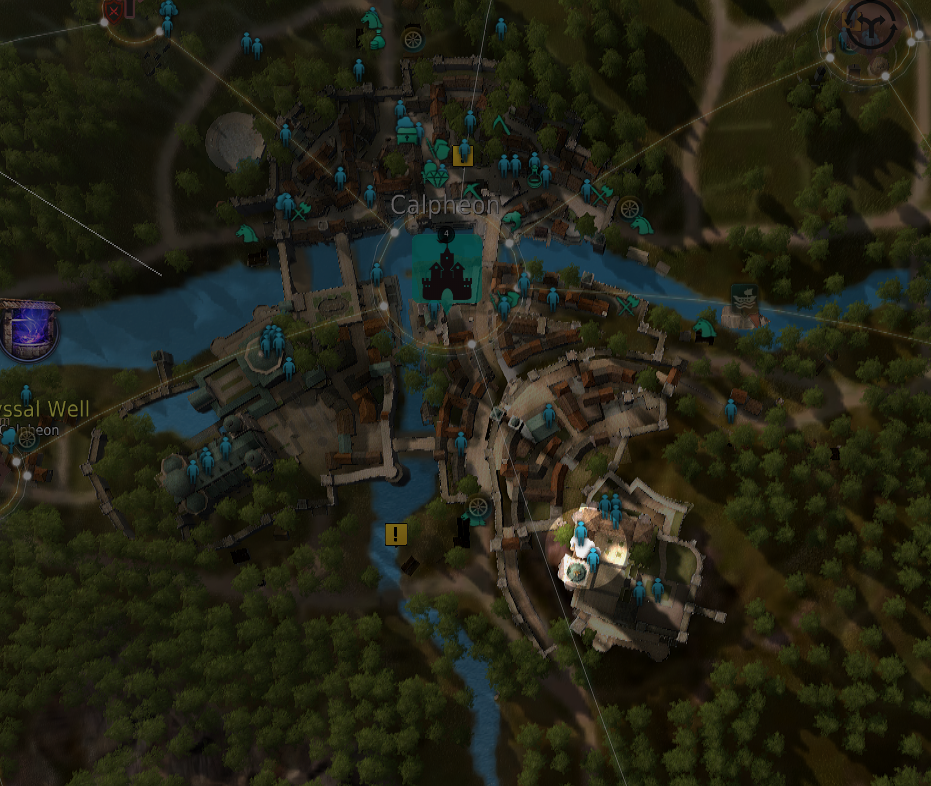
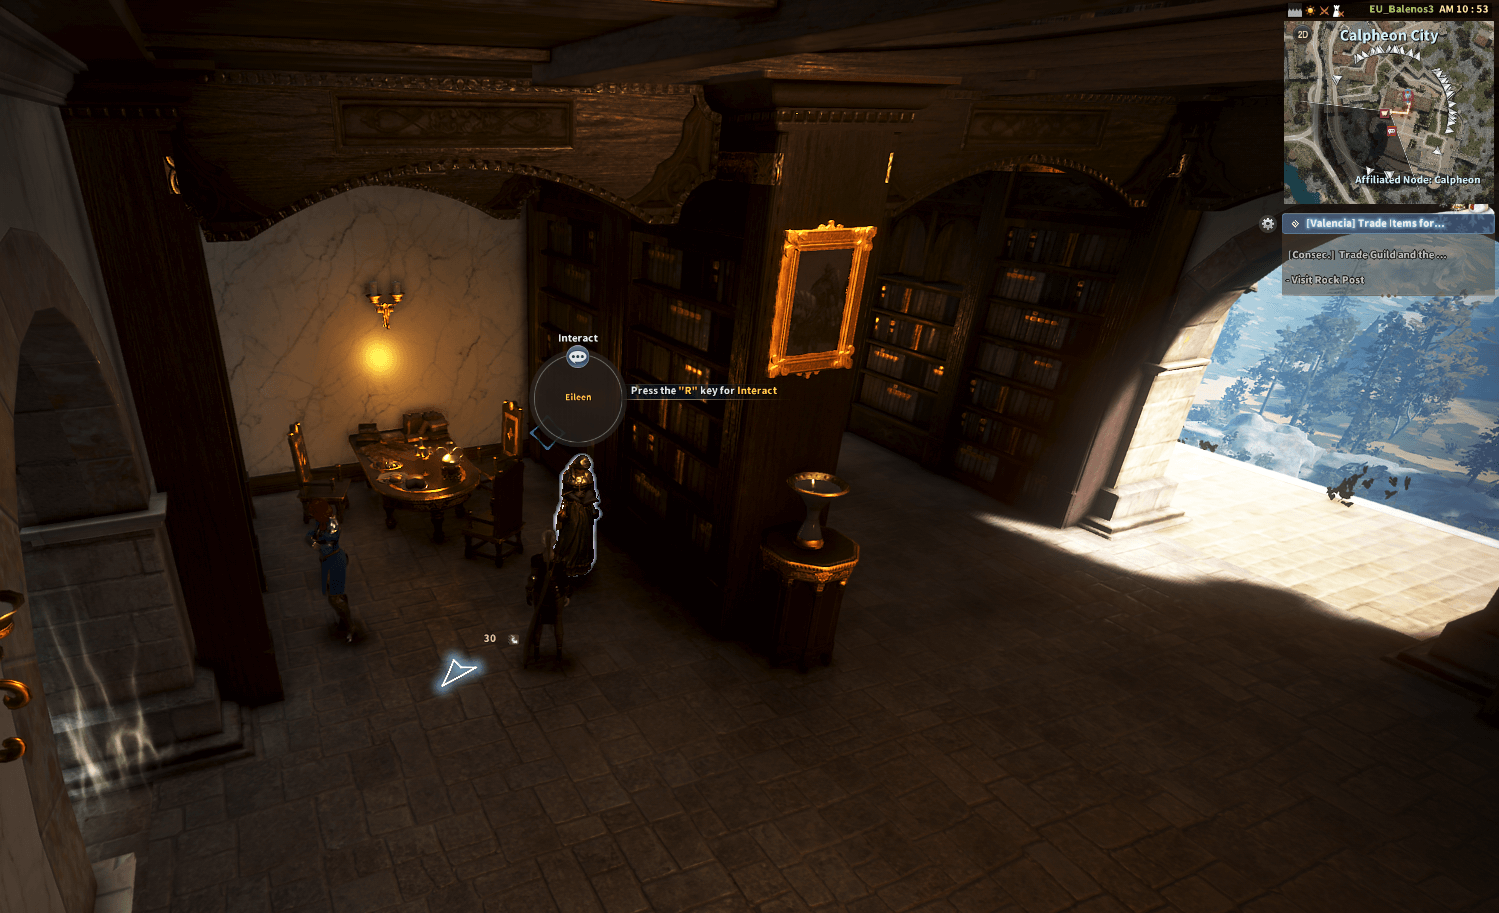
Eileen Matures
The NPC Eileen in the calpheon library, provides a quest that rewards the "Eileen Matures" knowledge.
 |
 |
And they lived happily ever after? #1
The NPC Gorgath in the calpheon library, provides a quest that rewards the "And they lived happily ever after? #1" knowledge.

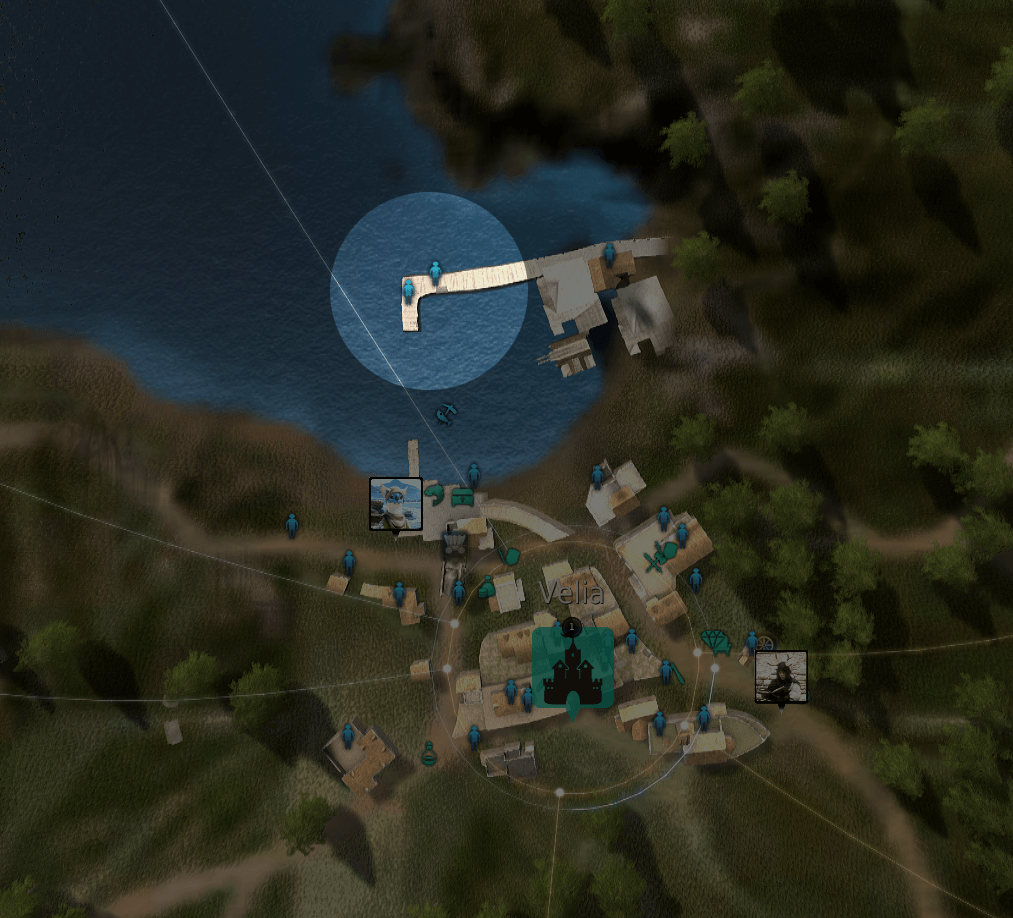
And they lived happily ever after? #2
The NPC Yeonhwa at the velia ship port, provides a quest (What are you doing here?) that rewards the "And they lived happily ever after? #2" knowledge. This quest can only be done on a character that has completed the Magnus.
 |
 |
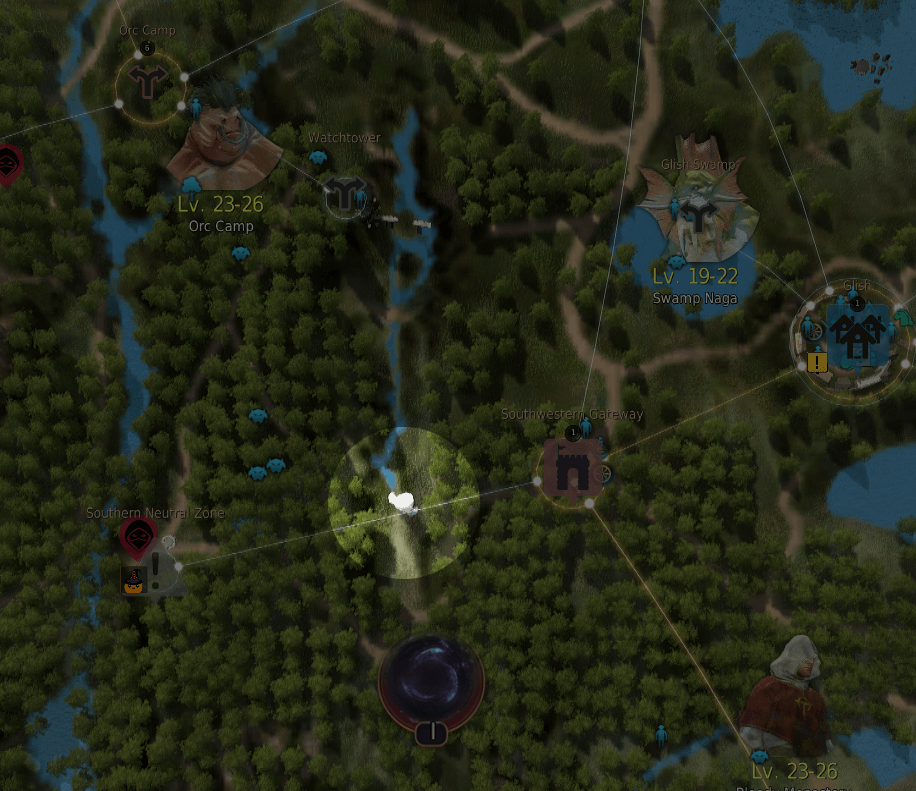
And they lived happily ever after? #3
The NPC Jordine Ducas next to Orc Camp, provides a quest (I didn't tell you?) that rewards the "And they lived happily ever after? #3" knowledge. This quest can only be done on a character that has completed the Magnus.
 |
 |
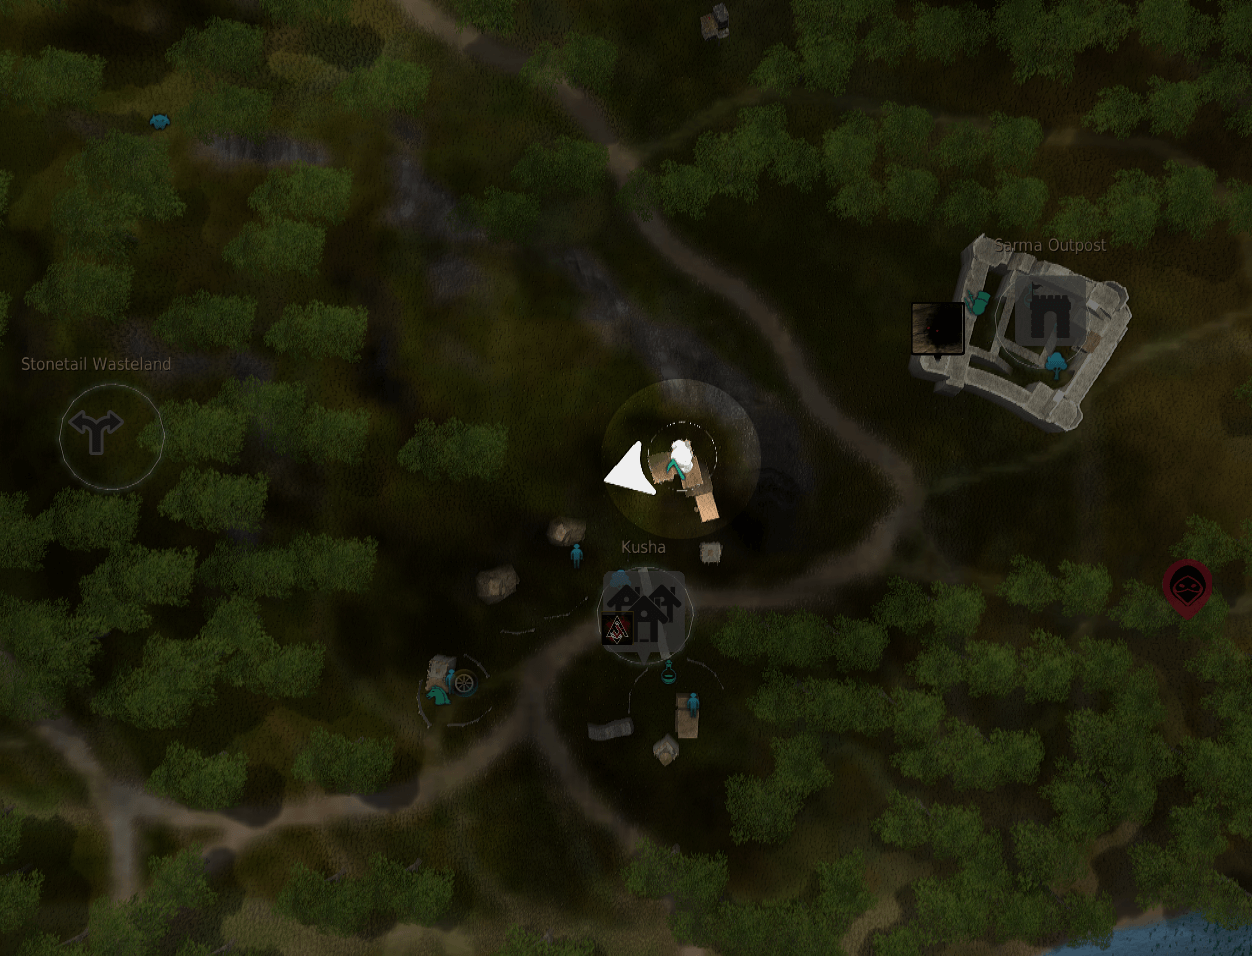
And they lived happily ever after? #4
The NPC Goyen next to Kusha gives "And they lived happily ever after? #4" knowledge. This quest can only be done on a character that has completed the Magnus.
 |
 |
 |
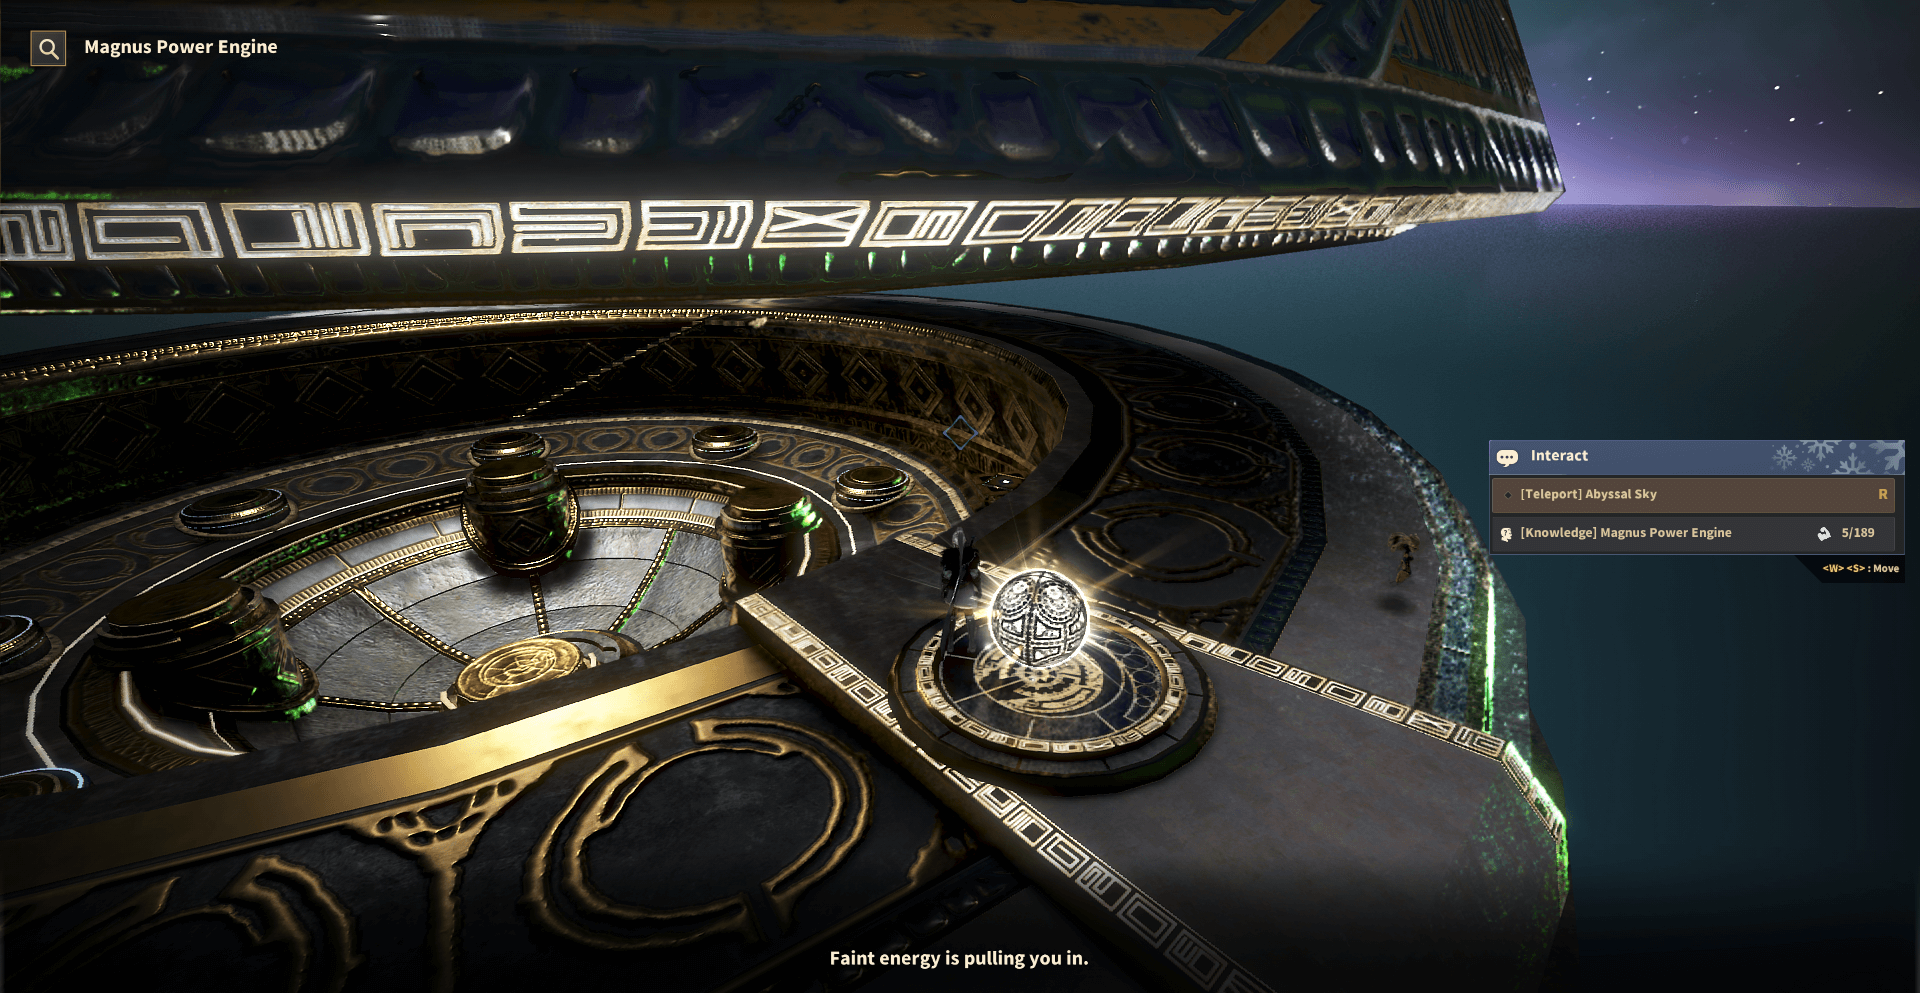
Magnus Power Engine
Interact with the "Magnus Power Engine" Orb in Magnus to obtain the knowledge. This Orb can also teleport you to the top of the Magnus structure.
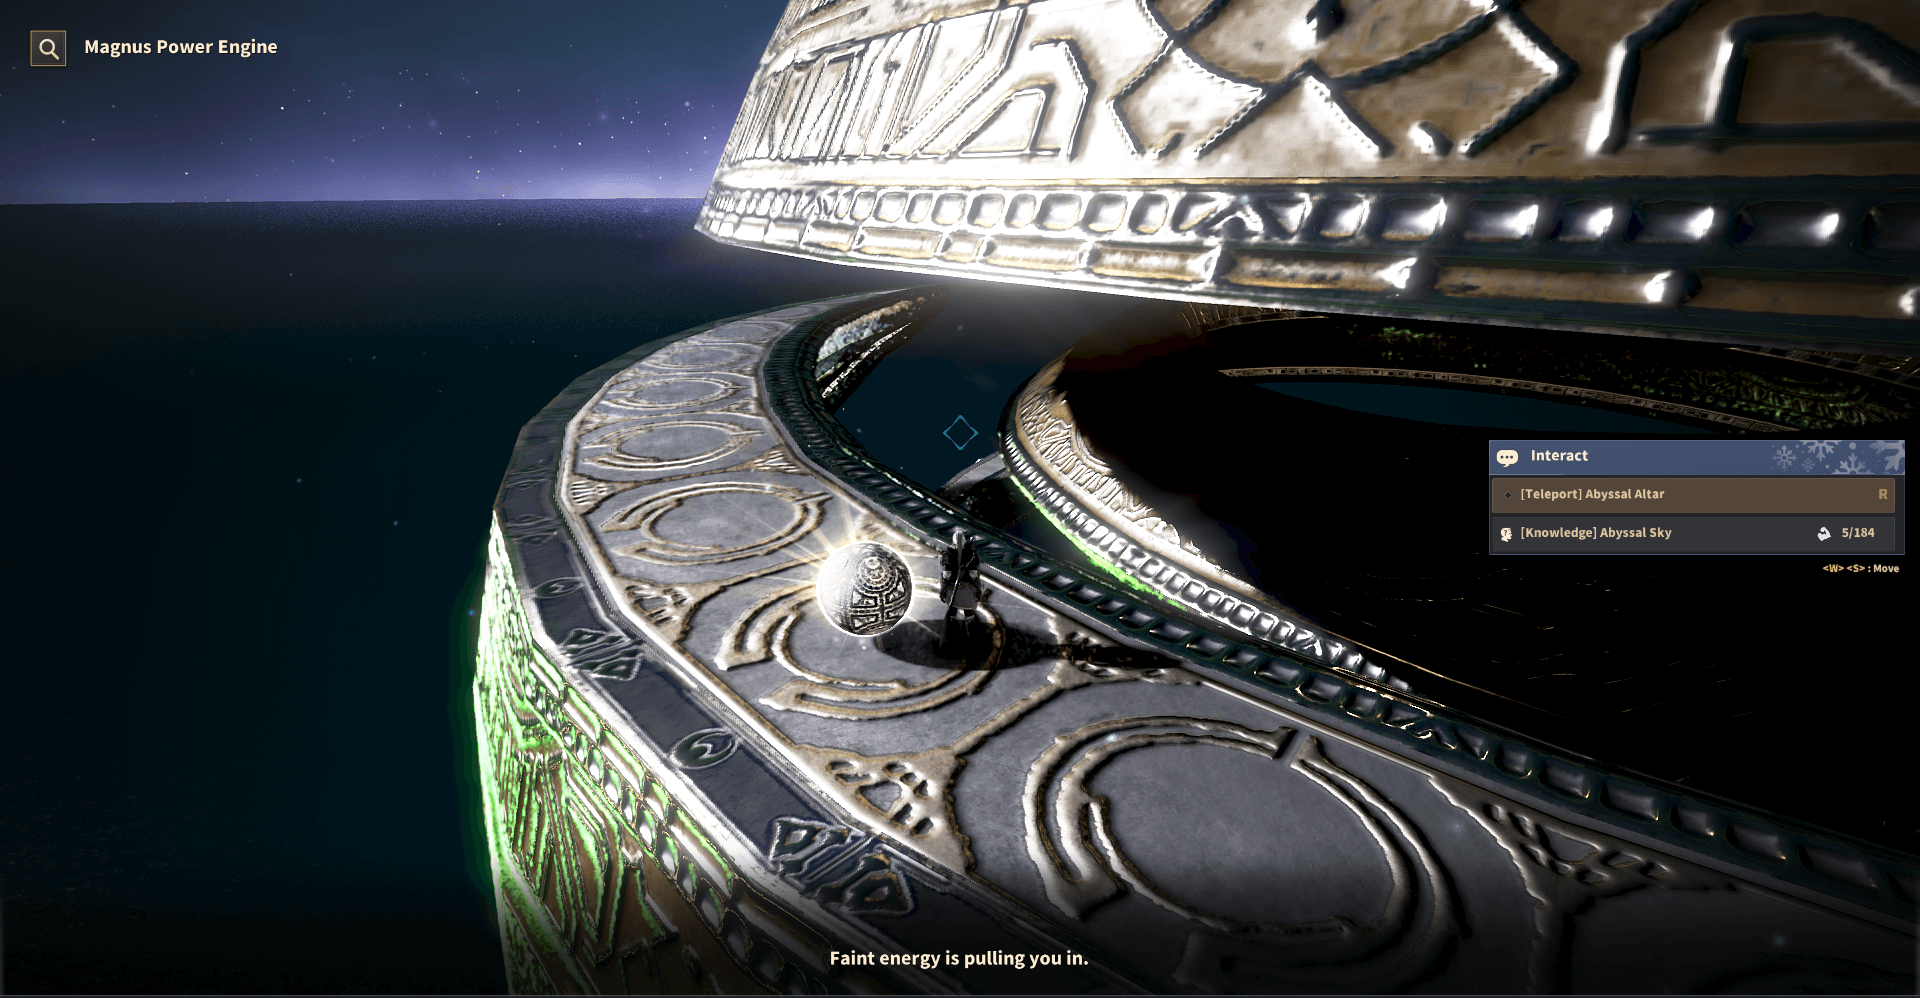
Abyssal Sky
Interact with the Orb at the top of Magnus to obtain "Abyssal Sky". Use the Magnus Power Engine to teleport to the top where you find this.
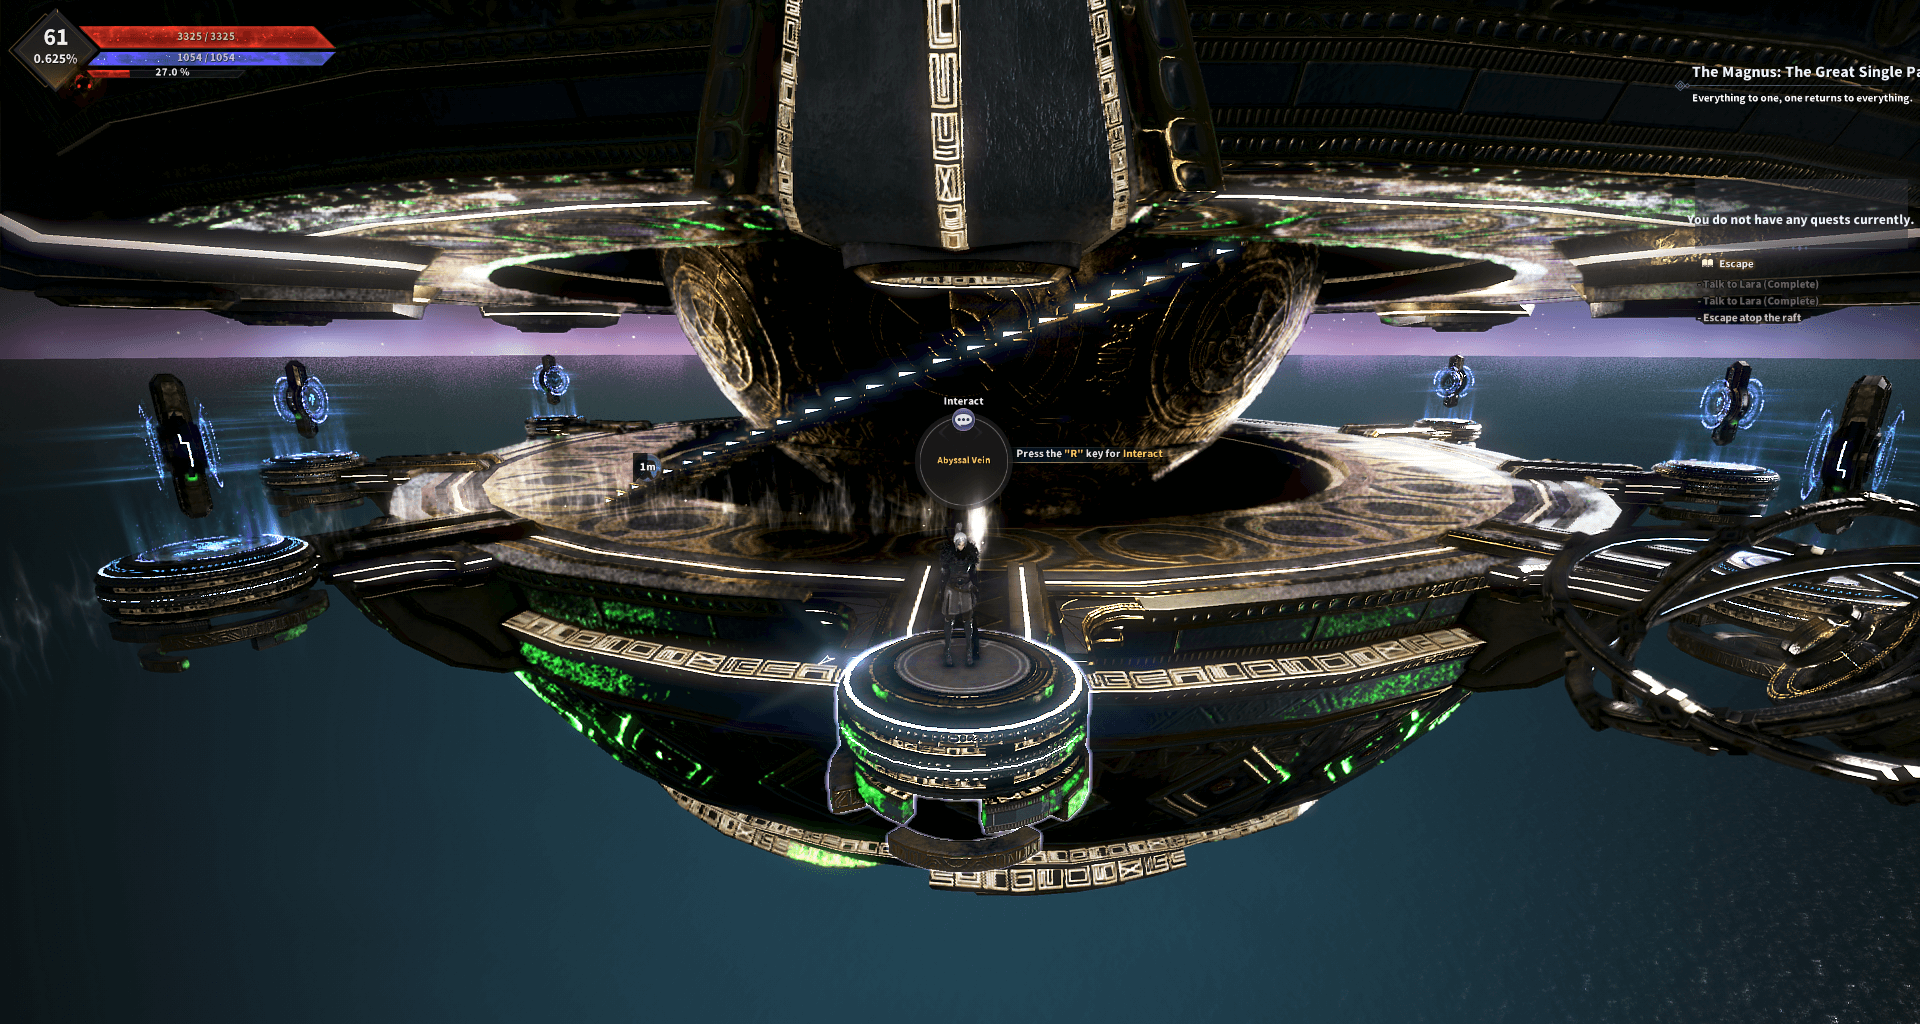
Abyssal Vein
Interact with "Abyssal Vein" in Magnus next to all of the City teleports to obtain knowledge.
Abyssal Altar
Interact with the "Abyssal Alter" at the center of Magnus to obtain knowledge.

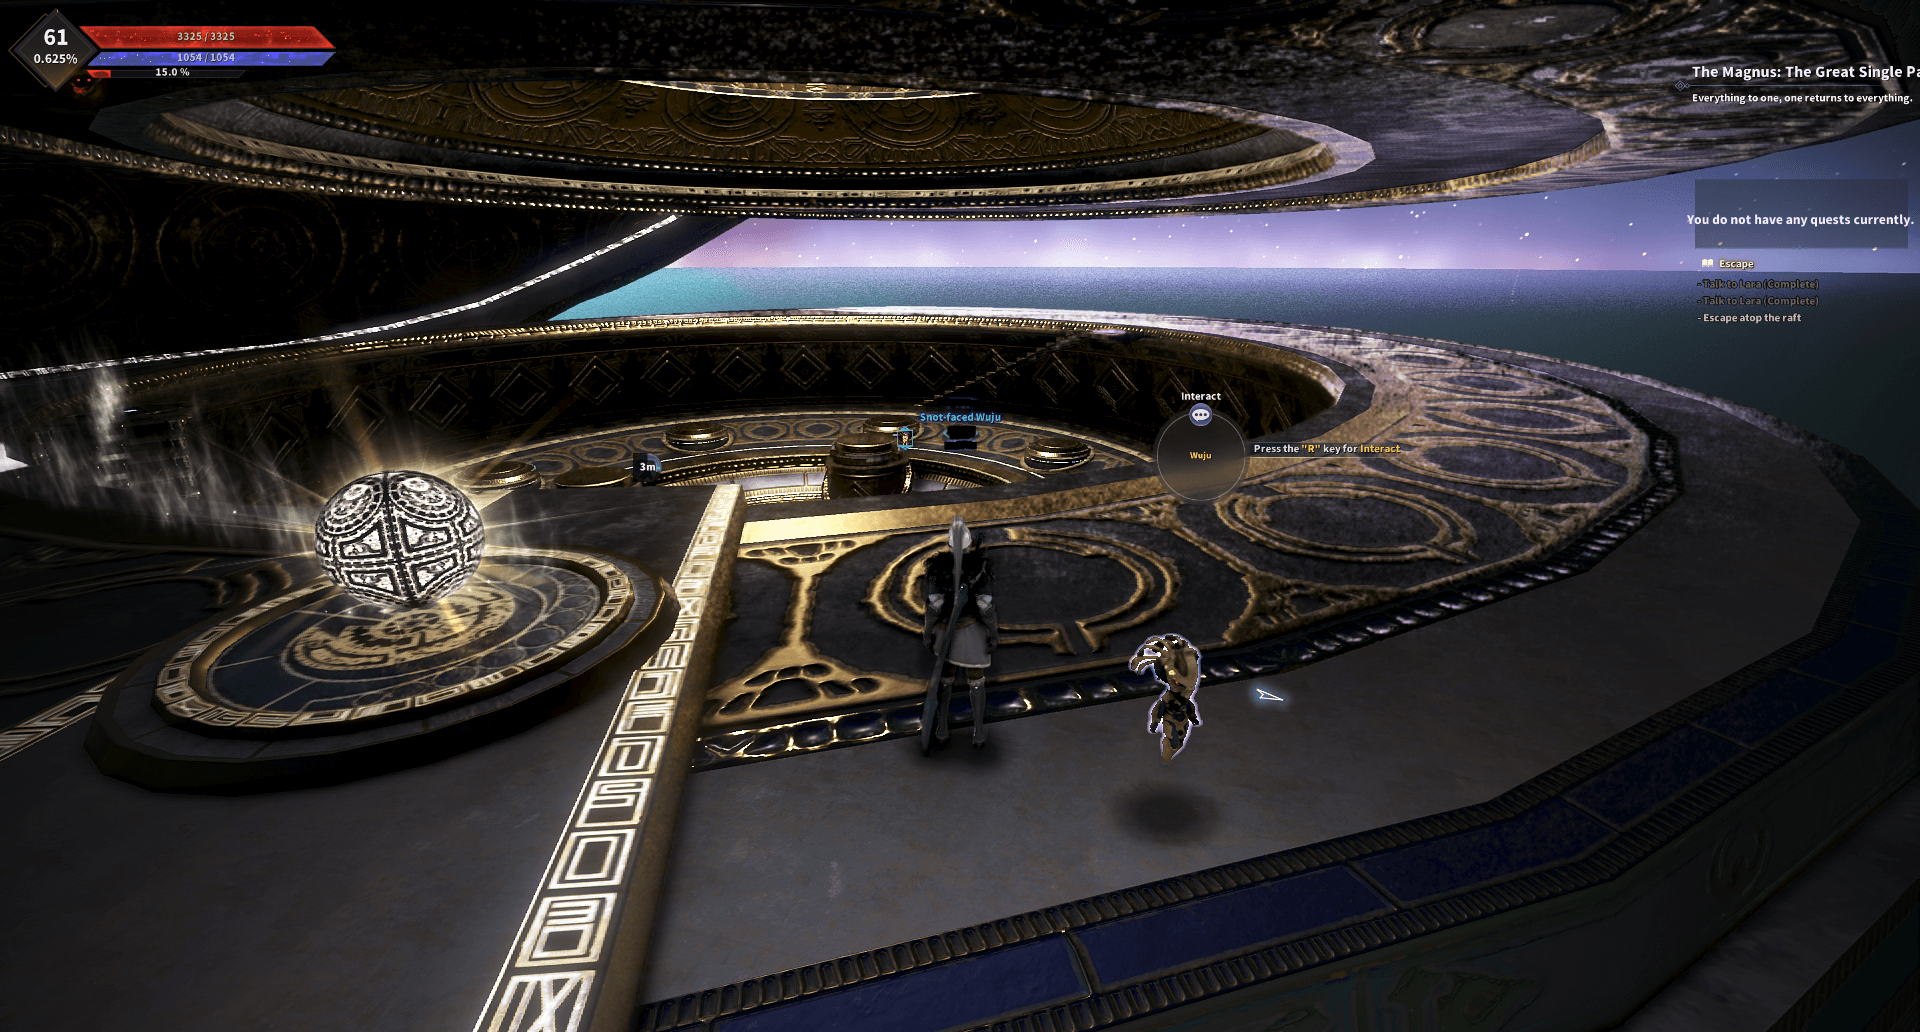
Abyssal Magia and Abyssal Well
Equip the "Snot faced Wuju" title and Talk with Wuju in Magnus to obtain the "Abyssal Magia" and "Abyssal Well" knowledge.
What are your thoughts on the Magnus?
-- Change log - Added Fast Travel Teleportation Map as part of the rewards - 25/01/2024