Atoraxxion - Sycrakea
Black Desert's Second Dungeon!

By nyaiera
Published: Oct 27, 2024
Updated: Dec 24, 2025
25,913
2

Introduction
Atoraxxion Sycrakea is an underwater dungeon and the second dungeon in the Atoraxxion series!
- Completing the Atoraxxion Sycrakea dungeon offers different first time completion rewards
- There are 3 different difficulties for the dungeon, Season, Normal and Elvia Realm mode
- The Atoraxxion dungeon has story quest content that is not mandatory to complete in order to enter
- The dungeon can either be completed either Solo or as a Party, only the Party will give the main rewards.
2. Entering Atoraxxion
To enter the dungeon you'll need to head over to the Ancient Stone Chamber, the same place you met Edan during early questlines at the start of the game.
 The entrance to Atoraxxion is behind a doorway at the end of the Stone Chamber, here's a picture for reference:

You'll then be able to see an object that you can interact with called Talibre's Door - Sol Magia, interacting with it will bring you to the dungeon entry menu.

You'll need to be at least Level 60 in order to enter the dungeon but that's the only requirement.
This window will let you queue with a party, solo or use the matchmaking to try and form a party for a run.
The different symbols are to choose which dungeon you'd like to enter, this time we'll be entering the second dungeon Sycrakea.

The Solo entry is more for completing the questlines and gathering knowledge, you'll only be given a first time completion reward.
You won't be able to use Solo Entry mode to get the weekly chest reward for completing the dungeon.
3. Difficulty Modes
There used to be three different difficulties, now Elvia mode the only remaining difficulty, the gear suggestion is 280 AP / 340 DP.
There is death penalties in all areas upon death except for in the final area, Vaha's Cradle, meaning you won't receive death penaltes against the final boss.
Now you'll only need to do 1 weekly dungeon run of each of the dungeons and Cron stones are now a guaranteed reward, here are the other rewards:
|
[Weekly] Sycrakea: Abyssal Chest
Open to receive the following at a set probability: |
||
| Item | Type | Qty |
 Deboreka Necklace (up to PRI)
|
Random | 1 |
 Deboreka Earring (up to PRI)
|
1 | |
 Deboreka Belt (up to PRI)
|
1 | |
 Deboreka Ring (up to PRI)
|
1 | |
 Rich Merchant's Ring Piece
|
1 | |
 Vaha's Dawn
|
1 | |
 Fragment of the Deep Sea
|
1 | |
 Maha's Fragment
|
Guaranteed | 10 |
 Dehkima: Token of the Oath
|
45 | |
 Abyssal Essence
|
1 | |
 Ancient Relic Crystal Shard
|
1 | |
 Trace of Nature
|
5 – 10 | |
 Ancient Spirit Dust
|
15 – 20 | |
 Cron Stone
|
100 | |
Atoraxion Story Questlines
If you'd like to do the questlines, then you'll need to start off with the Invitation of I main questline. It's not mandatory to enter and complete the Atoraxxion dungeons, but you need it to start the quests.

Then there's the main atoraxion questline, which will involve you actually completing the dungeon. Doing the questline on the solo mode can be a good first way to complete the dungeon.
The quests will take you through the different areas of the dungeon in a step by step way while dropping lore along the way, so if you're interested in that feel free to complete them.
This time we'll be doing the Sycrakea version, here's the quest line for the second dungeon:

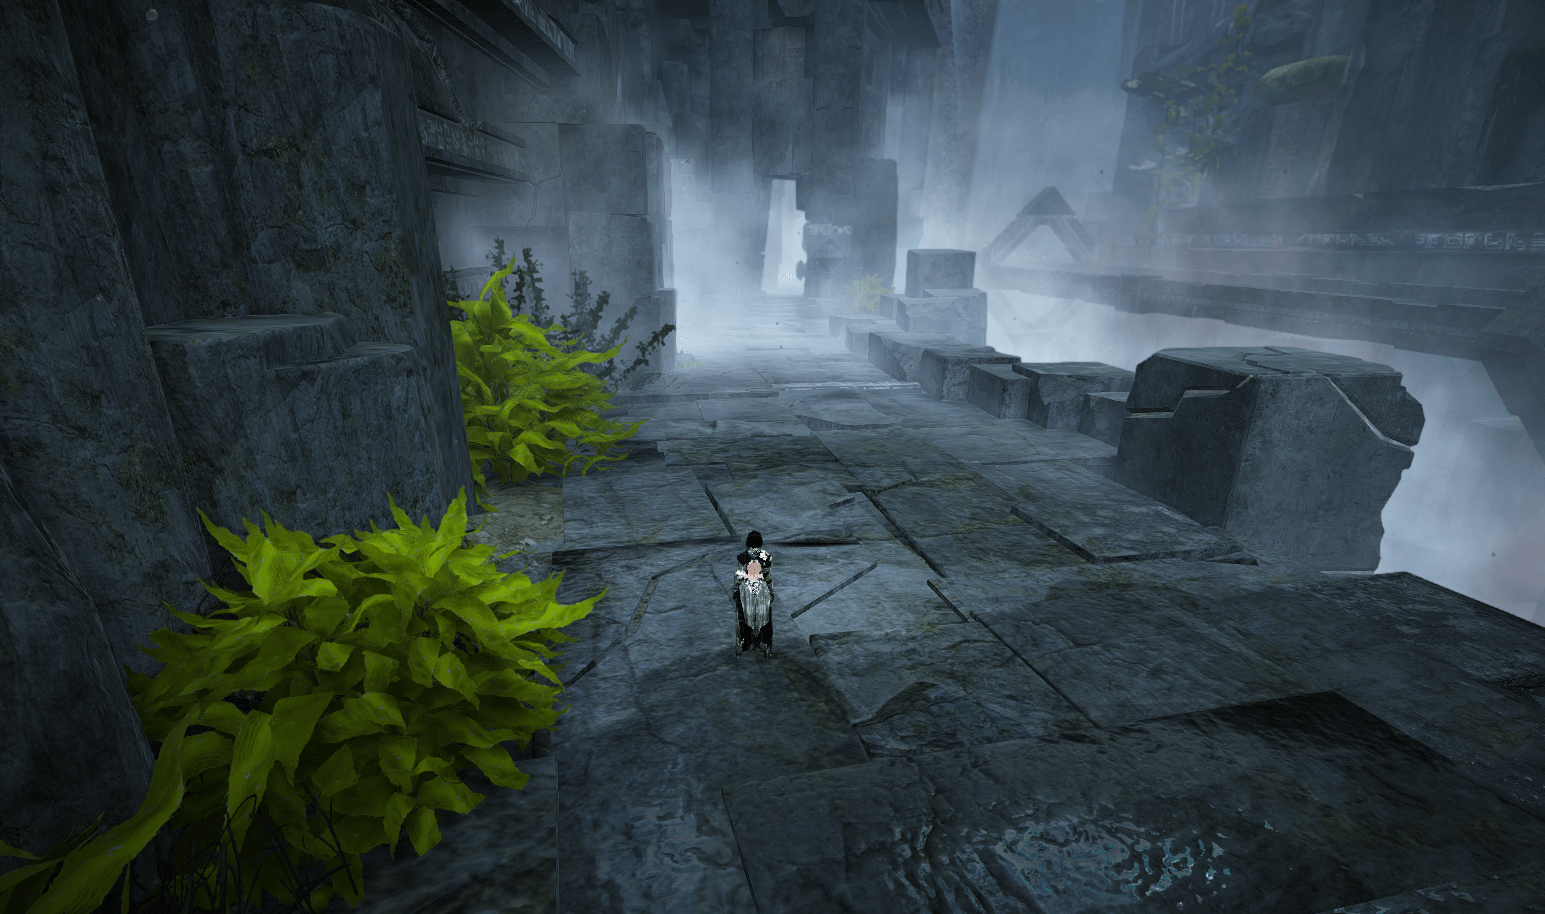
Starting the Dungeon

When first entering the dungeon, there will be two ancient constructs by the entrance. These can be used to exit the dungeon and stock up on potions or repair.
Once you've unlocked other zones of the dungeon, you can use the teleporter to jump to those zones.
The knowledge NPC will also unlock more knowledge that can be exchanged. If you're running as a group you can also pick up Medical Kits which is the only way to revive players in the boss room.

You can also gather more knowledge by using the Ancient Weapon Blueprint combined with a Syca's Circuit of Special Information that drops from mobs.

I'd advise on picking up some potions if you don't have infinite pots just because the dungeon features a lot of environmental effects like burning and poisons that apply damage over time to you.
Grabbing some potions can help deal with it but if you have decent HP recovery skills you won't really need them unless you're in Elvia mode with gear score on the lower end.
Completing the Dungeon
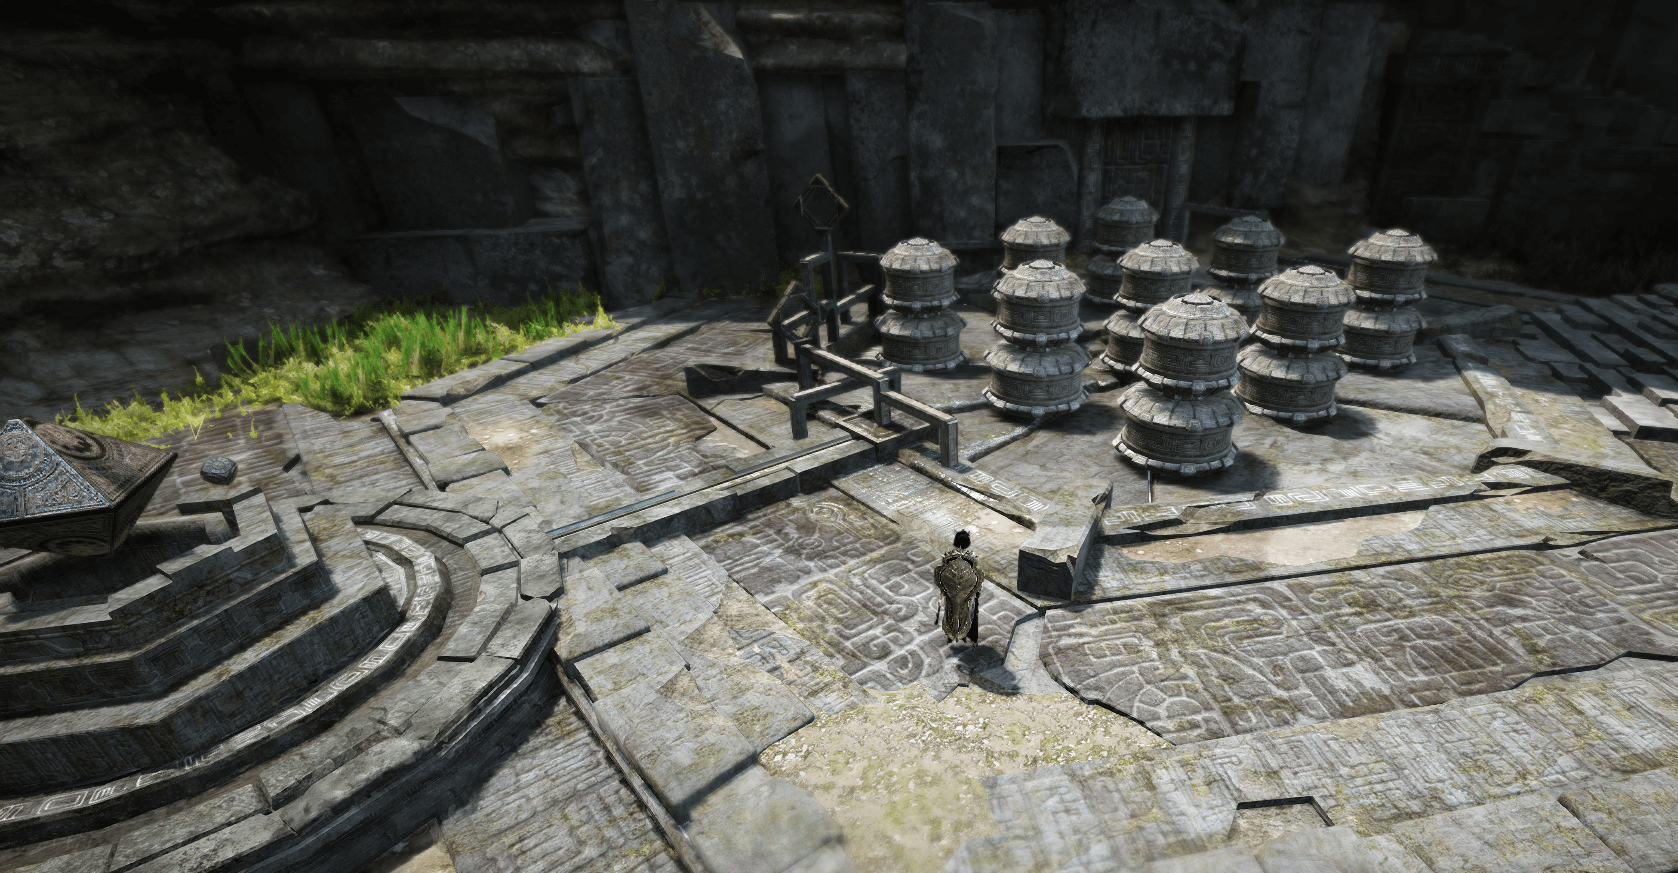
Follow the linear path and you'll come to the first set of mob spawners in the dungeon, we'll use this set of mobs to gather materials to summon a boss.
The mobs in the dungeon can also trigger a large golden barrier, this barrier will drain your MP if you're hit by it so watch out.
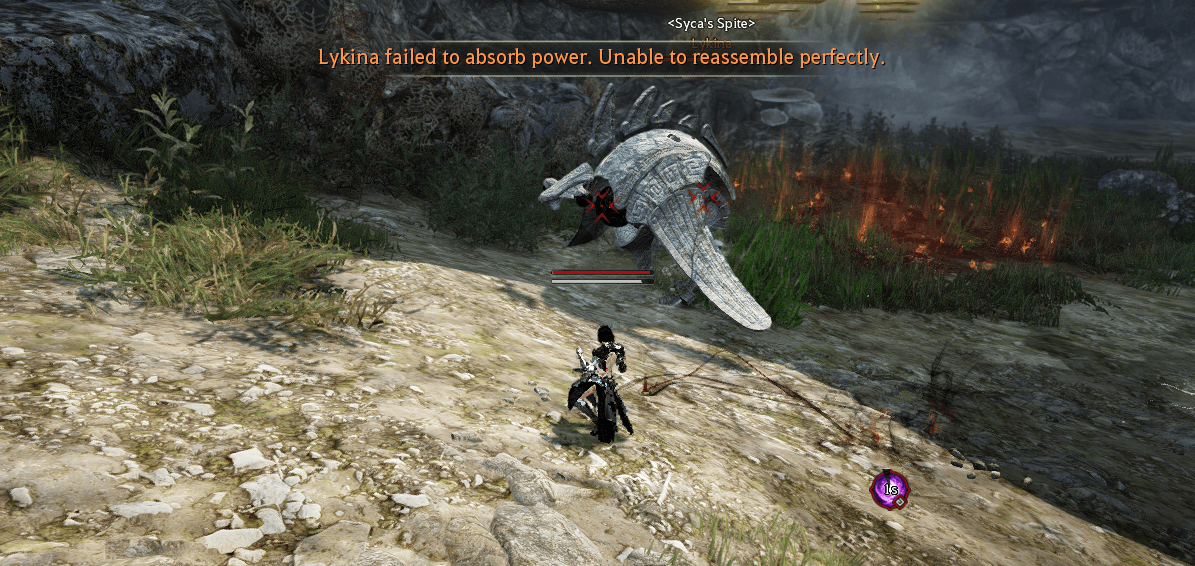
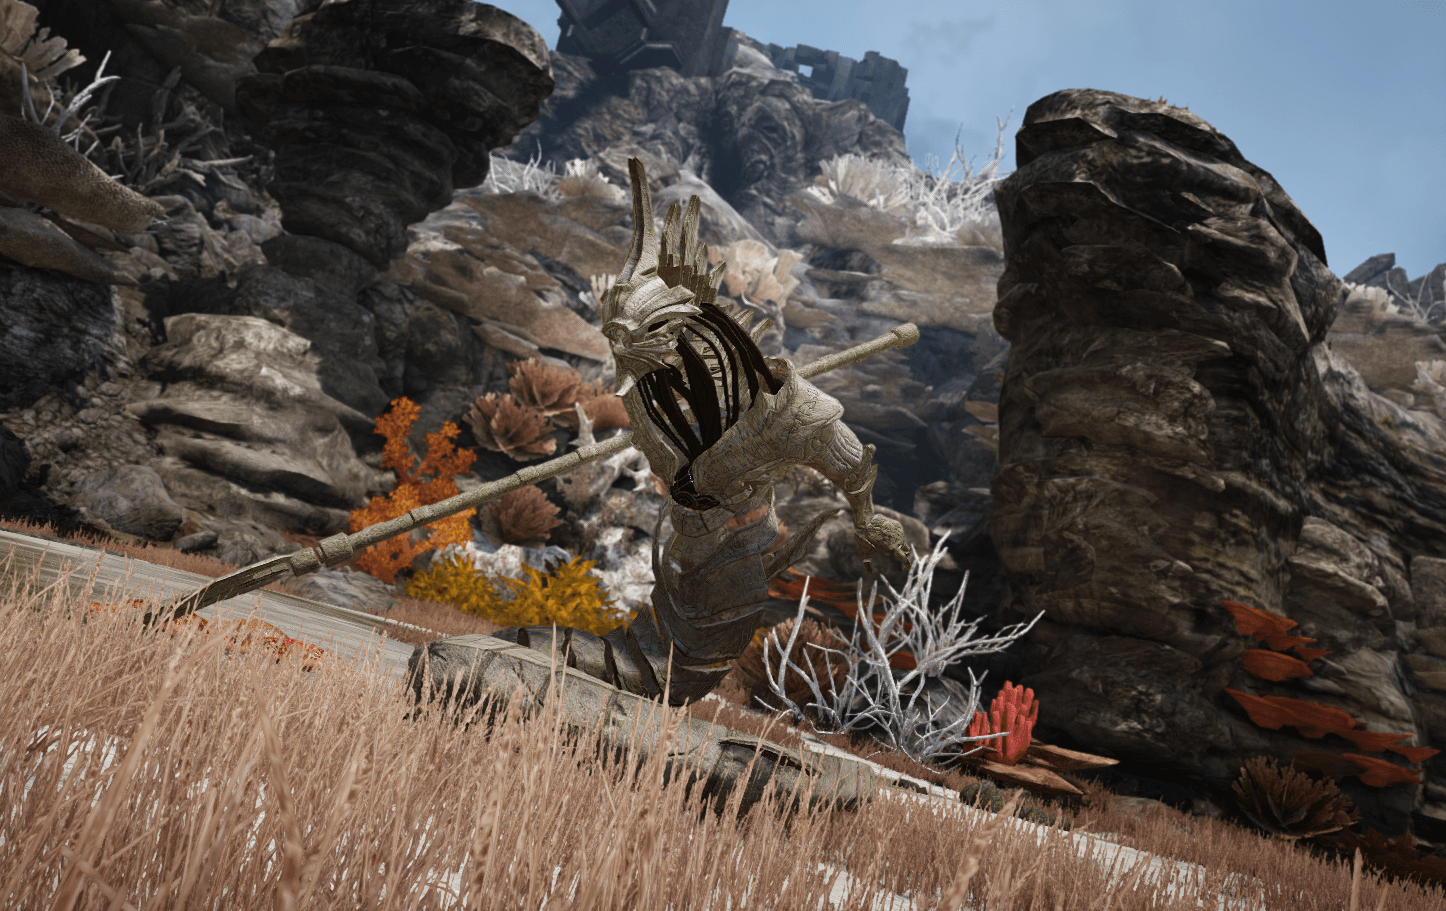
There's a mini boss called Lykina that drops the items we'll need. Syca's Frigid Scale x2 and Egg of an Arid Epoch x2.
All party members need to create the items in order to progress through the dungeon, just like with Vahmalkea.
Sometimes Lykina will attempt to gather power, turning into a water bubble while other mobs charge it with power. Just kill the enemies to stop it's charging.
Once you have 2 of each item, you can combine them together using Simple Alchemy (L) to craft the item we'll need to summon the first dungeon boss.
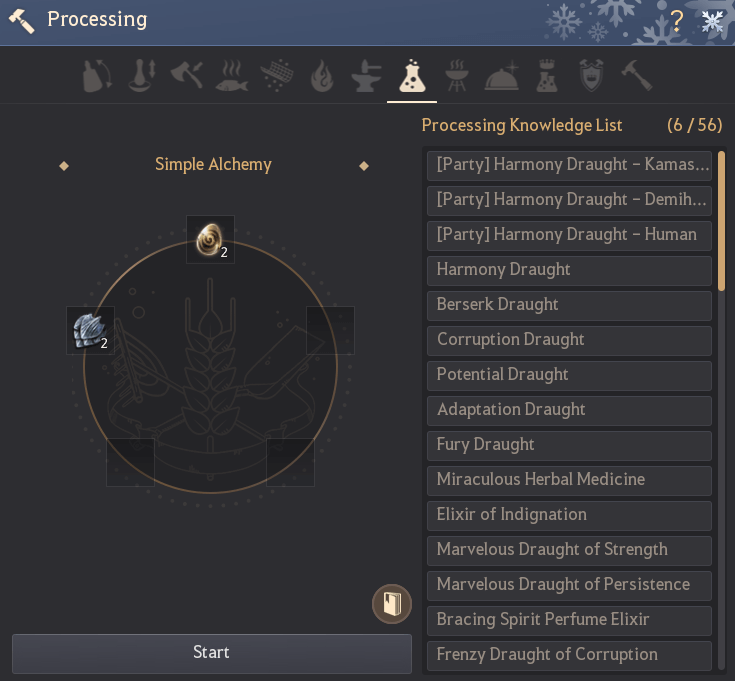
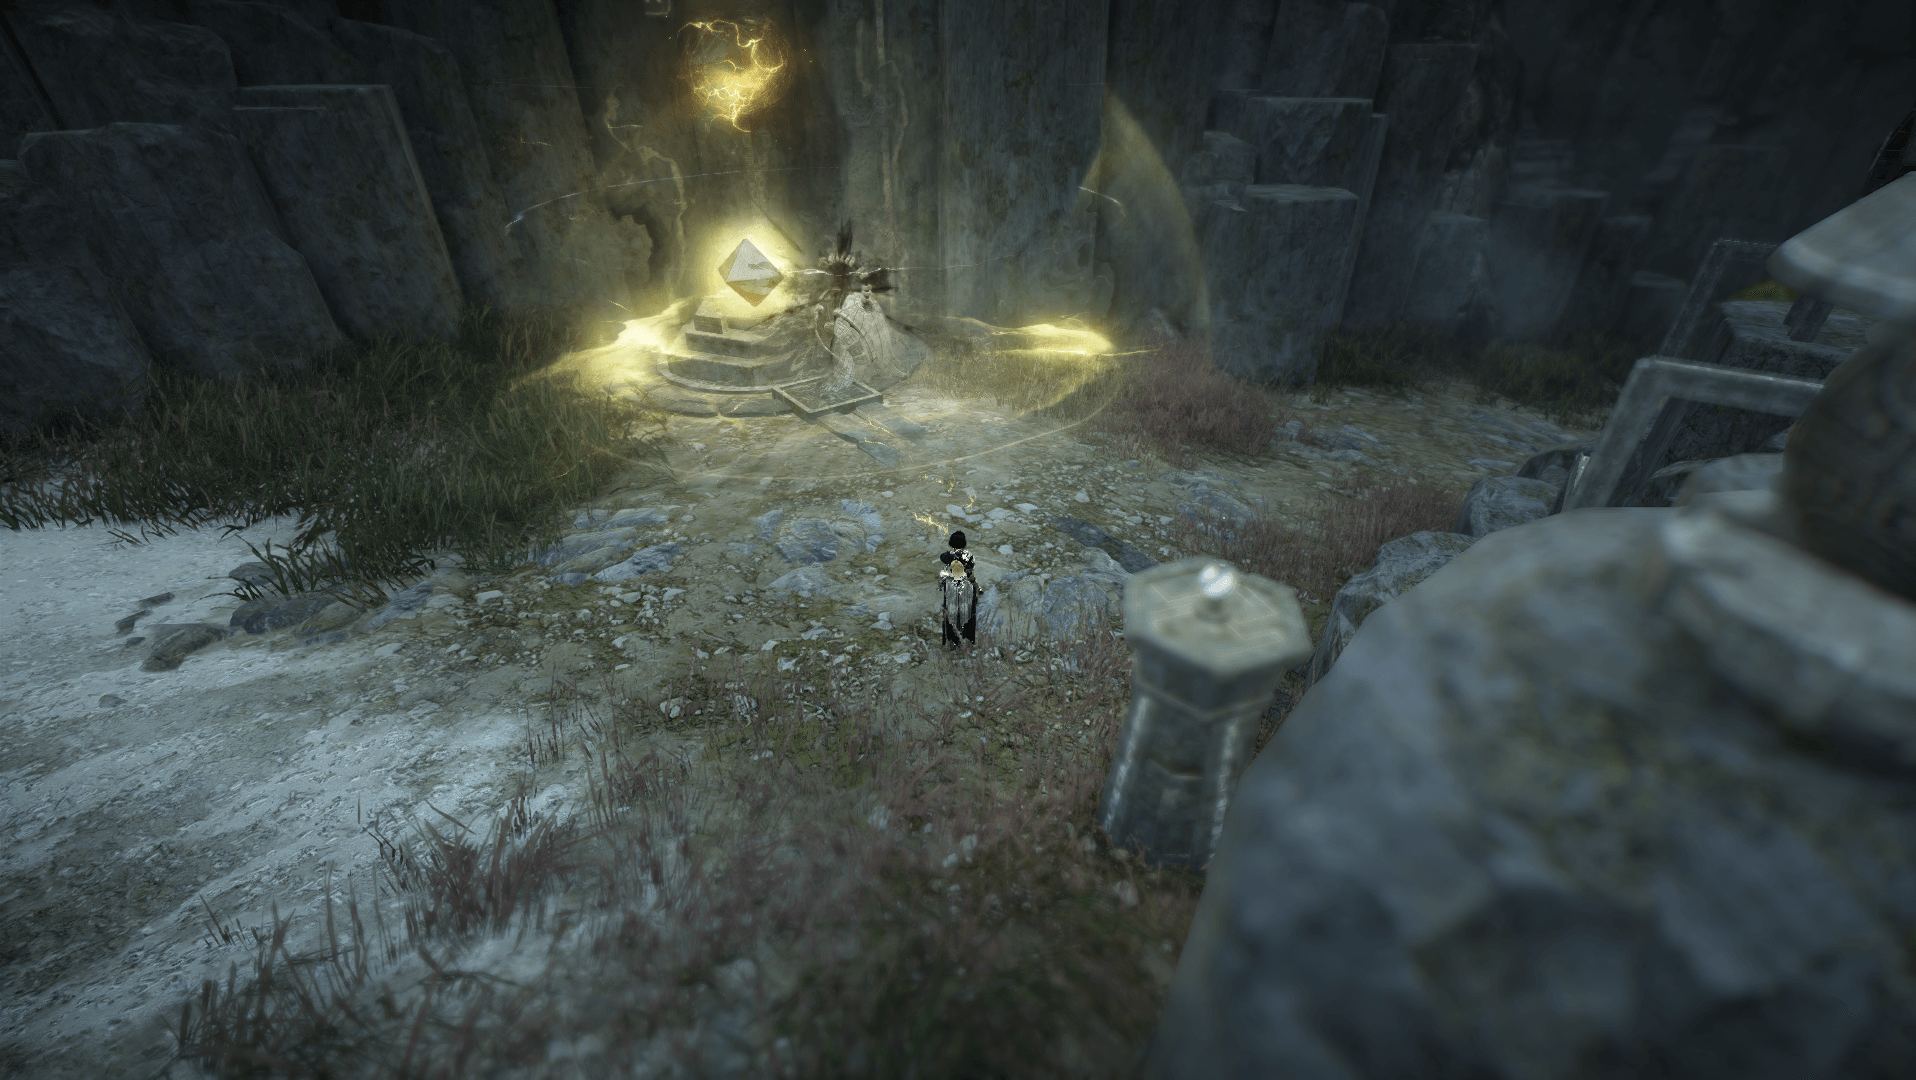
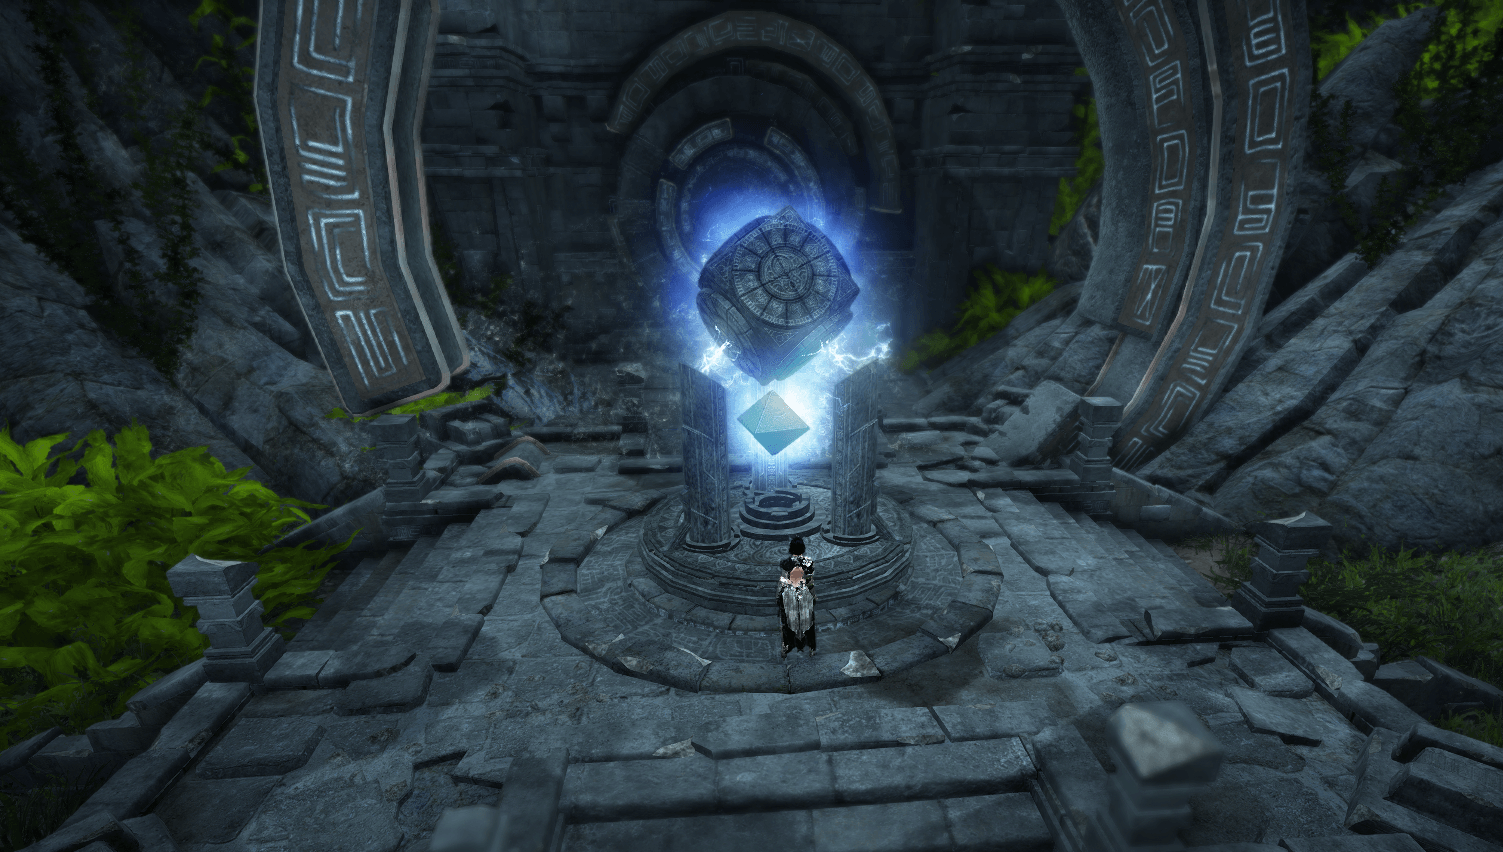
Once you've crafted the Yolun Piece of Envy just right click on it to path to the boss. The right click auto path will take you through the first zone, Syca's Scale.

When you get there you'll need to summon the boss by using the construct in the image below:
Defeat Berurah and we'll be able to continue on to the next zone, the boss has some simple red circles on the ground to dodge so pay attention while fighting it.

Fires will spawn around the boss, to get rid of the flames, drag the monster fish "Pisces" to the fire zones to extinguish them.
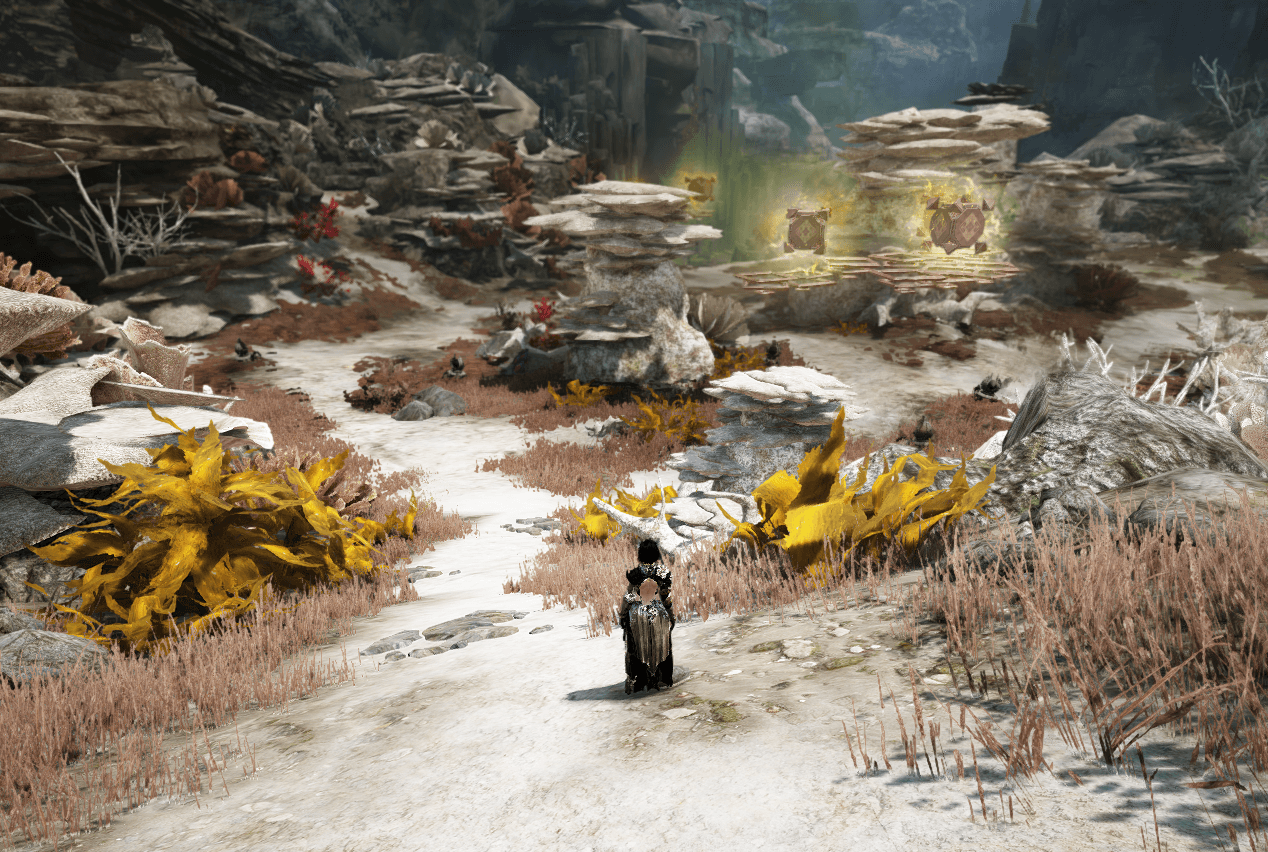
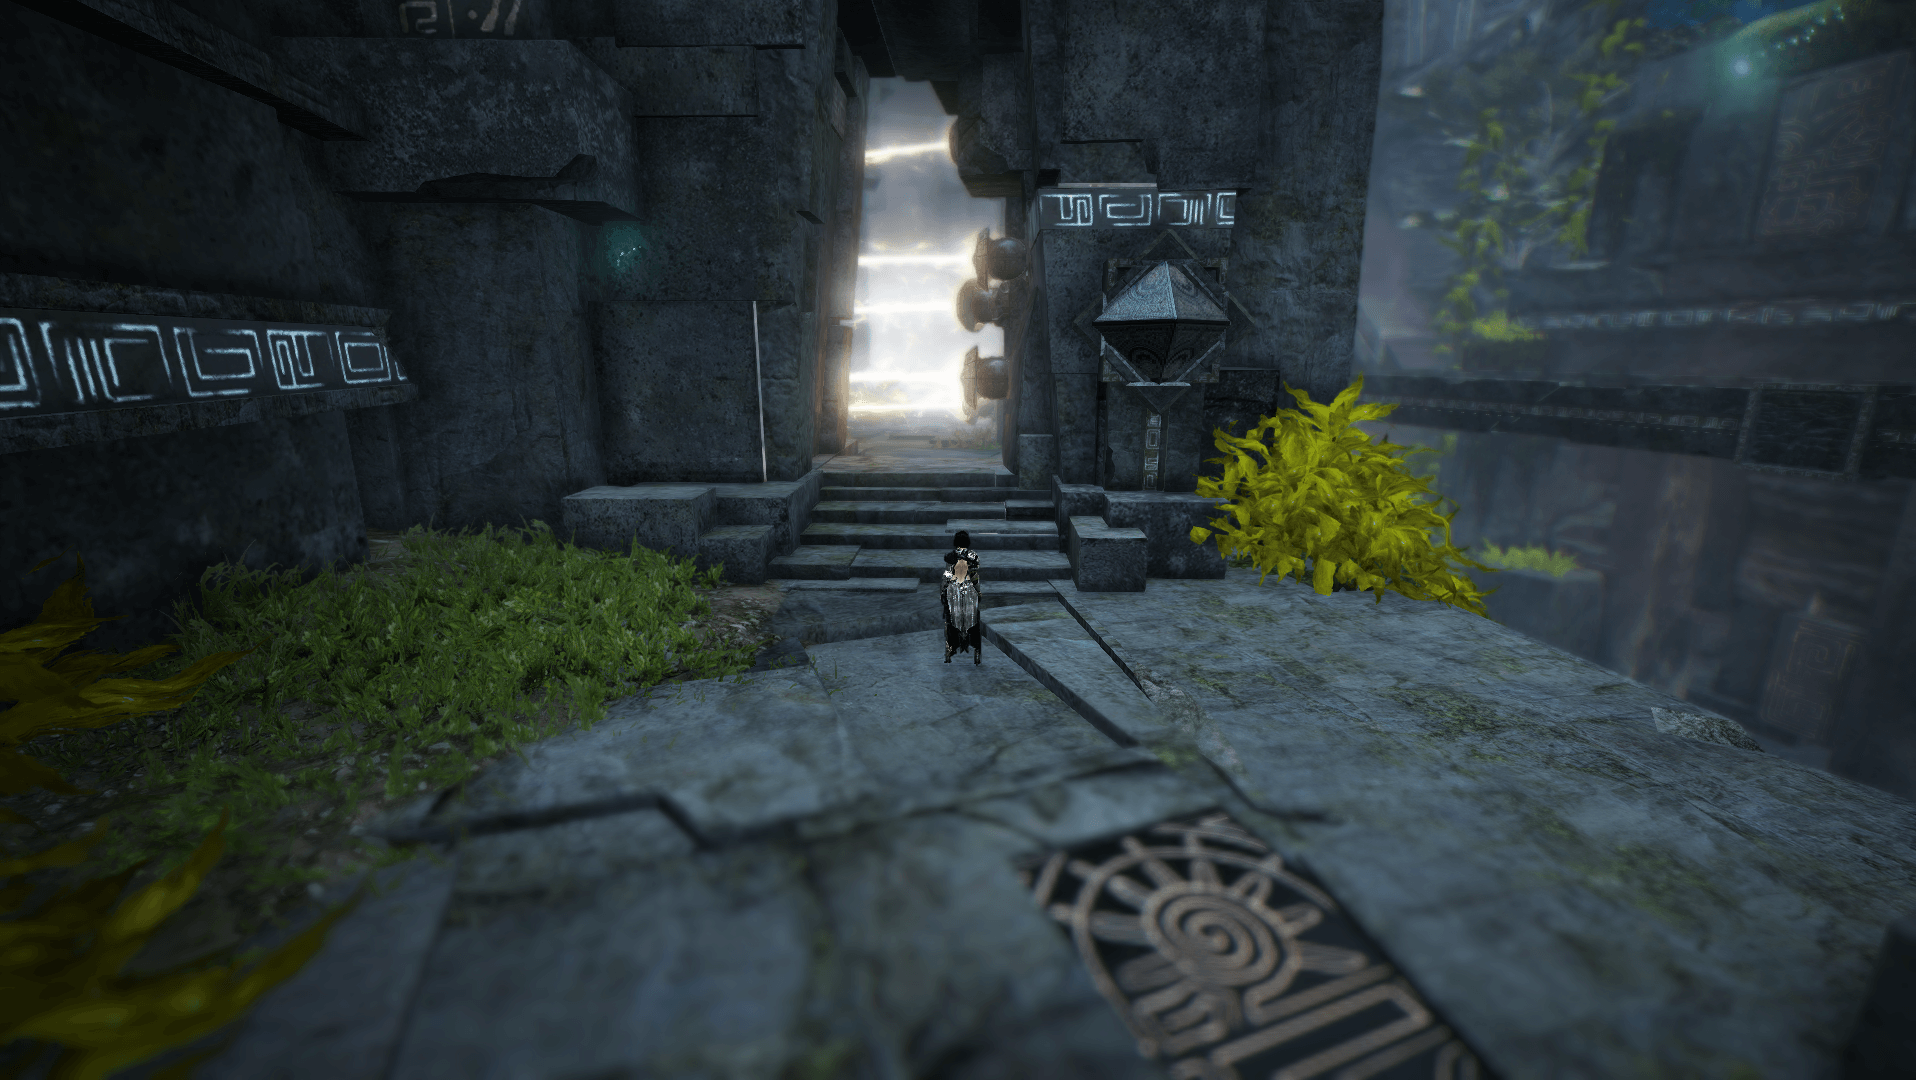
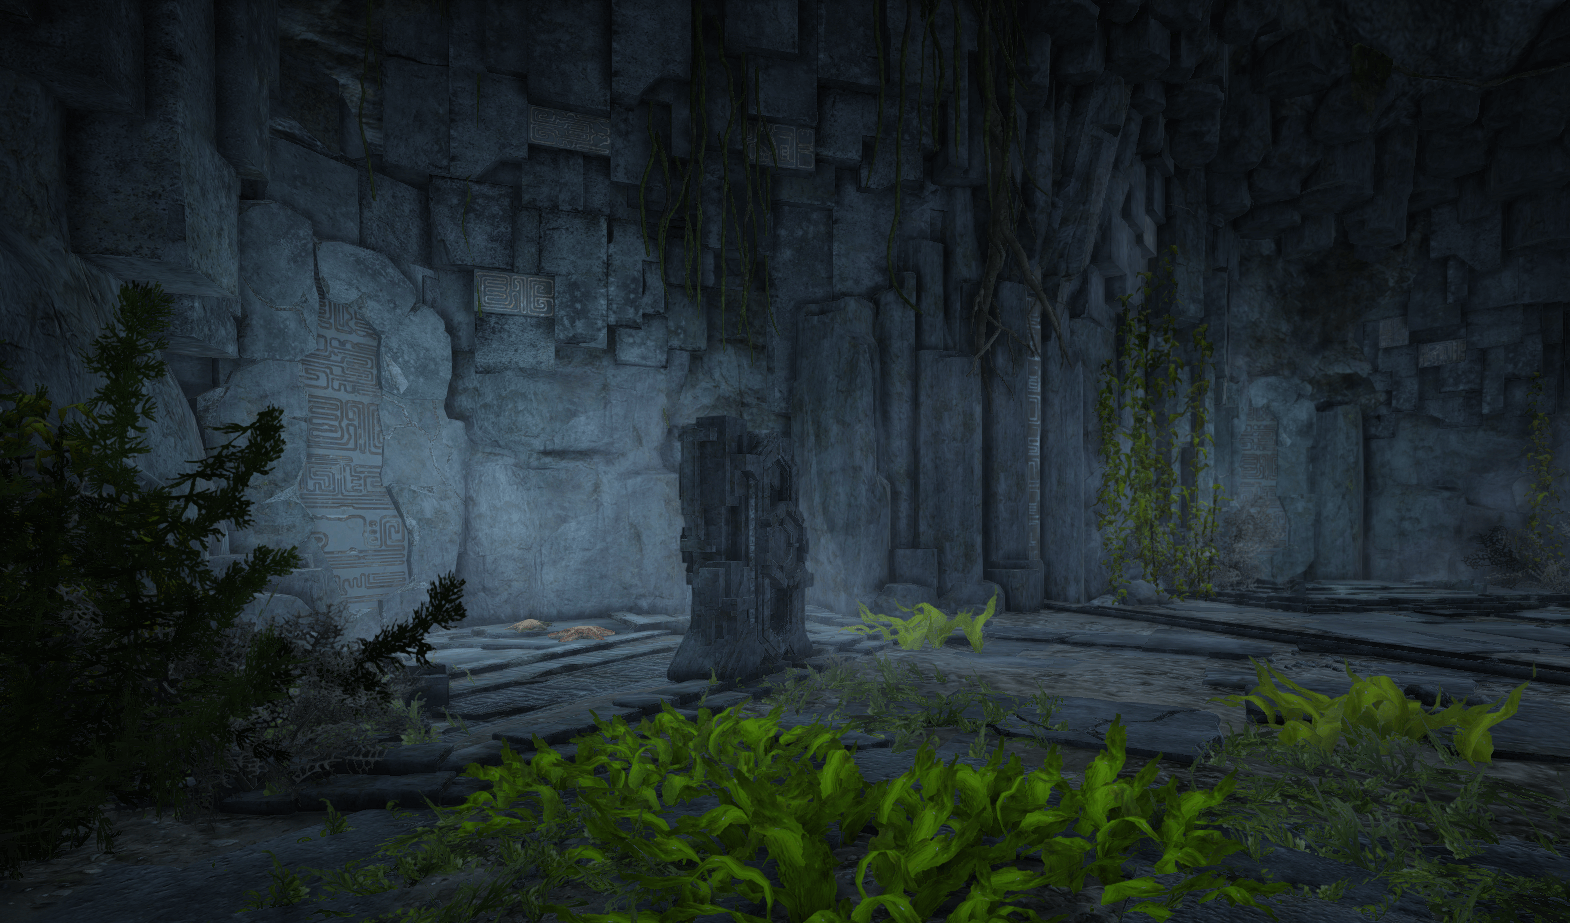
After you've defeated the boss, you can move on to the next area, just look for the large construct as an indicator for which direction to head.

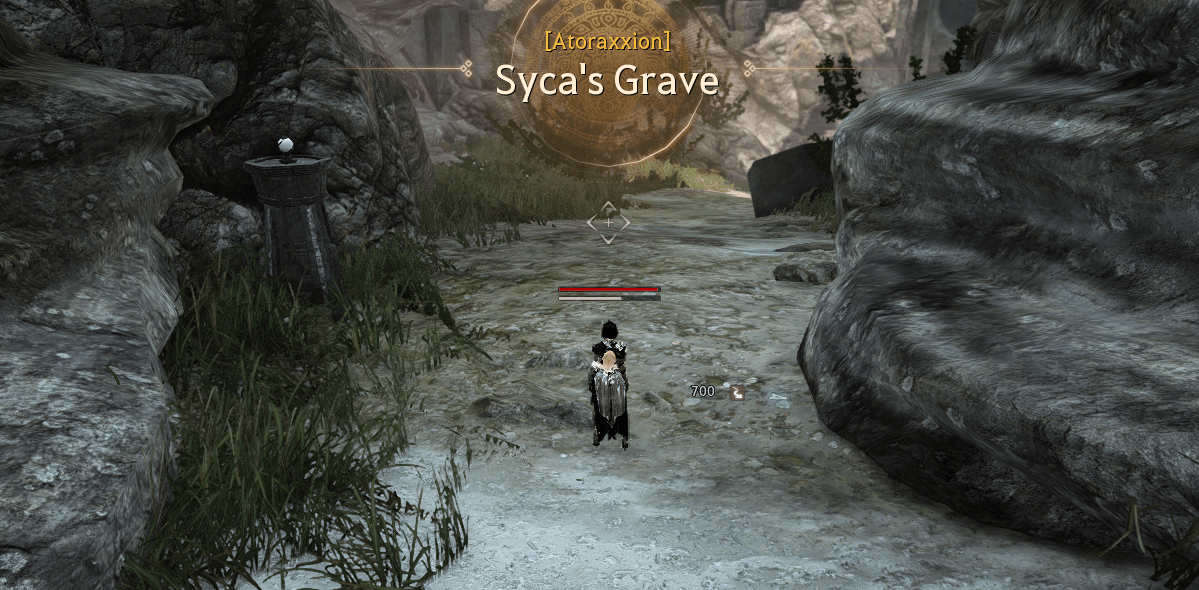
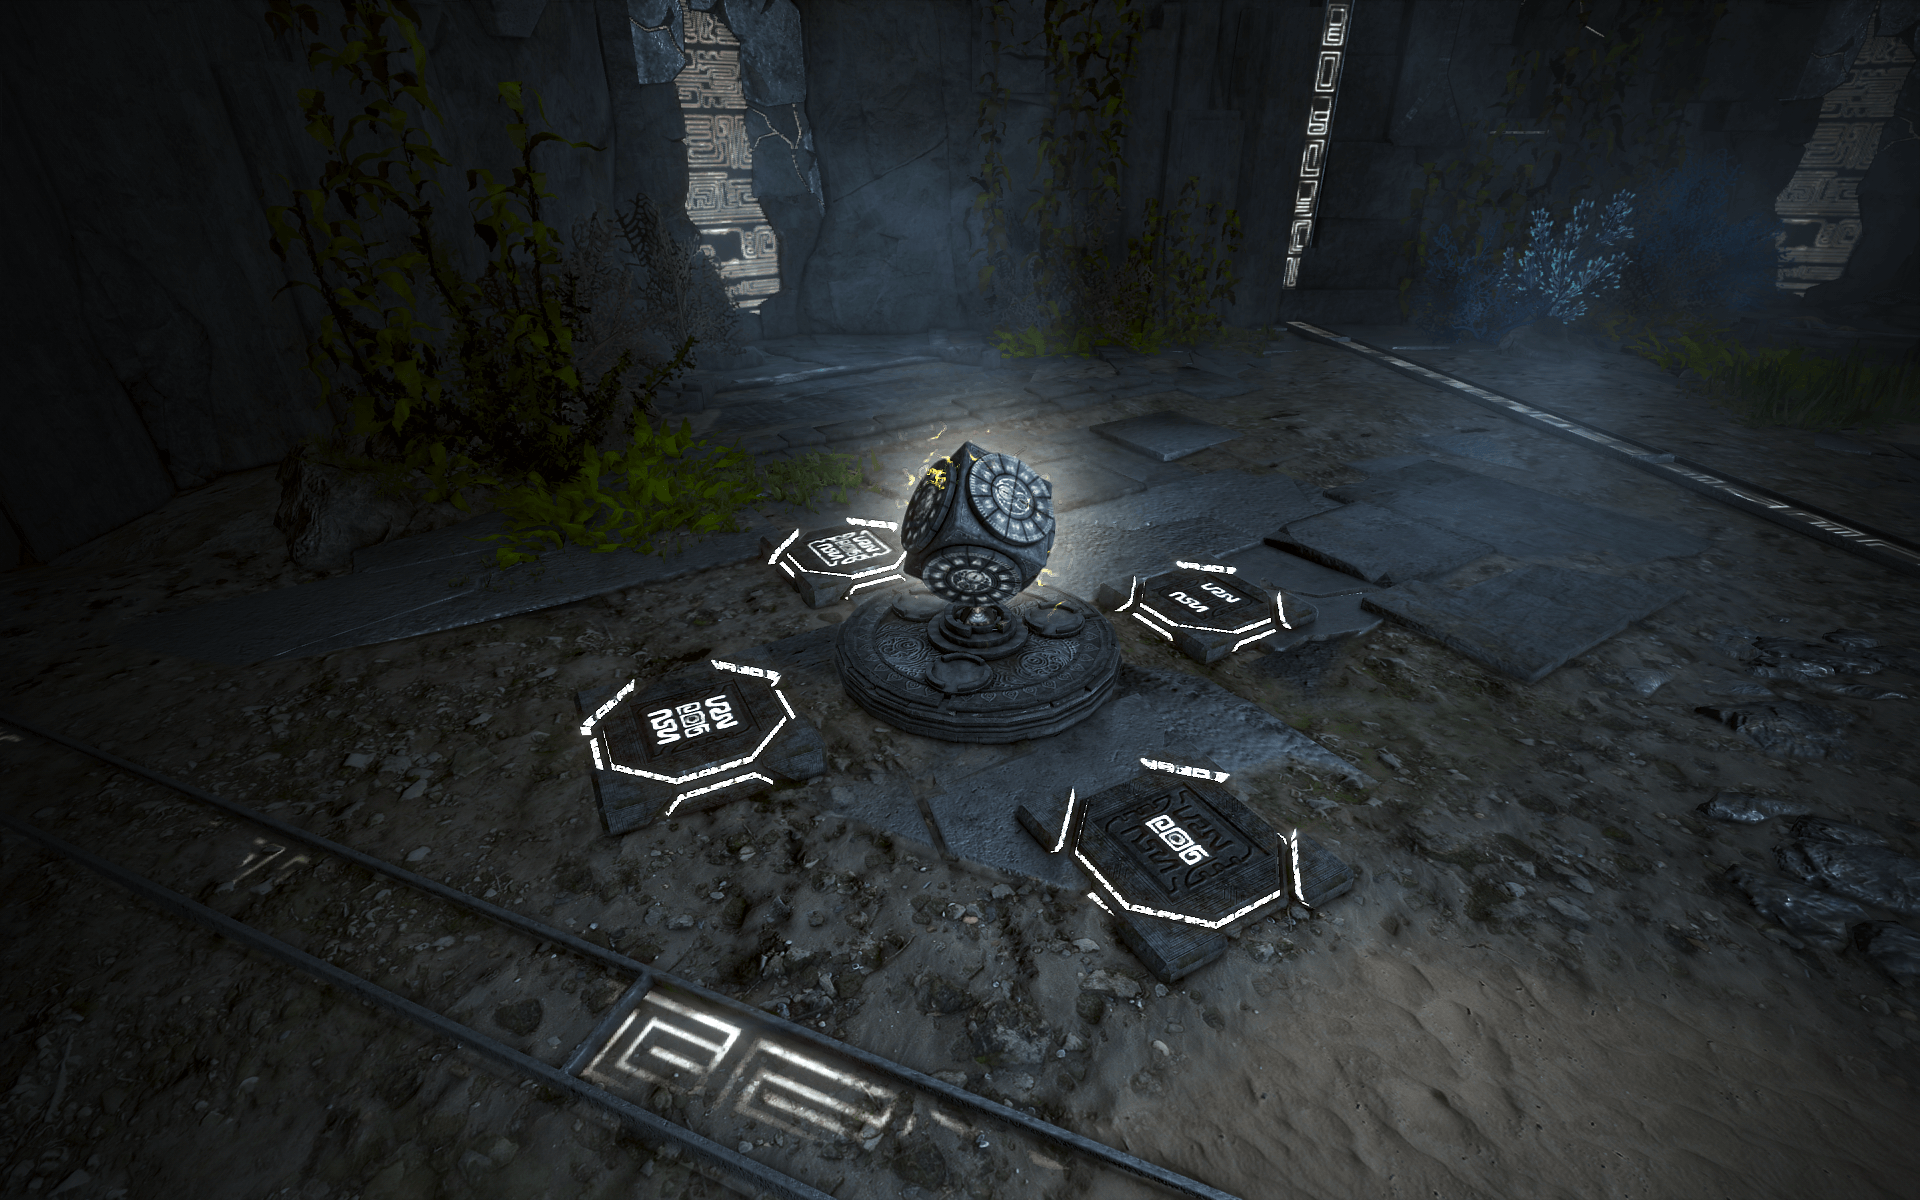
Heading this way will take you down to Syca's Grave, which is where the second boss will be located but we'll need to grab more materials first.
The mob spawners here will work just like the ones from earlier, you just have to defeat the mobs for their drops and repeat the process.
This time you'll obtain a Egg of a Fearful Epoch and Syca's Frigid Scale which you'll need to use Simple Alchemy on again. Make sure to obtain 2 of each and that all party members grab the items.
This time we'll summon the boss Serpen. It has a few basic mechanics like charged up attacks and pools of poison, so watch out for those.
If you're playing a party, Serpen will also summon green coloured pillars. You'll have to destroy the ones that say Power Source.
After you've finished with the boss, here's the direction you'll need to travel in order to move towards the next boss location:

Before continuing, you'll be able to see a glowfish construct. It'll be hanging around near this activation construct. When you hit it, it'll release a yellow energy field that will power the construct.
Hitting the fish once will activate the field, repeatedly hitting the fish will encourage it to move, so you can guide it towards the construct.
This will deactivate the laser beam tunnel that is just up ahead, if you don't deactivate the lasers they'll one shot you.
Once they're deactivated you'll be able to head inside the passage way which will lead to another puzzle.
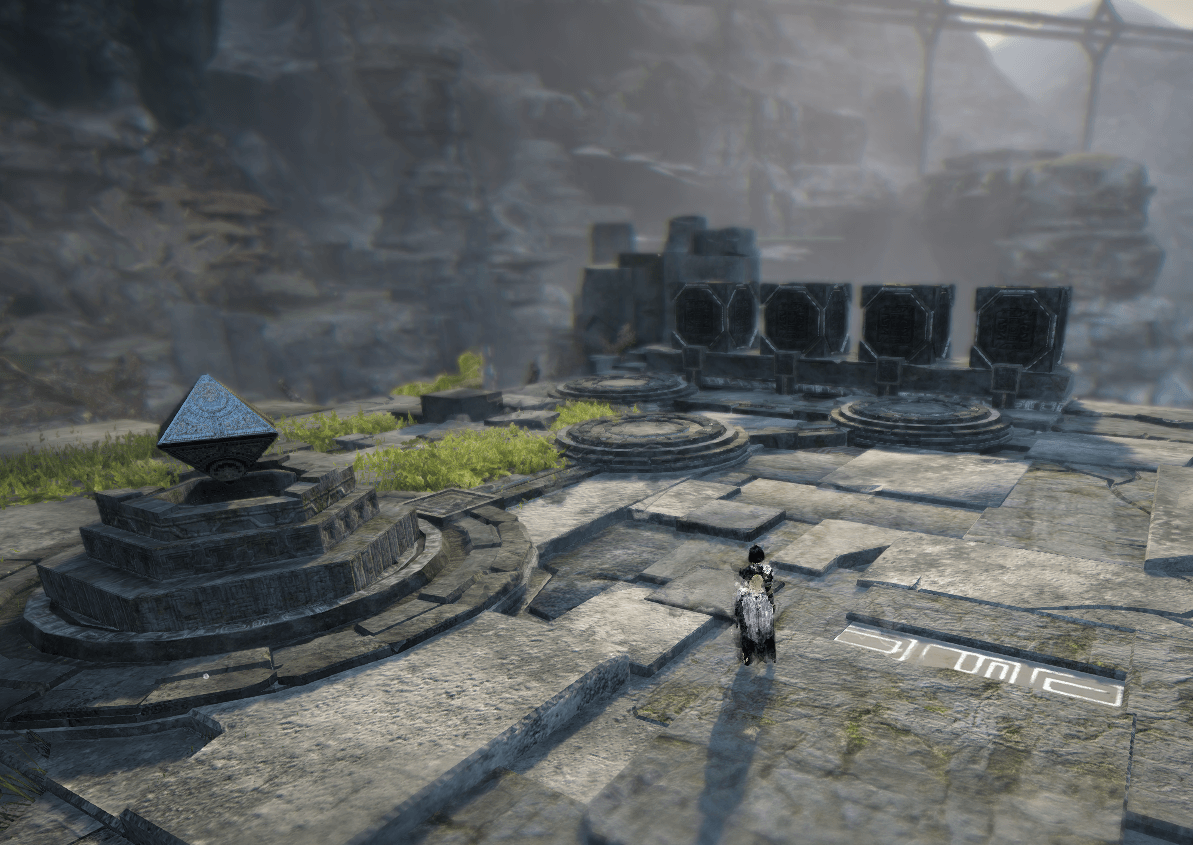
Light Puzzle Room
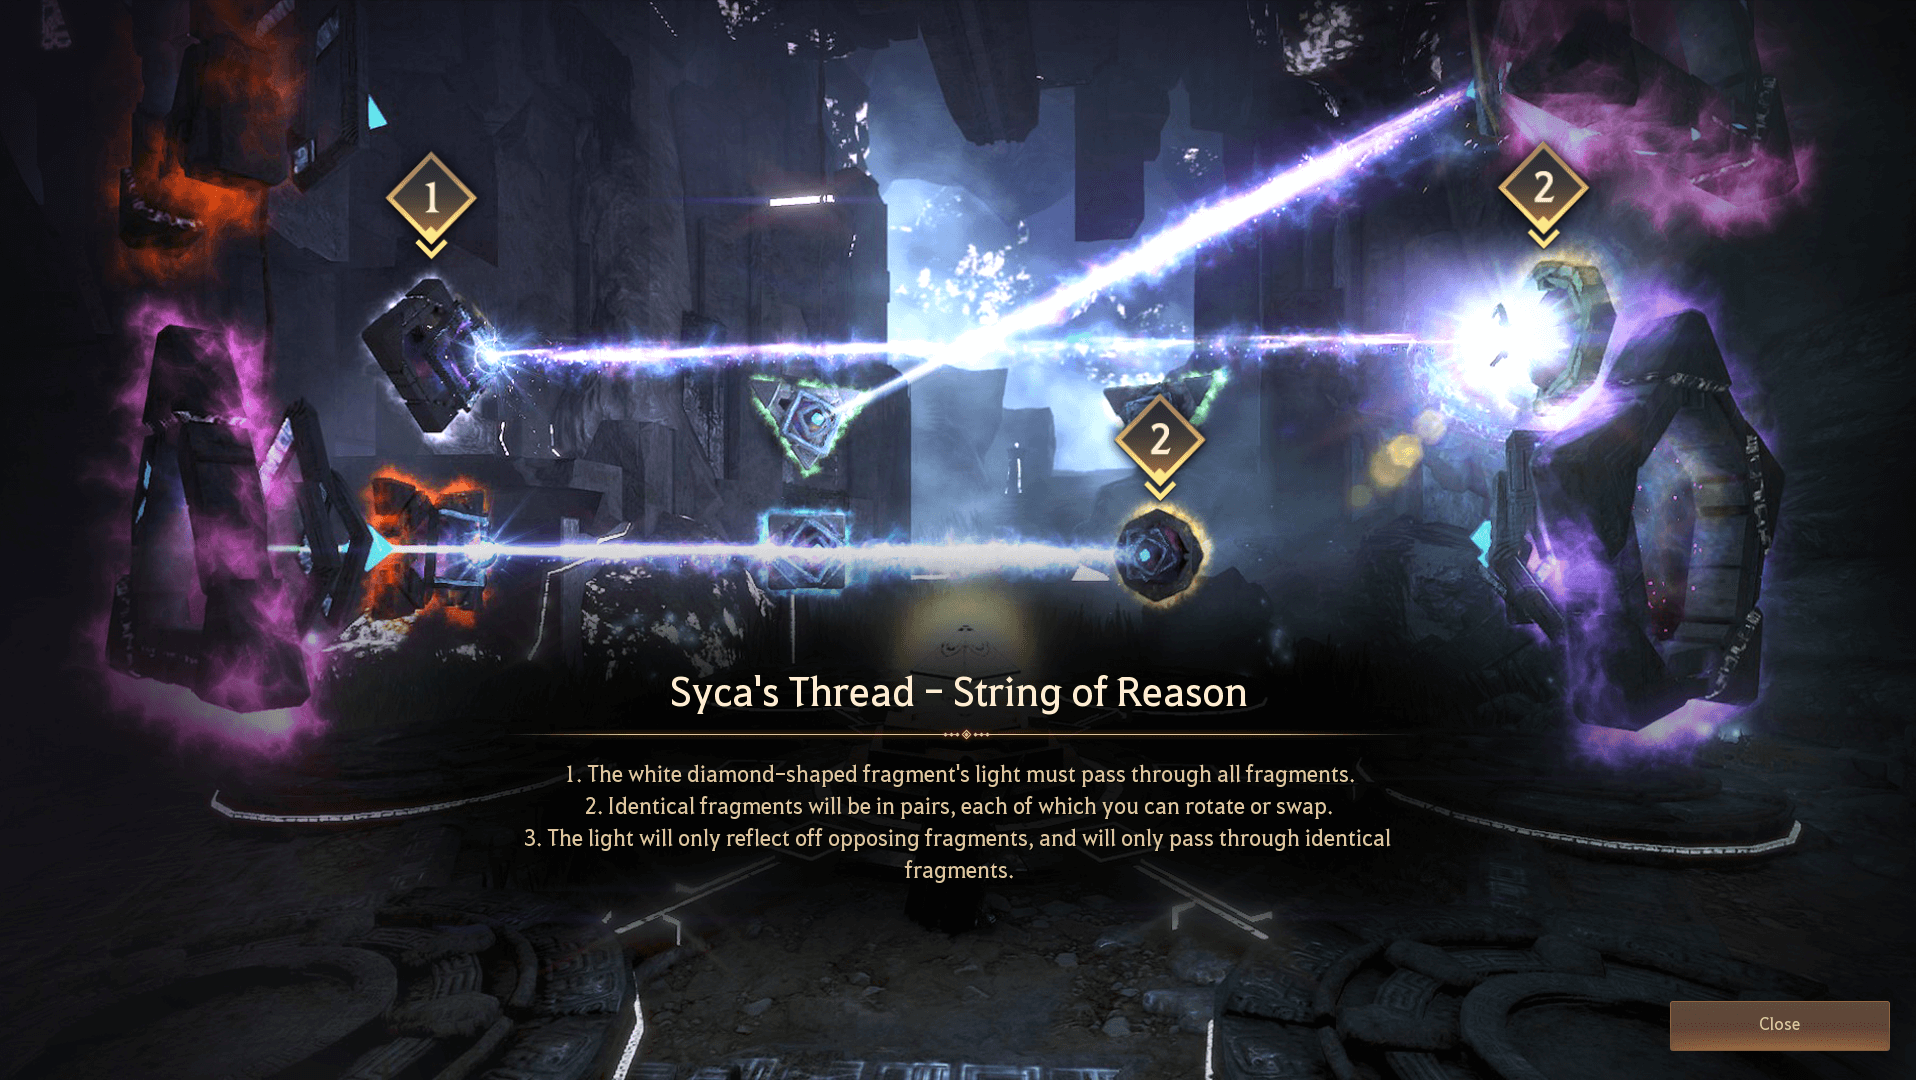
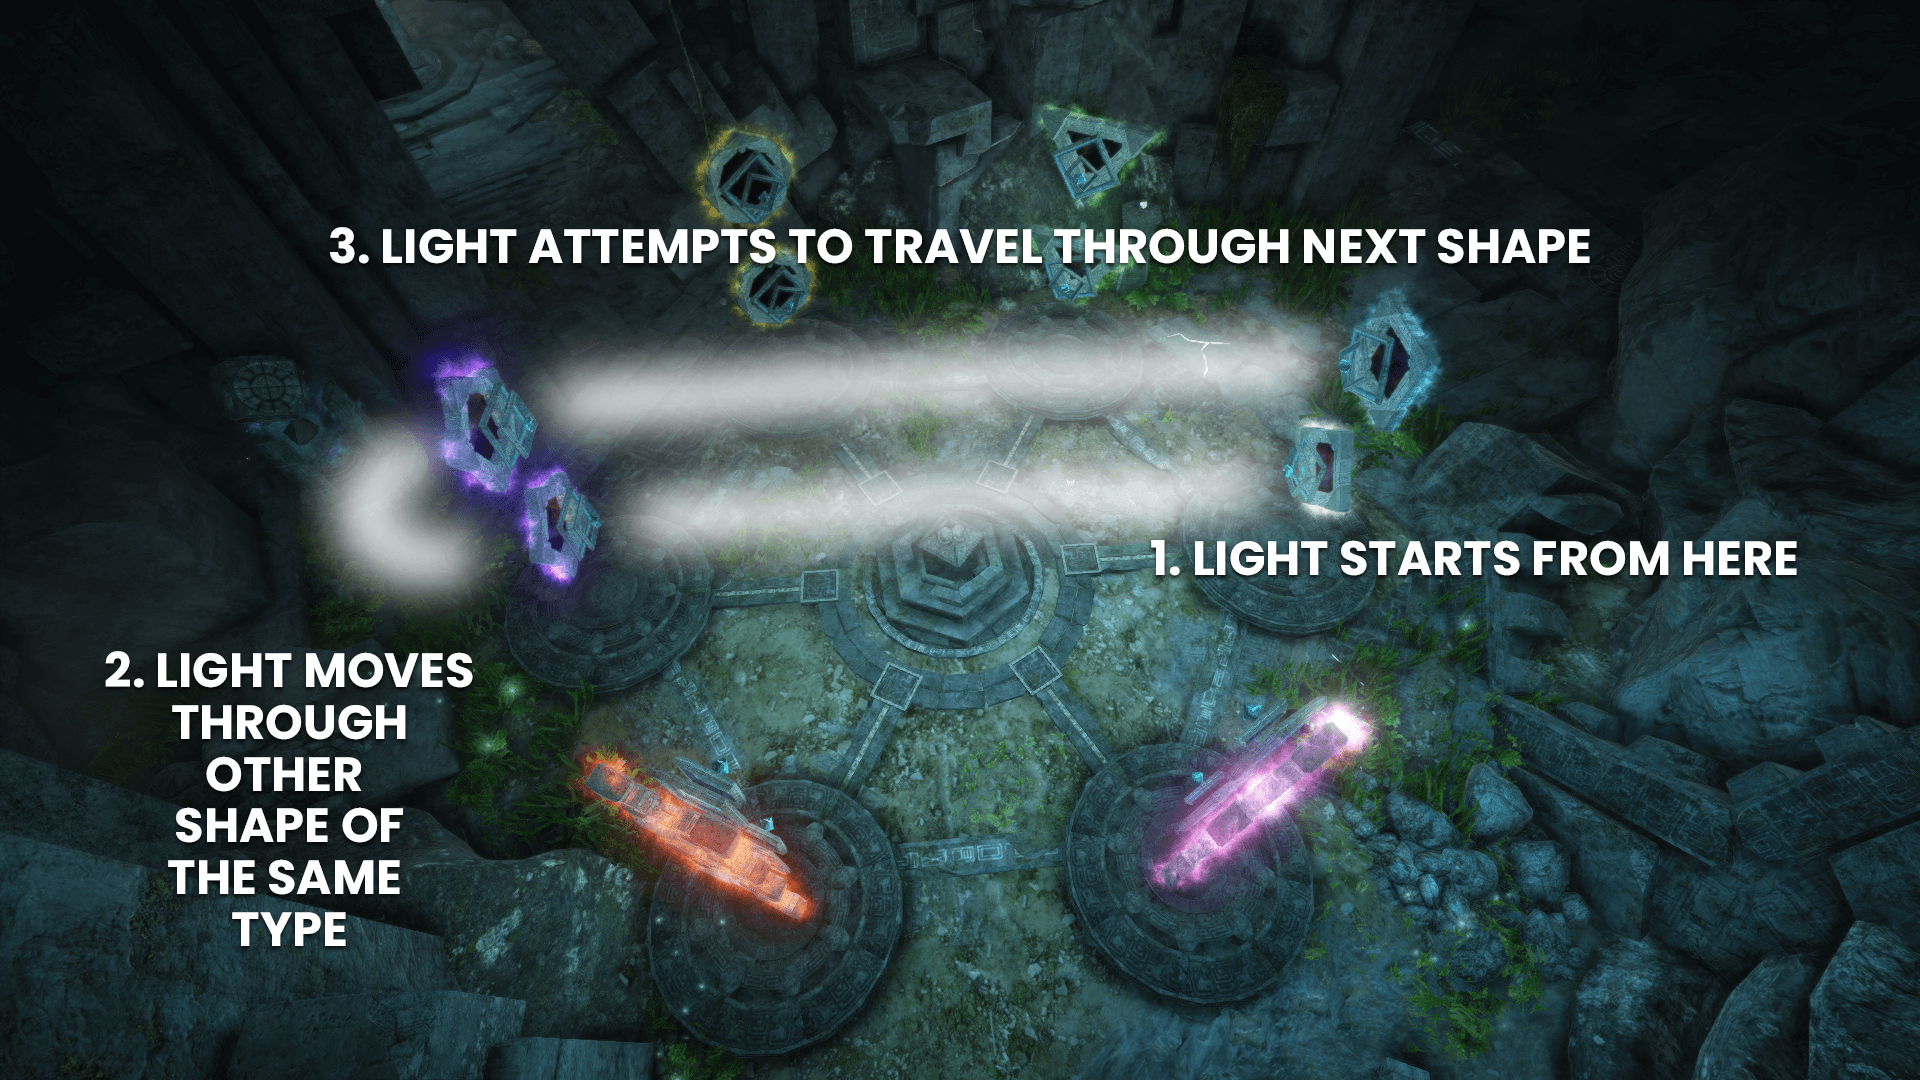
When using the puzzle, the white symbol will fire a beam of light. This beam of light will shoot whatever is opposite it.
The light will then pass through the shape that was hit and flow out of the 2nd version of the shape. There's two of each shape except for blue and white.
Speaking to the center console will give you two options. The first rotates the position of the bottom symbols. The second option fires the light, letting you test your progress.
By interacting with the symbols around the room, you can also flip their positions. The bottom symbol will switch to the top, while the top switches to the bottom.
A quick way to complete this puzzle is by rotating the lower level once by using the center console, it doesn't matter which order the colours start in.

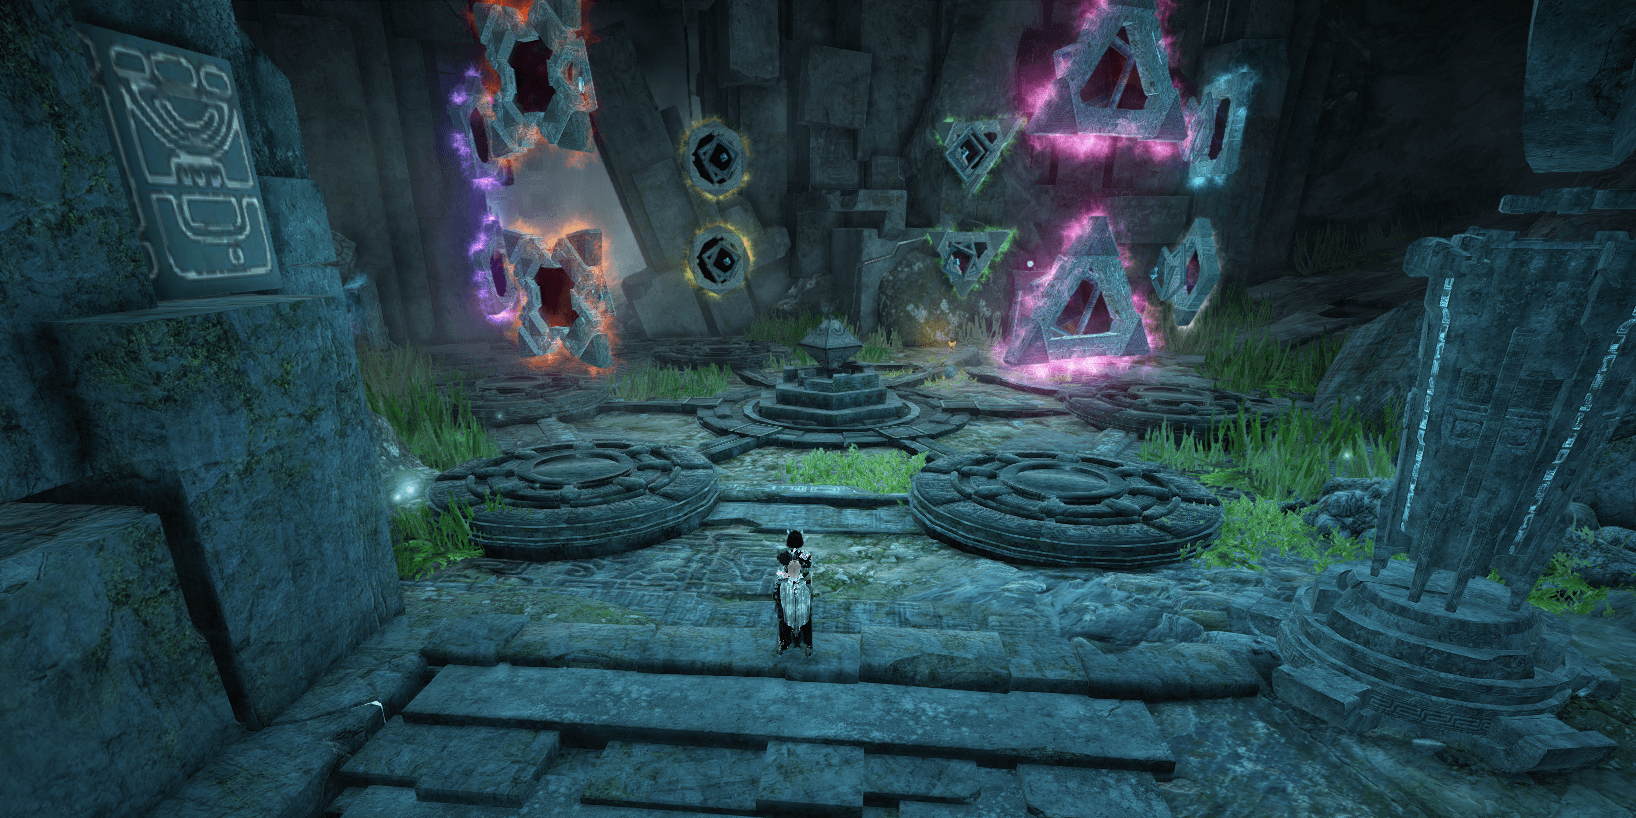
Here is an example of the puzzle after it has already been rotated once.
After you've rotated it once, flip the position of the two symbols. You can use the image above as a reference of which one to flip.
After you've flipped the centre one, move left to the next 2 symbols and then flip those. After that, head to the centre construct and operate the machine to fire the light.

After you've done this and it should travel through every shape and the puzzle should be complete.
Third Boss
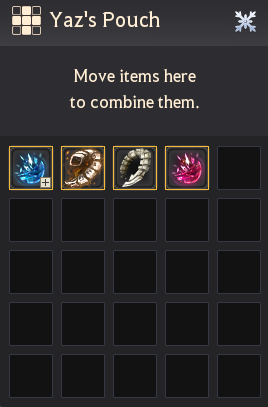
In order to get to the next boss, you'll need to craft the next item using the drops we've collected so far. Arrange Yolun Piece of Envy, Syca's Arid Tentacle, Yolun Piece of Cruelty and Syca's Burning Tentacle in your Yaz's Pouch.
Next you'll need to interact with the construct in order to unlock the gateway that leads to the third boss.
You'll need to guide all of the different fish to the different pillars, just like with the previous laser puzzle and then hit them to create their force fields.
While you're doing this the boss will be spamming out AoE attacks that you'll have to dodge, keep an eye out for them as they're also coloured yellow, which can be difficult to distinguish from the fish's yellow barriers.

Once you've activated all of the pillars with the fish, the boss will fall down to the ground which will let you damage them.
The boss will then have a second phase, this time you'll need to destroy the pillars and then a mini version of the boss.

Destroying them all will ground the boss a second time, letting you DPS down the boss. Killing the boss will give you the item Yolun dagger.
Final Boss
After beating the third boss you'll be able to combine this with the other dungeon items we've been crafting in order to craft the last piece, the Corrupt Yolun Dagger.
You'll then be able to activate the next transport construct, letting you move towards the final boss.
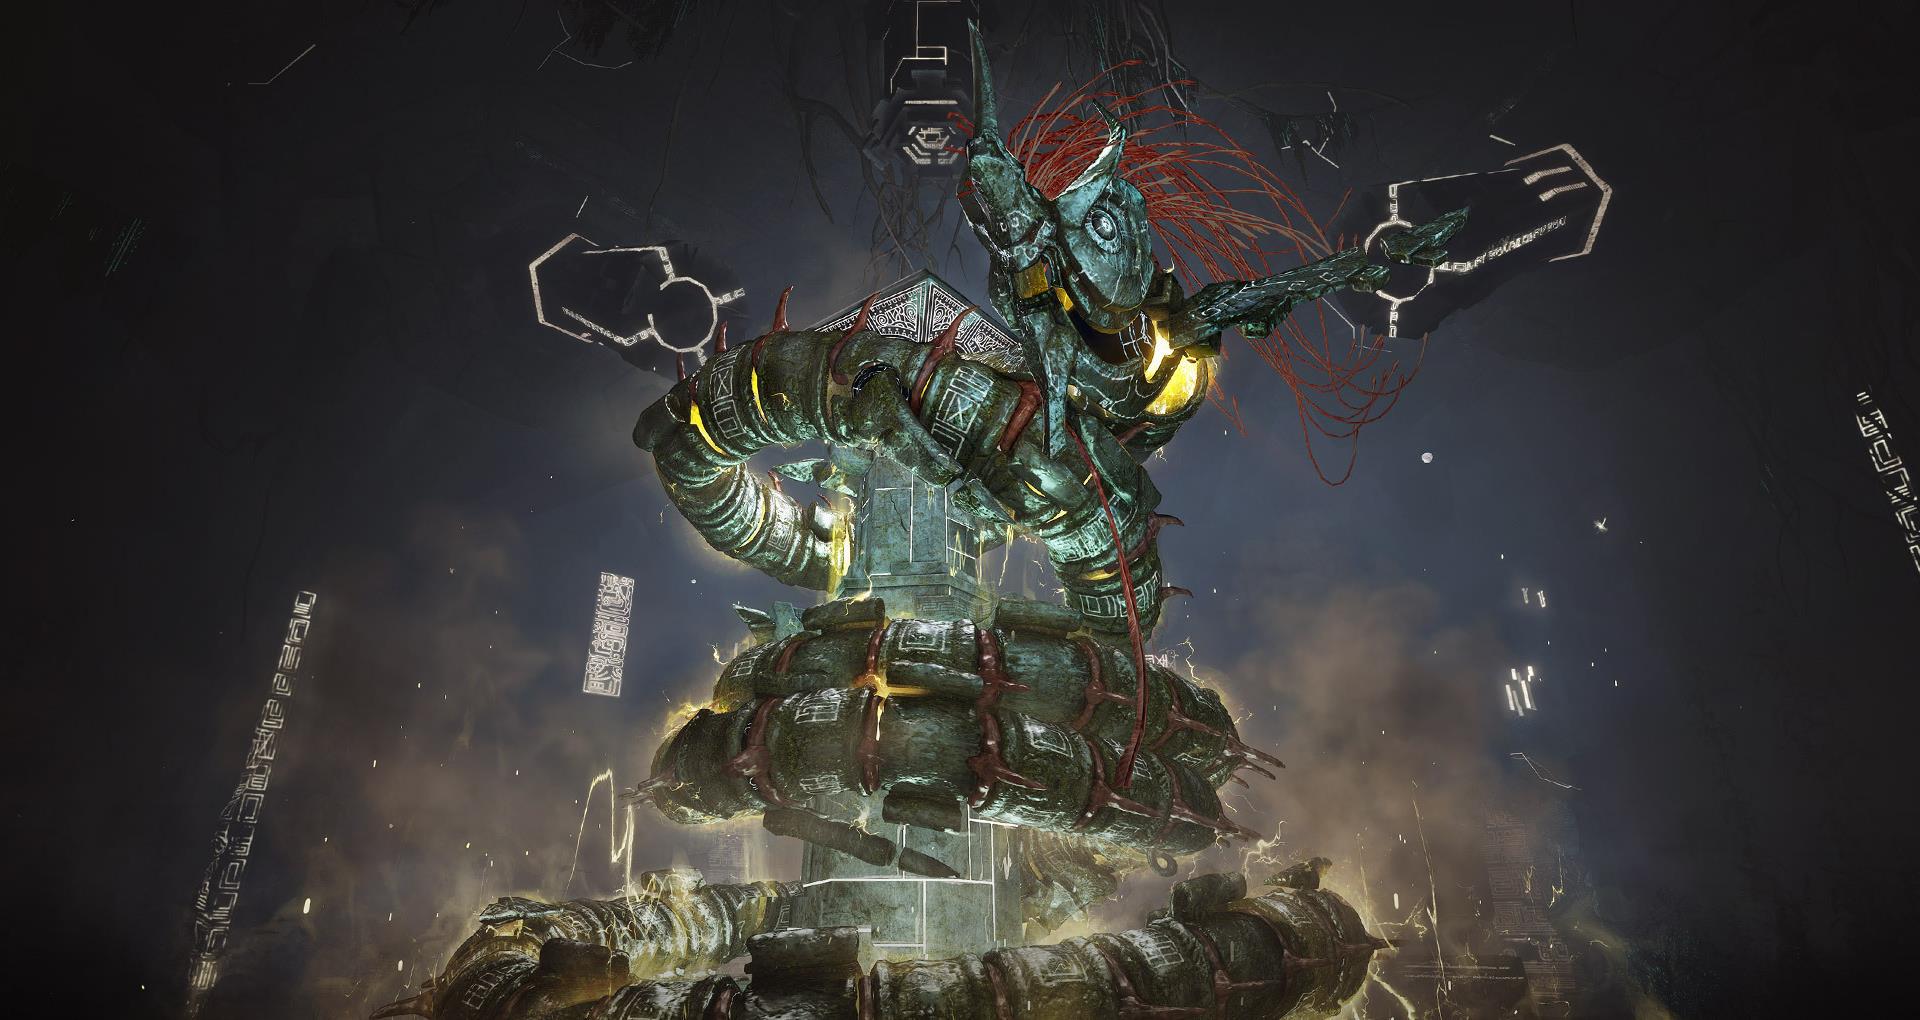
You'll be taken to a new room where you can place the corrupt dagger, if you're playing a party, you'll need 5 of the daggers in order to unlock the boss room.
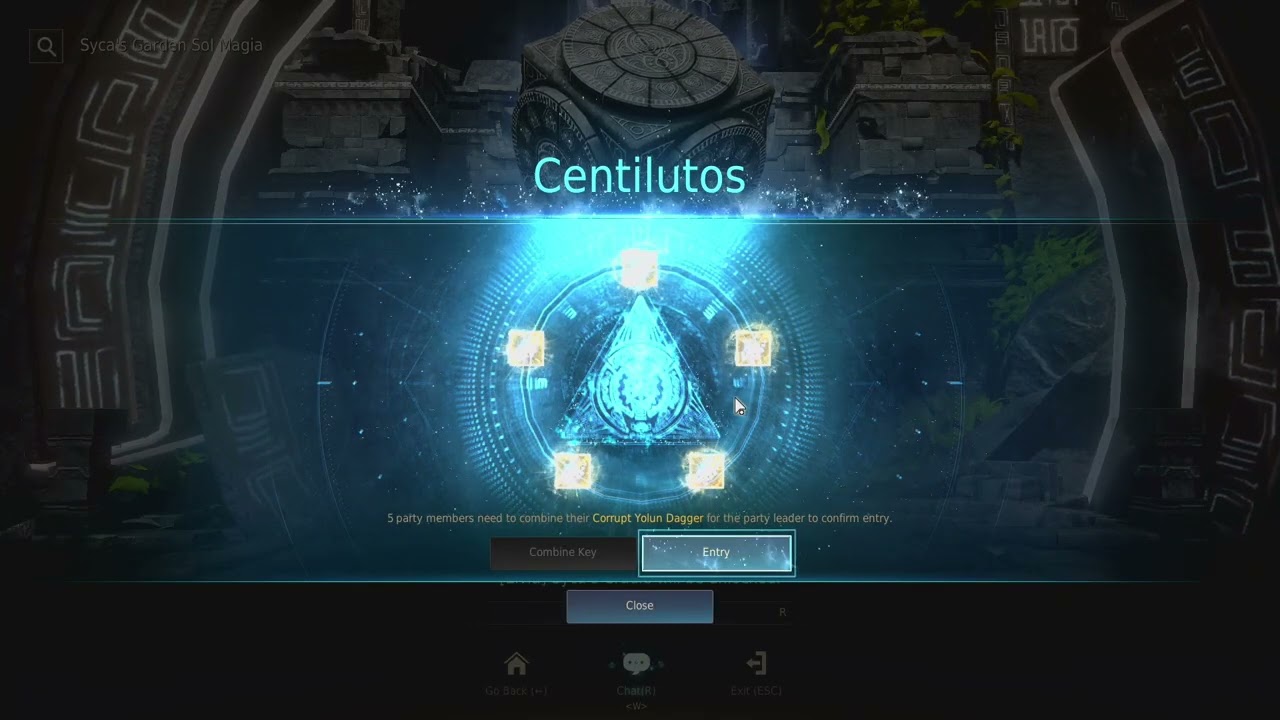
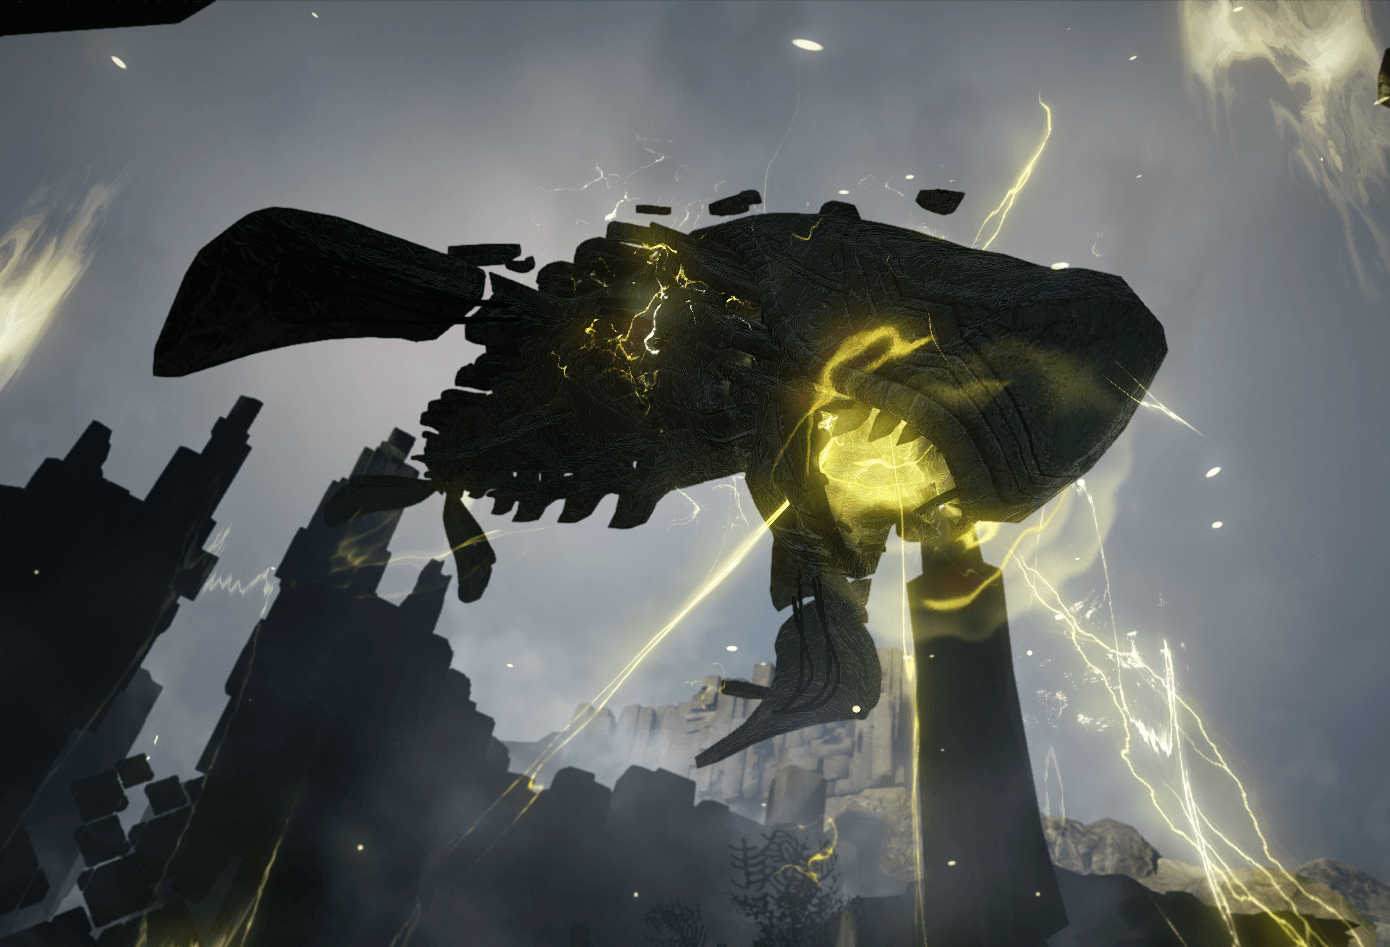
This is where you'll come across the final boss, a large sea serpant coiled around a tower:

To be honest if you're running solo you really don't need to worry about mechanics, just jump down and hit it, it's not too challenging and you'll burst through its hp pretty fast.
As a party you'll need to make use of the Power supplies that are positioned around the room. The power supply devices in Syca's Cradle are divided into 4 levels.
The higher the level, the lower the Centilutos' defense but it will deal more damage meaning you'll have to balance out how much defense vs offense your party can handle.
During the boss fight the boss can also do a glowing gold vacuum move, after this move, run to either side of the room where you can hide behind one of these barriers to protect you from the next attack.
When the boss loses health through its first phase, it'll end up spawning some fish constructs like we've seen throughout the rest of the dungeon.
Split your party up and you'll each have your own fish to take care of, if it glows like this, then you'll need to kill it:

if it doesn't glow, you'll need to let it survive and make its way over to the boss, here's how it looks if it doesn't glow:
Around the room different constructs will appear that look a bit like squids, killing them will give you an item called Berurah's Power Stone.
This is used for stopping beams of light, you'll need to find the thickest glowing yellow beam and then use the power stone right next to the construct firing the beam of light.
When entering the next phase there'll be different coloured beams around the boss. The colours will be red, white, yellow and blue.
Have everyone count for a different colour then run over to the wall with the colour that appeared the most and you'll be given a buff to protect you from the boss mechanic attack.
Next up is a mechanic to do with the barriers on each side of the boss, the ones that protected you from an attack earlier will now glow a yellowish gold.

The barrier will display 1 of 3 symbols, it can be a number 8, a triangle or arrows. On the floor glowing white symbols will appear, matching the ones that the barrier can display.
Have 1 person match the barrier symbols with the ones on the floor, they'll need to stand on the correct symbol that the barrier is displaying.
If light beams spawn across the room, hunt them down and kill them. If scorpion constructs spawn, you must attack them from behind to kill them.
If you have high damage you might be able to out DPS the last two mechanics, letting you skip over them but it's pretty gear and damage dependent.
Additional Puzzles - Nine Sentences
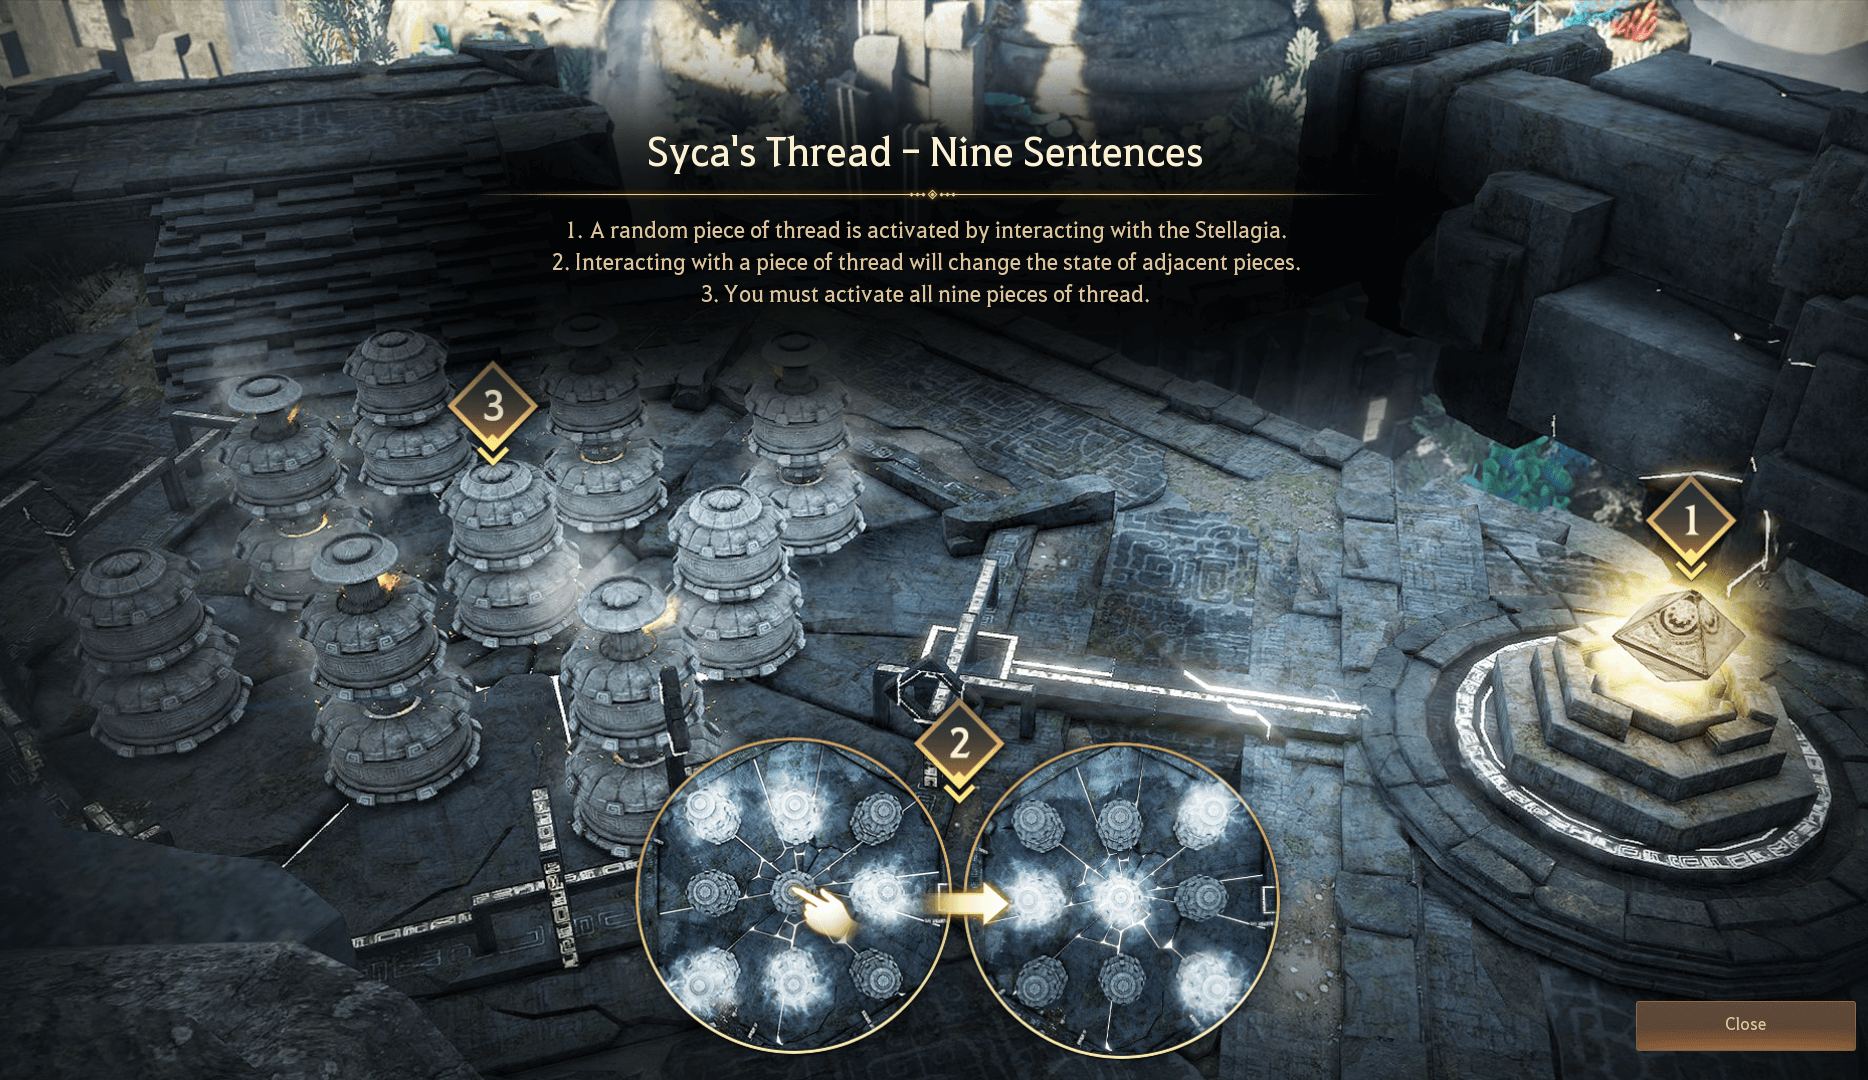
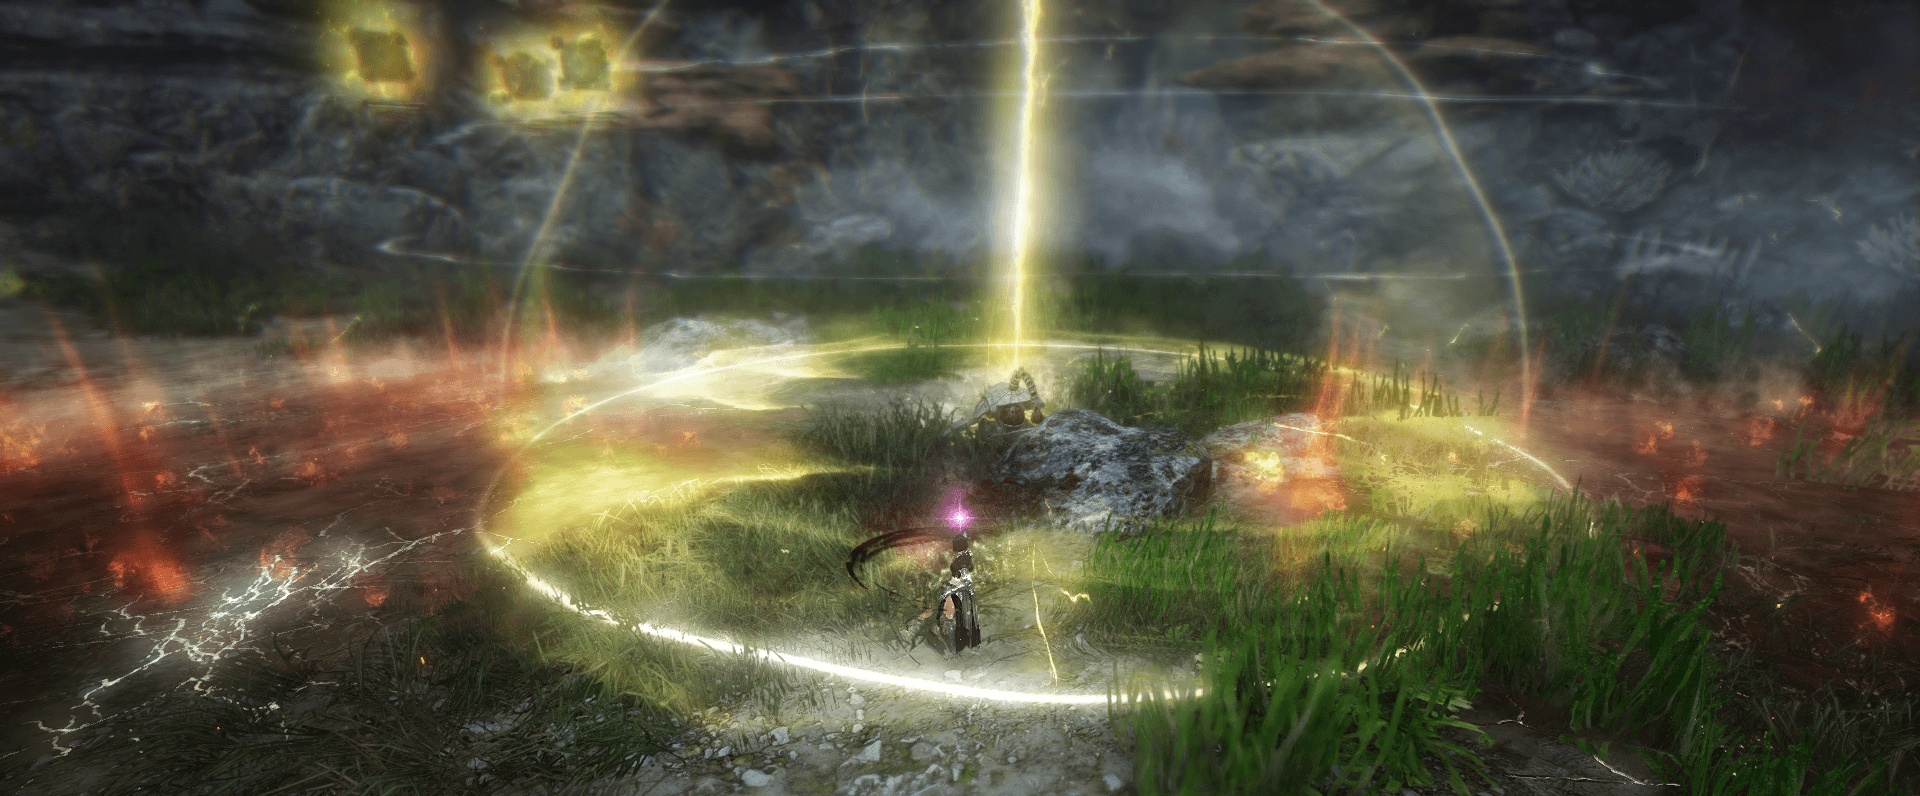
This is the first of the additional puzzles, it's a simple mechanic and a famous puzzle design but solving it is actually pretty difficult.
When you interact with one of the towers, the towers surrounding it will move, you can see which ones have been activated by the way that they raise up slightly.

Once you've completed the puzzle, all of the towers will fire off and you'll be given a notification to say you've completed the puzzle: 
If you're struggling with the puzzle using trial and error, you can look up a Lights Out Puzzle solver online.
There are simple tools made for completing this popular type of puzzle and you'll be able to use them to solve this variation as well.
Skippable Puzzles
While almost none of the puzzles are strictly mandatory to progress through the dungeon, these two puzzles are easily completed during the solo questline.
You'll run from this area to this second puzzle and then they'll be auto completed, then you'll run back to the initial puzzle and it'll be completed also.

This is because usually these puzzles are completed with several people, but i'd strongly suggest just doing them with the questline (if you decide to do them at all.)
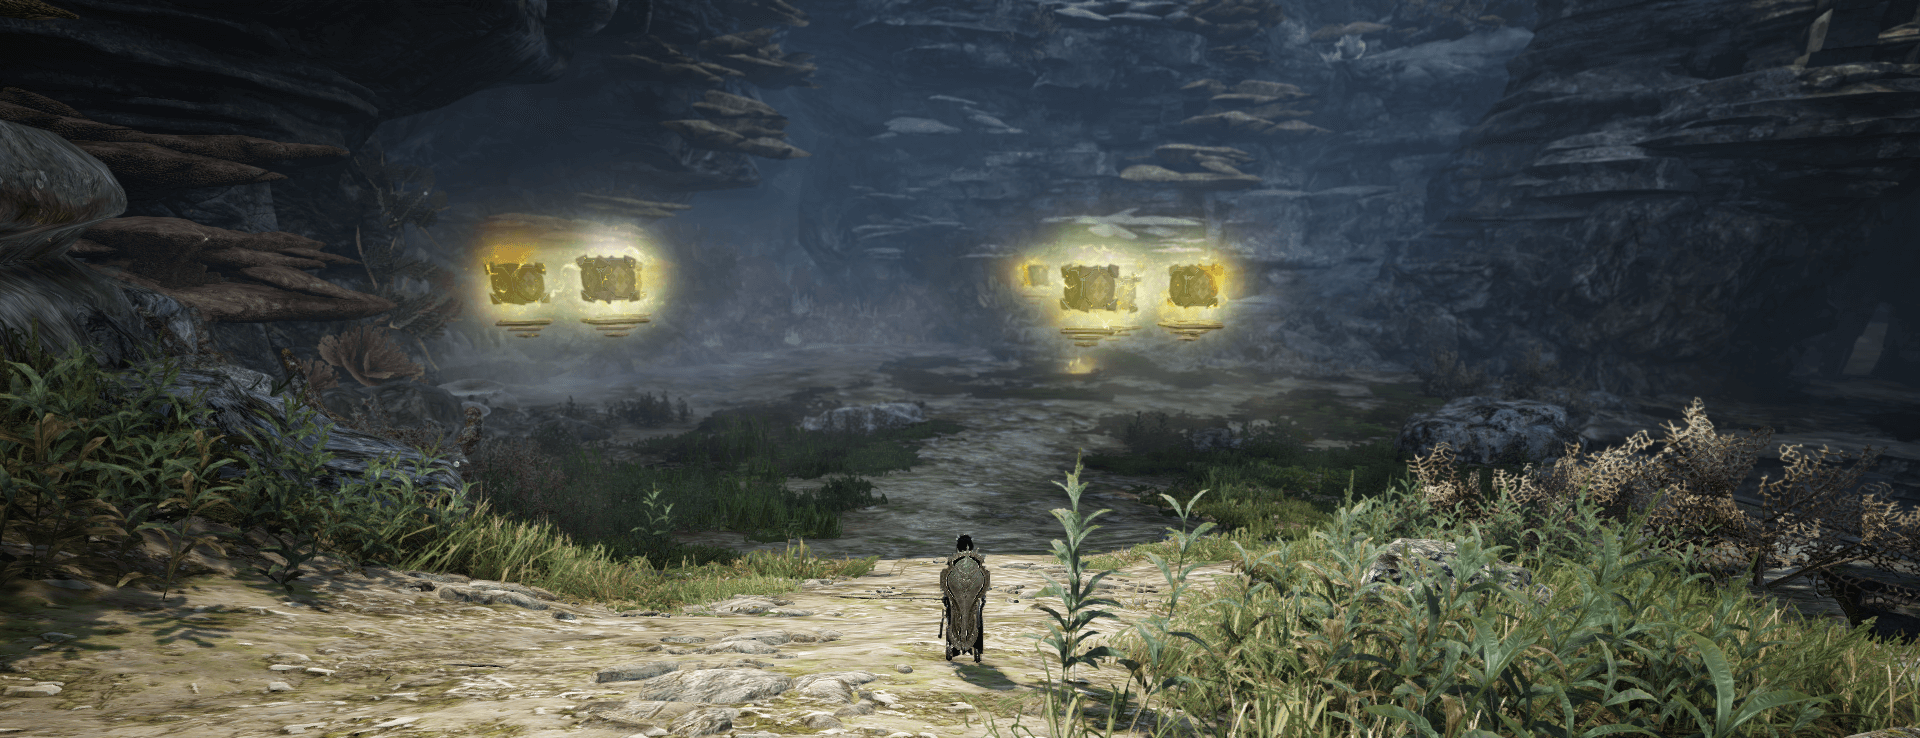
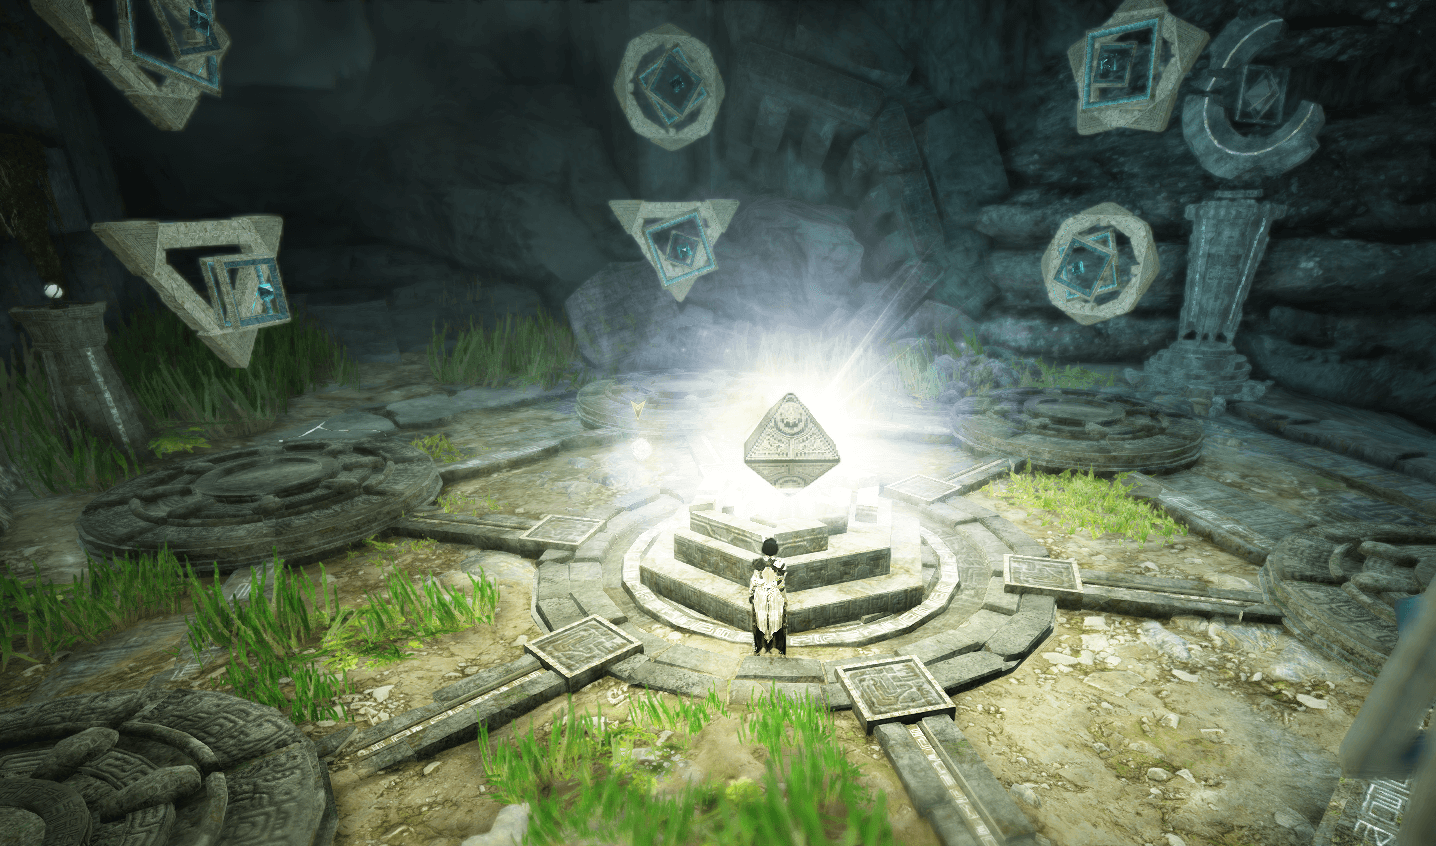
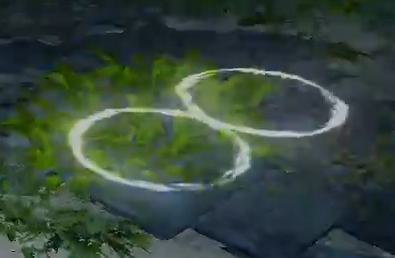
Moonlight of Chaos

This puzzle is pretty simple compared to some of the others in this dungeon. The basic explaination is that there are connected floating cubes that each have a unique symbol as you can see in the image above.
Hit one of the cubes, then interact with the cube that isn't connected to the others to check on the symbol: 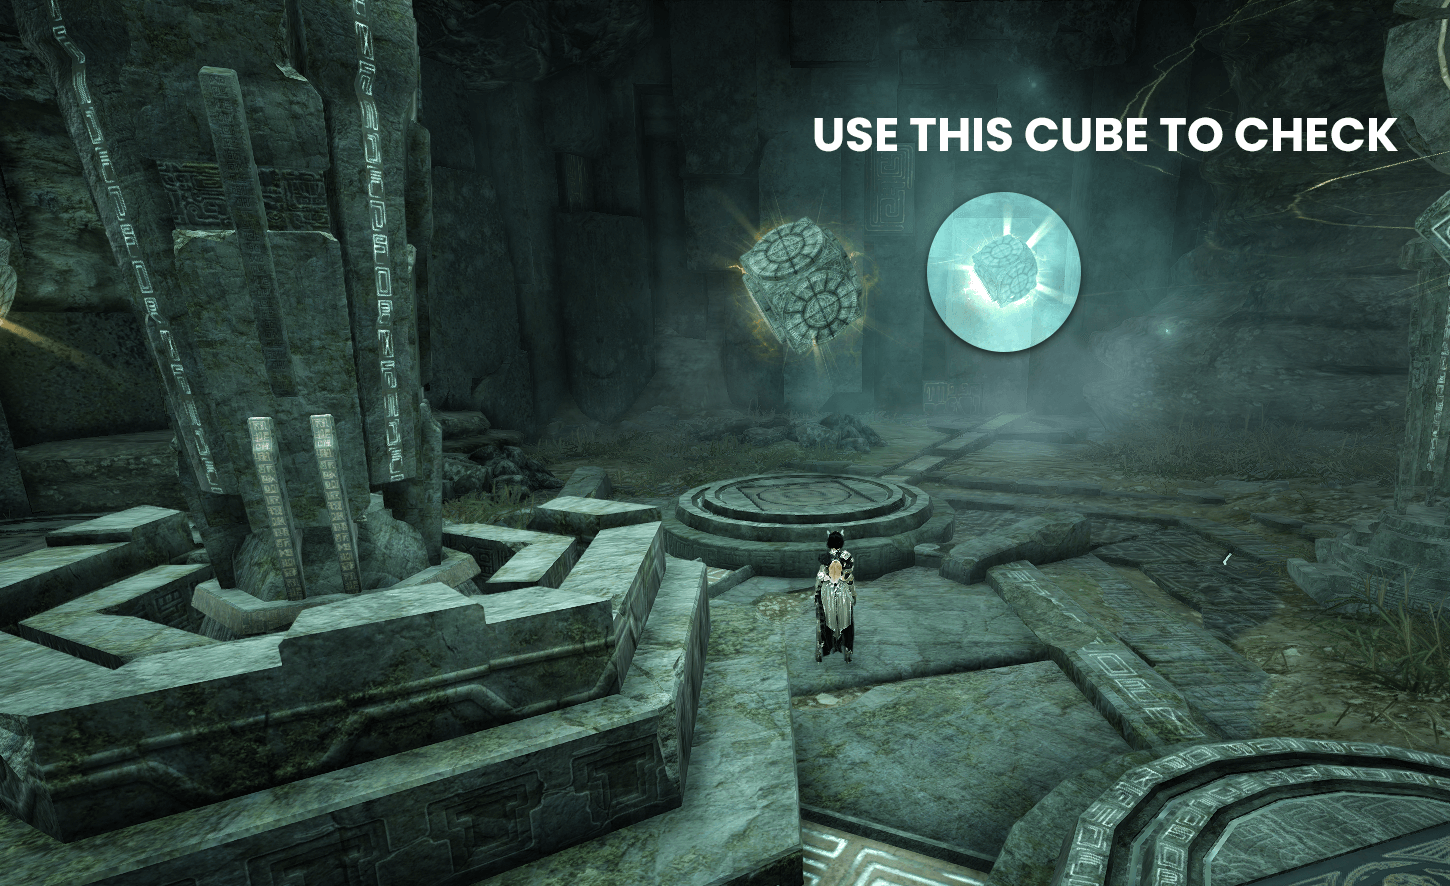
When you've assigned the correct symbols to the correct cubes, the puzzle will be complete.
Have you completed the Sycrakea dungeon, or do you not like the dungeons are in Black Desert? Let us know!
Why not check out some of our other guides while you're here?